Tuesday, December 9, 2014

6:00 AM

The 12 Days of Christmas Nail Art Challenge Day 5: Ice Blue and White Colors

     
     I'm back with the 5th day of the 12 Days of Christmas Nail Art Challenge. Today's theme is Ice Blue and White colors. There's a lot of freedom with a prompt like this, but I knew exactly what I wanted to do as soon as I saw it.

     As many of you know Frozen was the big winter movie last year. Let's be honest it was more than a big hit, it went viral times 3. My daughter still sings the songs on a daily basis, some days my boys even join in. What you might not know is that Cuttin' Edge polish released a polish trio based on the movie. I snatched them up and then never used them... That got me thinking, what better polish to use for this theme than one inspired by the ice princess herself! And with a little stretch of the imagination, my waterfall technique turns into icicles.

 
      My base color is called Let it Go and is a beautiful medium blue linear holographic polish that has sat unloved for too long in my collection. 2 easy coats was all I needed for full coverage. True color is slightly lighter than shown here. With a much appreciated steady hand, I painted the icicles with 2 KISS stripers in White and Silver Glitter. Let's hope that steady hand sticks around for the rest of the challenge.

 
      I really like the way this turned out. Especially on the ring finger. The waterfall technique is one I've wanted to try for a while, and now I can scratch it off my manicure to-do list! What would you have done with this prompt? Let's see what the other ladies have come up with below. Thanks for stopping by and Happy Polishing!


Monday, December 8, 2014

6:00 AM

Shimmer Polish - Jennifer

     Today I'm taking a break from the Christmas nail art challenge to bring you a post on Jennifer, a glitter nail polish from Shimmer Polish. The Christmas nail art is fun and all but sometimes you need a break in order to get your creative juices flowing.

     Jennifer is a clear based polish with soft blue, pink, periwinkle and holographic glitters in multiple shapes. I used 3 coats on my ring finger over China Glaze Capacity to See Beyond for full coverage. I tried my hand at a glitter gradient on the other fingers.

Jennifer-Glitter-Nail-Polish-from-Shimmer-Polish
  
     I've come across several manicures on Pinterest and Facebook showing similar color combinations and I knew I wanted to try it out for myself. It just seems like a winning combination to me. And I love the look of glitter gradients but have a bit of a heavy hand with them so I could use the practice. I just can't seem to get the glitter to fade nicely.

Jennifer-Shimmer-Polish

     Jennifer has easy glitter application with no fishing required. The glitters aren't as dense as some polishes out there but I think that's a good thing. Not everyone wants full coverage every time they use a glitter polish. And I don't think 3 coats is all that bad to get full coverage from a glitter polish at all. I've used some that take almost twice that. That's a lot of layers on your nails!

     I don't see myself wearing this polish alone as a full manicure unless I stamped over it. I'm not a full glitter polish wearing kind of gal. But I do see it as a great accent to a variety of polishes. And I do love a good accent nail, especially when it's a pretty glitter!

     Jennifer is still available for purchase at shimmer polish if you'd like to get your own bottle. I'll be back tomorrow with another post in the Christmas nail art challenge. Until then, thanks for stopping by and Happy Polishing!


Sunday, December 7, 2014

6:00 AM

The 12 Days of Christmas Nail Art Challenge Day 4: Santa/Elves

   
      I'm breaking my regular posting schedule to bring you my manicure for the 4th day of the Christmas Nail Art Challenge. Today's theme is Santa and or his Elves.

     After discovering that many of my striping polishes have dried up beyond repair I decided to throw my original idea out the window and focus on Santa. I also decided that I need to go shopping for new striping polishes. ;)

    
     I used Zoya Rekha as my base color for 4 of my nails. On my ring finger, I used a variety of striping polishes and regular polishes to make my Santa. The entire face was done with dotting tools, except for the hat. That I was able to actually use a striping polish for and paint it on. I even tried to give him rosy cheeks with a sheet tint pink polish. As you can see I didn't wait long enough before adding my top coat and the red streaked a little bit. Well ok, I'll be honest, it streaked a lot!


     The streaking really made me sad because up until then my Santa looked pretty cute and jolly.  So lesson learned, wait more than 20 minutes to apply top coat when working with red and white polish.  Although I still think he looks kind of cute.

     Now let's see what the others have come up with for today. As always thanks for stopping by and Happy Polishing!


Friday, December 5, 2014

6:00 AM

The 12 Days of Christmas Nail Art Challenge Day 3: Snowmen

     Welcome to Friday and the third day of the Christmas Nail art Challenge. Today's theme is Snowmen.  For last year's snowman theme I did a traditional manicure and this time around I wanted to shake things up. Unfortunately, I was really stretched for time so while this isn't your typical snowman manicure, it didn't exactly test my nail art skills either.


      Trying to stick with my nontraditional color scheme for this challenge I started off with 2 coats of Carpe Noctem Literary Lady plus top coat. While that dried I tried to come up with the kind of snowman design I wanted to do and which colors I wanted to do it in. That's where I got stuck. Nothing I pulled out of my helmers seemed like the right polish to use and I was running out of time.


     And then I remembered I had these cute little snowmen decals that I picked up from Sally's last year on clearance. If you're looking for cute seasonal decals and stickers at a cheap price always go after the holiday has passed. You might not get the best selection, but the prices are pretty darn good! I don't know about you but I am all about saving those pennies.

     So there you have it my quick and easy snowman manicure for today's prompt. I'll see you back here on Sunday with my Santa/elves manicure but in the meantime make sure to check out the other snowmen manicures from today. Thanks for stopping by and Happy Polishing!


Thursday, December 4, 2014

7:00 AM

MoYou London - The Festive Collection (Press Release)

     
     This Friday MoYou London is releasing 2 more plates for their Festive Collection.  Check out all the details below and let me know which plates might go on your wish list.
HO HO HO!

 ❊ ❉  Christmas is just a few weeks away now!  ❉ ❊ 

We know how you love your Festive plates!

So here you are, 2 NEW FESTIVE PLATES

<< FESTIVE COLLECTION >>


These 2 plates will be released this Friday the 5th of December.
Have a great day and Merry Christmas!
The MoYou-London Team 

     I actually like the look of both these plates. I'm in love with all the little ornaments. I like the idea of the words on the plate, but I'm worried that the fonts will be hard to read once stamped on the nail. Hopefully, MoYou will give us a few sneak peeks at some manicures done with that plate to help me make up my mind. Thanks for stopping by and Happy Polishing!
6:30 AM

Limited Edition One Direction Make-up Kits


     Recently I was given the opportunity to review the limited edition One Direction make-up kits from Markwins.  The kits consist of 3 colored mascara's, 3 lip glosses and 3 nail polishes with matching glitter.
     ELECTRO GLAM MASCARA

Give your look a jolt of electric colour, with this limited-edition trio of ultra-bold coloured mascaras for hair and lashes, in three heavily pigmented, buildable colours.
FOR LASHES- Make a subtle statement by adding a pop of colour to the tips of your lashes, or add coats to your entire lashes for a shockingly chic look. The more the better!
AS A HAIR MASCARA- Apply to small sections of hair and swipe through for instant ELECTRIC highlights.

Why don’t we go there- Shock of blue
Does he know?- Pinkest hot pink
Story of my life- Amped canary yellow


 LIQUILIGHTS GLOW GLOSS

Liquilights Glow Gloss sparkles brilliantly during the day and illuminates under UV black light after dark. Enriched with natural oils and vitamin E to keep your lips soft and hydrated all day and all night.
Gloss can be worn alone for a pop of sparkle and color, or paired with One Direction crème lipstick for a bolder look.

Through the Dark- Electric glitter poppy lip gloss that glows to neon red-orange under UV light
Kiss You- Orange glitter rush lip gloss that glows to neon yellow under UV light
Taken - Powerhouse glitter pink lip gloss that glows to neon orange under UV light


 ROCK ME NAIL KIT

ROCK ME NAIL KIT, featuring NEON UV-REACTIVE Nail Varnish and UV-REACTIVE GLITTER nail toppings that add even more sizzle to your mani, for nails that light up day and night.
Sprinkle the glitter over wet polish for a subtle accent, or go for the glitz and dip your entire wet mani in mega-watt sparkle!

Nail Varnish:
Happily– UV iced blue glitter
Moments- UV neon pink
Diana- UV 3D holographic

Glitter Toppings:
Kicks- UV snow cone blue
Not afraid- UV electrified pink glitter
Star-- UV holo glitter

Makeup by One Direction will hit the follow stores November 15th!
Macy's
Dillards
Boscov's
Stage Stores
Beauty Brands
Lord & Taylor
*The products in this post were provided to me for my honest review by Brand Backer and Markwins. All opinions are my own. *


Wednesday, December 3, 2014

6:00 AM

The 12 Days of Christmas Nail Art Challenge Day 2 : Christmas Trees

     
     It's the Second day of the Christmas Nail Art Challenge and today's theme is Christmas trees. I had a heck of a time trying to come up with an idea for today's theme.  I wanted to go for something different again and attempted a few different ideas. But fancy nail art was just not in the cards for me today. After 4 failed manicures I finally settled on a French twist with stamping.


     I'm actually pretty proud of how this turned out considering how frustrated I was when I started it. And for some reason, I can freehand a French tip in my sleep, but I can't paint lines to make a tree to save my life. Funny how that works.

     Enough of my nail art skill ponderings, back to the manicure. I started off with a layer of Simply Smooth. I wanted even color for the "nude" part of the nail along with a smooth surface to work with. The French tips are Ho Ho Holly from Color Club and a sparkly red striping polish I picked up at Sally's. I stamped with Finger Paints Paper Mache and Konad plate M12. Add in some gold accents with Orly Luxe and viola my manicure is completed!


     I wish the Merry Christmas was a little easier to read, but I still think it looks cute. Festive but not over the top  I guess. The next prompt is snowmen and I hope I don't have as many issues coming up with a manicure for that one. While I'm off thinking up ideas why don't you check out the other manicures in the challenge.  Or check out what I did for last years Christmas Tree prompt. Thanks for stopping by and Happy Polishing!


Monday, December 1, 2014

6:30 AM

Loki's Nail Vinyls

     
     For my second post today I have the pleasure of reviewing a brand new nail vinyl company, Loki's Nail Vinyls. I'm sure you have heard of Lokis Lacquer around the nail art community. It's actually run by a girl named Tara and she has an amazing blog that I can get lost in for hours.  Well after getting many questions about nail vinyls over the last 12 months she has decided to start her own line. And guess what, her shop opens today with worldwide shipping!

    I decided to create 2 looks with the vinyls that I was sent to share with you today. The first one is a gradient so I could test out the nail aprons. I really wanted to do this one first because I have a feeling the nail aprons will be a big seller. They are available in 2 sizes and what makes them different is that they come in 2 pieces. That means you can get a better fit around your nail. No more gaps where you had to bend or crease the wrap to get a proper fit.


     Another great feature of the wraps is that they are reusable. I used the same set for my entire manicure.


     Because of the proper fit, you get hardly any clean up as you can see here by this poorly done gradient. Just a tip, don't try to do a gradient on a bare nail it's a PITA. I probably would have had even less clean up if I had added a base coat of white first. Then I wouldn't have tried using so much polish on the sponge to get coverage.

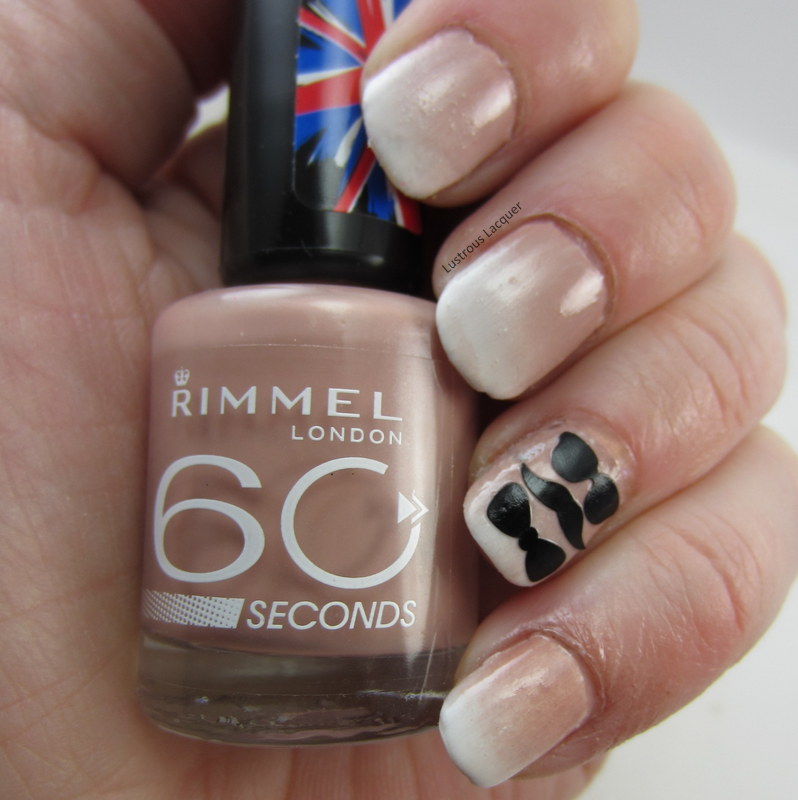
     For my finished look, I used these cute vinyls to create the silhouette of a man as an accent to my manicure. I used Sinful Colors Snow Me White and Rimmel Caramel Cupcake as my gradient colors.


     All nail vinyls are made from a plastic product and will melt over time when a solvent-based liquid is put over them. A quick dry top coat is best to apply when leaving them on like stickers. Tara recommends Seche Vite after testing out a few. I actually used Out the Door and had no issues after wearing the vinyls for 24 hours.

     For my next look, I used the French tip guides for a sideways half moon manicure with an art deco feel. The colors I used for this look are Orly Luxe, OPI 4 in the Morning and a white striper.


     The vinyls are quite sticky, if you use them as stencils I recommend sticking them to the back of your hand a few times to remove some of the tackiness. Otherwise, you run the risk of pulling off your base color when trying to remove them. Trust me on this one.  Also, I noticed these vinyls are thicker than others that I have used, making them better quality, and easier to reposition without damaging the shape.

     All of Loki's nail Vinyls are available at http://lokisnailvinyls.storenvy.com and come in your choice of color. (With the exception of the basic chevron and French tip) Eventually, there will be an option of a custom service for designs, but there is already a wide variety to choose from. I hope you like the designs I created. I'll have more in the next coming weeks to share with you. Thanks for stopping by and Happy Polishing!


6:00 AM

The 12 Days of Christmas Nail Art Challenge Day 1: Snowflakes

      
     Welcome to December! It's that time of year again, the time for Christmas Manicures. I am participating in the 12 Days of Christmas Nail Art challenge again, hosted by the group Challenge Your Nail Art on Facebook.


     Today's theme is Snowflakes. I knew I didn't want to use traditional colors but still wanted something with a winter/Christmas feeling to it. Last year I used a lot of traditional colors and my manicures looked a lot like everyone else's. A great example would be last years snow theme.
    
     While trying to come up with ideas I came across a manicure in my newsfeed from Beginnails that was perfect. So this manicure is dedicated to her and the inspiration she gave me.

Snow-Flake-Manicure-with-glitter

     I started with 2 coats of KBShimmer Hexy Bikini for my base. After it was dry I dabbed on the OPI sheer tints to random spots on my nails and added a layer of top coat. I really liked how it looked and really didn't want to mess it up so I waited a full hour before moving on to the next step.

Snowflake-nail-art-with-Glitter

     For my snowflakes, I used Finger Paints Black Expressionism and image plates from Bundle Monster and Shandy. ( BM-319, BM-323, and SH-202.) I have realized that in addition to needing better image plates for Halloween I also need ones for Christmas. Although I did like the variety I had with snowflake images to choose from.

     I liked the look of this glossy but it was hard to photograph. I kept getting glare and losing the detail in the snowflakes. So I did what every polish loving person would do, I mattified it!

Matte-Snowflake-Nail-Art

     I'm having a hard time deciding if I like it glossy or matte better. The Glossy version had much more sparkle, but the matte version shows much more detail. Which way do you like better?

    Before you go, make sure you check out the other participant's manicures. Thanks for stopping by and Happy Polishing!


Like what you see? Share it with your friends!