Showing posts with label 40 Great Nail art looks Challenge. Show all posts

Wednesday, August 10, 2016

6:00 AM

40 Great Nail Art Ideas - Violet


     Ok, so I've got a super quick blog post for you today because it's playoff season for me and I'm working on borrowed time as it is. For those of you who don't know I play on a softball team and we were on the field until after 11 pm Monday night for playoffs. Yay, we are winning but boy am I tired. Being the glutton for punishment that I am I agreed to help out 2 different friends on their Volleyball teams for playoffs which are Tuesday and Wednesday night. I'm either going to be in great shape after this on unable to move. I guess time will tell on that one.

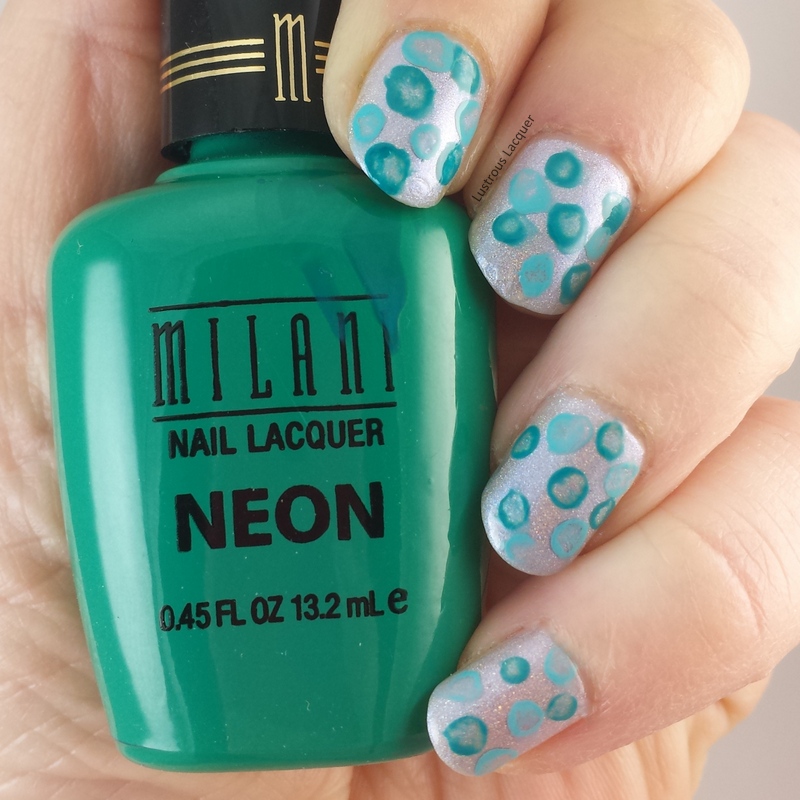
    Anyway back to the reason you're here, the nail art! I have fallen so hopelessly behind on the 40 Great Nail Art Ideas challenge that I know I will never catch up, but I'm determined to finish it! I'll have all my posts done, albeit months behind but the inlinks are no longer open so I won't be able to share the other looks with you. However, if you're reading this post and participating in the challenge please feel free to leave a link to your post in the comments.  So just what is the 40 Great Nail Art Ideas Challenge? Well, it's simple really, This challenge is set up a bit differently than most. For starters, there is the option to do weekly manicures with one week dedicated to themes, and one to colors. Or you can do every other week and stick with themes only or colors only. For the color portion of the challenge, each person is also assigned a pattern. The end result is 40 different looks all done in the same colors. As most of you know I opted to do the color challenge and you can see my previous looks using TealOrange, Purple and GreenBlack and WhiteGreyGlitter toppersPale Blue , 3 shades of PurpleTurquoise and 3 shades of Green

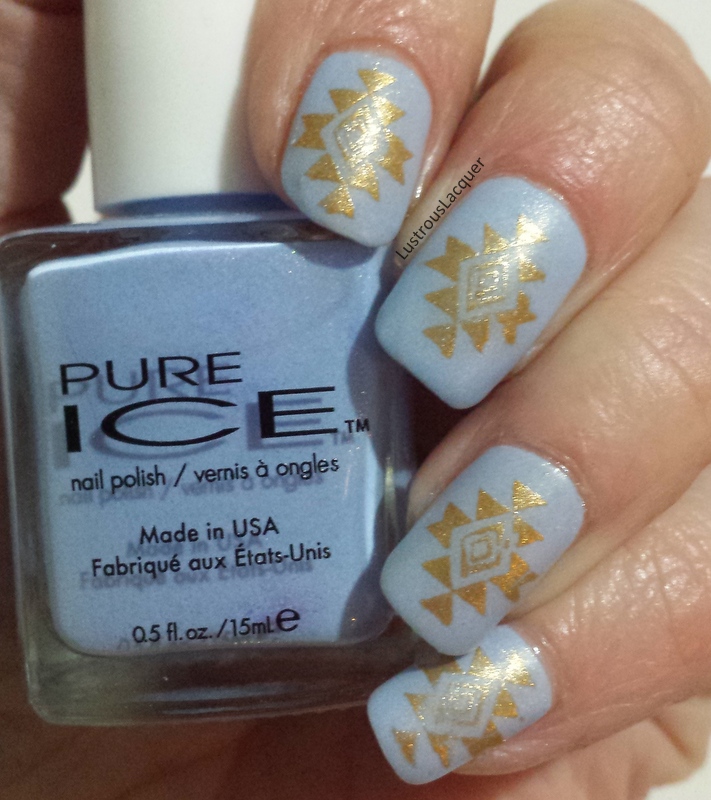
    For this prompt the color is Violet and I was given the pattern Aztec. Well, I sort of screwed up and thought it was tribal so feel free to use your imagination on this one. Or since my "tribal" manicure from a few months ago ended up looking more "Aztec" let's just say that I did this on purpose to give each pattern their 15 seconds of fame on my blog. Yeah, that sounds better than me just being scatterbrained and mixing them up!


    So this look was very easy to put together and I want to toot my own horn a bit about that image placement. Look at how centered they are on my nail!! That will probably never happen again so bask in its beauty while you can. 

    For my base colors, I used Sally Hansen Lively Lilac and Sinful Colors Snow Me White. For the image, I used NNail plate B97 and Hit the Bottle As Black as Night. The accent nail I stamped with Lively Lilac to tie it all together. After a layer of top coat, this manicure was complete. Just like this post is about to be. I hope you enjoyed this look. I will be back Friday to share more of my hectic life with you. Thanks for stopping by and Happy Polishing!

Friday, March 18, 2016

6:00 AM

40 Great Nail Art Ideas - 3 shades of Green


      Happy Friday to everyone! I'm finally back with another look for the 40 Great Nail Art Ideas Challenge. This week is 3 shades of green! How appropriate with yesterday being St. Patricks Day. Hmmm that was some clever planning by The Crumpet huh. Or do you think it was just the luck of the Irish?

     Now if you're new here you might be wondering what the 40 Great Nail Art Ideas Challenge is all about. So first of all welcome, I'm so glad you're here! And secondly, here's a little bit about what this challenge actually is. This challenge is set up a bit differently than most. For starters there is the option to do weekly manicures with one week dedicated to themes, and one to colors. Or you can do every other week and stick with themes only or colors only. For the color portion of the challenge each person is also assigned a pattern. The end result is 40 different looks all done in the same colors. As most of you know I opted to do the color challenge and you can see my previous looks using TealOrange, Purple and GreenBlack and WhiteGreyGlitter toppersPale Blue , 3 shades of Purple and Turquoise.  Whew we've done a lot of looks so far! Now for today's manicure.

    My "pattern" for today was an accent nail. I know not really a pattern but it is a nail art look so it still fits the theme. And is a really easy look to pull off! After thinking way too hard about what I wanted to do for my manicure I decided on the seran wrap technique.

      If you have ever done this technique you know it makes a mess. And there's nothing worse than cleaning up green nail polish from your skin right? Well blue and red polish are right up there too I guess.  I used my new bottle of Simply Peel latex barrier from My Bliss Kiss to keep the mess at bay and was very happy with the results. Plus it makes your skin sparkly when it dries and who doesnt like to sparkle?

Seran-wrap-manicure-St.-Patricks-Day-nail-art

    Using Zoya Tracie as my base color I dabbed on Sinful Colors Exotic Green and China Glaze Cast a Spell. Exotic green is a rich avocado green polish with a creme finish.  It really blended in but can be seen towards the cuticle on my middle finger. Cast a spell is a dark green with hints of gold glitter polish that seemed to take over the entire manicure. Leaving me with much less depth to this look that I originally wanted. 


   The best blending I was able to get is shown here on my ring finger. And because of this I decided to switch up my accent nail and shift it over to the middle finger. Which I'm still not entirely sure I like honestly. I think it's just because I'm so used to seeing the accent on the ring finger. 

   
     For the finished look I used Hit the Bottle To Have and To Gold with Red Angle plate Ra-116. Sadly with all the stamping plates I own the St. Patricks themed images were slim pickings. And this clover was really my only option.  But can we take a minute to ohh and ahh over who well this gold polish stamps! Just look at how bold it is over the dark base. I am so so so glad that I finally ordered a few of these polishes to try out. And now I am anxiously awaiting a restock so I can grab a few more. Ekkk Im so excited to stamp now, which is awesome because I haven't felt like even painting my nails in over a month. So be on the look out for those new posts coming up in the future, That's all I have for now. Make sure to check out the other amazing looks from today's challenge. Thanks for stopping by and Happy Polishing!


Friday, February 5, 2016

6:00 AM

40 Great Nail Art Ideas- Aqua or Turquoise


     It's time for another look from the 40 Great Nail Art Ideas Challenge! I don't know if you know this but I am actually really enjoying this challenge. Normally I get stressed during a challenge and struggle to get my looks done. But not this time! And you want to know why? This challenge is set up a bit differently than most. For starters there is the option to do weekly manicures with one week dedicated to themes, and one to colors. Or you can do every other week and stick with themes only or colors only. For the color portion of the challenge each person is also assigned a pattern. The end result is 40 different looks all done in the same colors. As most of you know I opted to do the color challenge and you can see my previous looks using TealOrange, Purple and GreenBlack and WhiteGreyGlitter toppersPale Blue and 3 shades of Purple.  This posting every other week is just my speed and helps keep me relaxed and stress free for the challenge. 

     This week the color theme is Aqua or Turquoise  and my pattern prompt is water color. The water color technique is one that I love but have been afraid to attempt until now. And to be completely honest this is one look that I didn't nail, but now I have a little more confidence and look forward to trying again. After I watch a few more YouTube videos on how's it's done of course. 


     For this manicure I started with Parallax Polish Arctic Ice from the newly released Secret of the 7 Seas Collection. You know how I mentioned watching some Youtube videos on how to do the water color manicure, yeah I probably should have watched a few before I attempted this manicure. I had no idea really what I was doing, but I jumped right in! I used the same technique as I did for my black and white swirl manicure from earlier in the challenge. 


    Doing one nail at a time I placed random dots of Milani Fresh Teal and Maybelline Day Glow Teal on the nail. Then I took a nail art brush dipped in acetone and dabbed at the center of the dots. I was going for a more translucent look for the centers rather than removing the color completely but as you can see that didn't work out. And I knew the more I tried the more frustrated I would become and end up ruining the whole thing. We've all had days like that right?

    
     While this manicure didn't turn out exactly as I planned I still like it. Its kinds funky and fun, and very different from any manicure I've done before. Next time I try a water color manicure I'll be sure to use a few more colors and overlap the dots a bit more. See if I can get it to look a bit more like floating bubbles. For those of you who have successfully done this technique, do you have any words of wisdom or tips for the water color novice? Let me know in the comments and then be sure to check out the other looks created for the Aqua or Turquoise challenge. Thanks for stopping by and Happy Polishing!


Friday, January 22, 2016

6:00 AM

40 Great Nail Art Ideas- 3 Shades of Purple


     It's Friday, which means it's time for another look from the 40 Great Nail Art Ideas Challenge. For those of you not familiar with this challenge here's a quick recap...This challenge is set up a bit differently than most. For starters there is the option to do weekly manicures with one week dedicated to themes, and one to colors. Or you can do every other week and stick with themes only or colors only. For the color portion of the challenge each person is also assigned a pattern. The end result is 40 different looks all done in the same colors. I opted to do the color challenge and you can see my previous looks using TealOrange, Purple and GreenBlack and WhiteGrey, Glitter toppers, and Pale Blue.  This week we are using 3 shades of purple and the technique I have is water marble. 

    Water marbling is one of the reasons I got into nail art, and was the first look I tried. So this was a fun week for me with remembering the excitement I felt back then and how proud I was when it turned out to be a success. I still haven't mastered how to get all my nails to look the same and probably never will to be honest. But I sorta like having each nail similar but not exact. And that's just how this manicure turned out. 

nail-art-water-marble-manicure-purple

    I used 3 colors from Sinful Colors in my water marble because I have had the most success with this brand so far. And I don't feel as guilty about wasting so much polish because of the overly wallet friendly price. The colors are Mesmerize, Sweet Tooth and Winterberry. 


     To make the colors more intense I used Milani White on the Spot as my base color. As a general rule I have a layer of white under all my water marbles actually. I think it stems from that first water marble attempt, where the polish looked so thin in the water and I was convinced it wouldn't be opaque on my nails. Now it's just habit I guess. one of those weird quirks us nail bloggers develop over time. Id love to hear about yours in the comments...hint hint. 


    Well I've run out of things to say about this manicure, and to be honest I not really sure there is more that could be said. So now it's time for you to leave me your thoughts in the comments because I love reading them. And then check out the other looks for this weeks challenge. Thanks for stopping by and Happy Polishing!


Friday, January 8, 2016

6:00 AM

40 Great Nail Art Ideas- Pale Blue Base


     Its time come again for another installment of the 40 Great Nail Art Ideas Challenge. For those of you unfamiliar with this challenge here's a quick explanation. This challenge is set up a bit differently than most. For starters there is the option to do weekly manicures with one week dedicated to themes, and one to colors. Or you can do every other week and stick with themes only or colors only. For the color portion of the challenge each person is also assigned a pattern. The end result is 40 different looks all done in the same colors. I've opted to do the color portion of the challenge and have been having a lot of fun so far. 

     Now after doing 2 similar looks for this challenge I wanted to try and think outside the box and come up with some interesting looks to share. I think I did just that with my tie-dye manicure but for this week I was crunched for time and took the easy way out. You'd think after having 2 weeks off from work I would have found a little time to do some nail art! Sadly my style seems to be put things off till the very last minute lately. So here is my pale blue base manicure with a tribal pattern. 

     I started with Pure Ice Prince Charming from the newly released Fairy-tale Forrest Collection. A pale blue with subtle micro shimmer. 

  
     Thank God my clear jelly stamper showed up last week because it made adding the tribal pattern go on almost effortlessly and faster than I've ever done a stamping manicure before. Seriously if you like to stamp and haven't pick this miracle stamper yet do it right now. I mean it, open a new window and order that baby up. I'll wait.... got your order placed? OK let's continue.


     Like I mentioned above I was crunched for time so stamping was the only way for me to go and I really liked this image from the promotional plate offered by Cult Nails about a year ago. I'm still so sad that they closed up shop...one of the very first indies I ever purchased. 

     I used Orly Glitz to stamp with and am extremely happy with how well it worked. For some reason I had it in my head that I had to use gold for a tribal pattern if my base was pale blue. It seemed more authentic to me, but don't ask me why.  And after sitting and staring at my collection for 20 minutes trying to pick a different color I gave up and went with gold. 


    I do actually like the way these colors go together and happy that I stuck with my original idea. But I wanted to see what it would look like matte. Again thinking it would have a more authentic feel to it.


     Now with the matte top coat you lose the sparkle in Prince Charming but I still prefer it this way. Its not a huge difference from the glossy version but it has a different feeling to it for me. Here's a macro of both look so you can pick which one you like better and let me know in the comments. 


   And remember this is a nail art challenge so there's a link up involved, so be sure to check out the other looks. Thanks for stopping by and Happy Polishing!


Friday, December 18, 2015

6:00 AM

Hobby Polish Bloggers and 40 Great Nail art Ideas presents - Christmas


     Its that time of year again. Christmas shopping, cookie baking, holiday parties and in my house the plague. The one thing my children share no matter what without fail is their germs, and after being nurse mommy for the last 3 weeks it's my turn so today's post is going to be a quick one. 

     This week both the Hobby Polish Bloggers monthly link up and the 40 Great Nail Art Ideas challenge have lined up perfectly so I can share my Christmas manicure for both with one post. I love it when things work out in my favor. Now most of you know I have been doing the color/pattern prompt for the challenge but this week I'm breaking from my regular schedule to join in on a theme week. Because of the holidays the color prompts were taking quite a long break and I wanted to keep my nail art momentum going. Now for today's nail art look....


    Thanks to my hectic home life right now I opted for something simple and easy to create. And I actually like the results, I feel very festive and fun even as I sit here in my sweats. 


      To create this look I used Fair Maiden Fire Frost as the base for my accent nail and Darling Diva Don't Call me, I'll Call You for the rest.  What you can't see in my photos is my thumb nail (I tried to include it for you but the pictures just looked awkward and not suitable for viewing) which is also painted with Fire Frost and a red rhinestone to help tie the whole thing together. 


    I used some new nail vinyls from KBShimmer to make my peppermint swirl design. The rhinestones I picked up from Dollar Nail Art and add just the right amount of bling for me. If you haven't checkout out Dollar Nail Art and you're a fan of embellishments I highly recommend them. 

     So there you have it. A quick and simple nail art look that's easy to create for the holidays. Let me know what you think of this look before you check out the other talented ladies. Thanks for stopping by and Happy Polishing!


Friday, December 4, 2015

6:00 AM

40 Great Nail Art Ideas- Glitter topper or Flakie


      It's time once again for another look from the 40 Great Nail Art Ideas Challenge. For those of you not familiar with this challenge here's a quick recap...This challenge is set up a bit differently than most. For starters there is the option to do weekly manicures with one week dedicated to themes, and one to colors. Or you can do every other week and stick with themes only or colors only. For the color portion of the challenge each person is also assigned a pattern. The end result is 40 different looks all done in the same colors. I opted to do the color challenge and you can see my previous looks using Teal, Orange, Purple and Green, Black and White and Grey

      This week the color is glitter topper or flakie and my pattern is tie-dye. Ummm yeah I was scared when I first saw this and had no idea how the heck I was going to pull it off. After a few failed attempts at making some tie-dye style decals I decided to throw the rule book out the window and just play around a bit to see what I could get.  Are you ready for my results?


     As you can see I cheated a little bit and ended up with what looks more like an oil slick than tie-dye. But honestly I don't care because I freaking love this!!!!! I love it so much I'm still wearing it chip and tip wear free I might add 7 days later. Whats my secret for such long wear time? There's a LOT of polish on my nails. 


      I started with a base color of Sally Hansen Silver Sweep. Once that was dry with was time to get messy. Thankfully I was smart enough to use my Nail Veil to take care of most of the mess but you can still see a few shimmering glitters hanging out that just would not come off my skin. 

     To get the tie-dye/oil slick look I placed random drops of polish onto a mat, dabbed my squishy stamper onto it and then placed that onto my nails. I over lapped colors as I went creating the blended look. I repeated this process until I had I look I liked. 


     For the colors I went with the Poolside collection from Finger Paints. I figured they were sheer enough to blend nicely but bright enough to look like tie-dye.  And they have micro glitter so I didn't completely ignore all the rules. The colors are Aloha Lei, Hula Aruba!, Margarita Mambo, Surf's Up and Wild Bikini. I topped everything off with 2 generous coats of top coat and sat back to admire my work. Sometimes it feels good to break the rules, and I did promise an out of the box look in my last challenge post. 

    I also made a rough tutorial video in case you wanted to see exactly how I created this look.


     Before you check out the other looks from this week I've got a bonus shot to share with you because well, I freaking love this manicure! Thanks for stopping by and Happy Polishing!


Friday, November 20, 2015

6:00 AM

40 Great Nail Art Ideas - Grey + Color


       Its time once again for another look from the 40 Great Nail Art Ideas Challenge. If you're new around here or just not sure what this challenge is here's a quick recap...This challenge is set up a bit differently than most. For starters there is the option to do weekly manicures with one week dedicated to themes, and one to colors. Or you can do every other week and stick with themes only or colors only. For the color portion of the challenge each person is also assigned a pattern. The end result is 40 different looks all done in the same colors. If you saw my Teal or Orange, Purple and Green manicures you already know that I picked the every other week color option of the challenge. 

     This week my pattern was a tape manicure which made me giggle a bit because I already used tape for the stripes in my orange, purple and green manicure. This time I rotated my tape 45 degrees and created this look. 

Nail-art-using-striping-tape-grey-nail-polish

      I think this turned out pretty darn cool but Id love to hear what you think. I used Sinful Colors Midnight Blue as my base and 6 different China Glaze Grey polishes for the stripes.  From lightest to darkest they are:
 -Five Rules
 -Pelican Grey
 -Intelligence, Integrity & Courage
 -Elephant Walk
 -Cosmic Dust
 -Kiss my Glass


     I did find out the hard way that I needed to remove my tape as I went along. Otherwise the lightest grey dried too much and pulled off with the tape. And to avoid getting too much polish between the tape use a small nail art brush instead of a dotting too. My first attempt at this look was not a pretty picture!


      It's a good thing I've been working on my patience when it comes to nail art. I was almost in tears at this point because it took me forever to get my tape placed perfectly. You'll notice in my previous tape manicures I'm a little anal about the placement. 

     I am so glad that I didn't get frustrated and give up because for me nail art is about learning, growing and improving. And in the end I came up with the manicure I had pictured in my head. Which as a lot of us know doesn't always happen. 


      Id like to hear about things you learned from a failed manicure attempt and what you think about my finished look. I promise to try and think a little more out of the box for the remainder of the challenge and stay away from stripes for awhile. Also be sure to checkout the other looks created for today. Thanks for stopping by and Happy Polishing!


Friday, November 6, 2015

6:00 AM

40 Great Nail Art Ideas - Black and White


          Its time once again for another look from the 40 Great Nail Art Looks Challenge. For those of you who don't know, This challenge is set up a bit differently than most. For starters, there is the option to do weekly manicures with one week dedicated to themes, and one to colors. Or you can do every other week and stick with themes only or colors only. For the color portion of the challenge, each person is also assigned a pattern. The end result is 40 different looks all done in the same colors. If you saw my Teal or Orange, Purple and Green manicures you already know that I picked the every other week color option of the challenge.

    This week the colors given to us were black and white and my pattern is swirls. I took a liberal or should I say creative approach with my pattern with a look originally done by Chalkboard Nails. (if you click on the link it will take you to the video tutorial.)


     And here is my finished look. I went for swirling smoke and sort of love how it turned out. Especially my pointer finger! Which of course is the last finger I did. Why is it that the last one always turns out the best? Do I really learn that much in 4 fingers about what not to or what to do?  Maybe that's one of the great nail art mysteries that I will never find the answer to.


    So to create this manicure I started out with 1 coat of Finger Paints Black Expressionism. Yes, you read that right 1 coat. This is seriously my favorite black nail polish! After that was dry I added a layer of top coat and waited about 15 minutes for it to dry before adding another generous layer of top coat.  This is a very important step because you need to protect your base color from the acetone when making the "smoke".

     After I was 100% sure my top coat was completely dry I added a little swoosh of white polish with my white striper and dabbed a flat brush dipped in acetone over it to get the effect. Doing one nail at a time until I was happy with the way it looked. 


     This is actually a really easy technique and I can see myself trying it out with a lot of color combinations.  I wonder how well it would work with a glitter polish? I might have to try that for the holidays. 

    Do you think I went too far outside the box for this to be considered swirls or do you like my creative take on the pattern? Let me know in the comments and be sure to check out the other looks created for today's challenge. Thanks for stopping by and Happy Polishing!

Friday, October 23, 2015

6:00 AM

40 Great Nail Art Ideas - Orange, Purple and Green


     Its time once again for another look from the 40 Great Nail Art Looks Challenge. For those of you who don't know, This challenge is set up a bit differently than most. For starters, there is the option to do weekly manicures with one week dedicated to themes, and one to colors. Or you can do every other week and stick with themes only or colors only. For the color portion of the challenge, each person is also assigned a pattern. The end result is 40 different looks all done in the same colors.  If you caught my Teal manicure a few posts back you already know that I picked the color/pattern option. If not don't worry there's still time for you to read it. 

    This week my pattern was stripes and I had an idea of what I wanted to do immediately, a reciprocal gradient! I used all Sinful Colors polishes for this manicure starting with a base of Snow me White.

    For the Gradient, I used Enchanted (purple) Clementine (orange) and Exotic Green. Once it was dry I placed striping tape vertically on my nail, rotated my sponge 180 degrees and repeated the gradient process. 


 Oh, wait, scratch that. That was my original idea for a mani but as you can see it didn't turn out as cool as it looked in my head. In fact, I only ended up doing one nail and then realized it wasn't going to work.  Having an odd number of colors throws off the reciprocal part, at least for me. The solid orange in the middle hides the fact that the stripes only go half way on the nail.   Good thing I had a backup idea.....


     Now, this is an orange, purple and green striped manicure don't you think! I kept my original gradient idea and the Sinful polishes, except for Snow me White. I switched it out for KB Shimmer Hexy Bikini


     Having a glittery base for this was a bit of outside the box thinking for me. I love glitter polishes, love the look when other people use them as bases for nail art, but never thought to reach for one to combine with a gradient. But I'm  really glad that I did because I love the finished look! It almost makes me forget about the mani fail from earlier.... almost.


    Now I don't know if it's the Halloween season, the color combo or the combination of both but when I look at this I'm reminded of those striped stocking associated with Witches. What do you think?  After you tell me your thoughts on that, be sure to check out the other looks created for the challenge. Thanks for stopping by and Happy Polishing!


Friday, October 9, 2015

6:00 AM

40 Great Nail Art Ideas - Teal


      Today is the start of a 52-week nail art challenge put together by the Crumpet. Now I know what you might be thinking.... but Katie, you're not posting very much lately. How the heck are you going to pull off a 52-week challenge? Want to know the secret? I only have to post every other week. That gives me two weeks to get a mani painted and a post done, and that should help get my mojo back. 

     The first prompt I am doing is teal. Now all the other ladies will be doing teal manicures also but the catch is we each have a different pattern. I can't wait to see what everyone comes up with, but first, let's get to my manicure.


     For the teal color, I went with Maybelline Antique Teal from the Vintage Leather Collection. A matte finish dark teal with scattered flakies. The application was a little tricky when doing multiple strokes on one nail. The flakes wanted to drag and cause streaks. I had no issues with dragging when only doing 3 strokes per nail. You might notice that the flakies are highly visible in the bottle but on the nail, they tend to disappear. 

     However, it works great for stamping! I used 2 images from Bundle Monster plate BM-11 to create this look. A positive and negative of the same image so to speak. For my white polish, I used Sinful Colors Snow me White.


     I really like how this turned out, with the stripe of image going down the center of my nail instead of a full coverage. How do you feel about using both the positive and negative sides of an image in a manicure? Or didn't you notice that until I pointed it out? Let me know in the comments and then check out the other amazing manicures. Thanks for stopping by and Happy Polishing!

Like what you see? Share it with your friends!