Showing posts with label Tape Manicure. Show all posts

Friday, November 20, 2015

6:00 AM

40 Great Nail Art Ideas - Grey + Color


       Its time once again for another look from the 40 Great Nail Art Ideas Challenge. If you're new around here or just not sure what this challenge is here's a quick recap...This challenge is set up a bit differently than most. For starters there is the option to do weekly manicures with one week dedicated to themes, and one to colors. Or you can do every other week and stick with themes only or colors only. For the color portion of the challenge each person is also assigned a pattern. The end result is 40 different looks all done in the same colors. If you saw my Teal or Orange, Purple and Green manicures you already know that I picked the every other week color option of the challenge. 

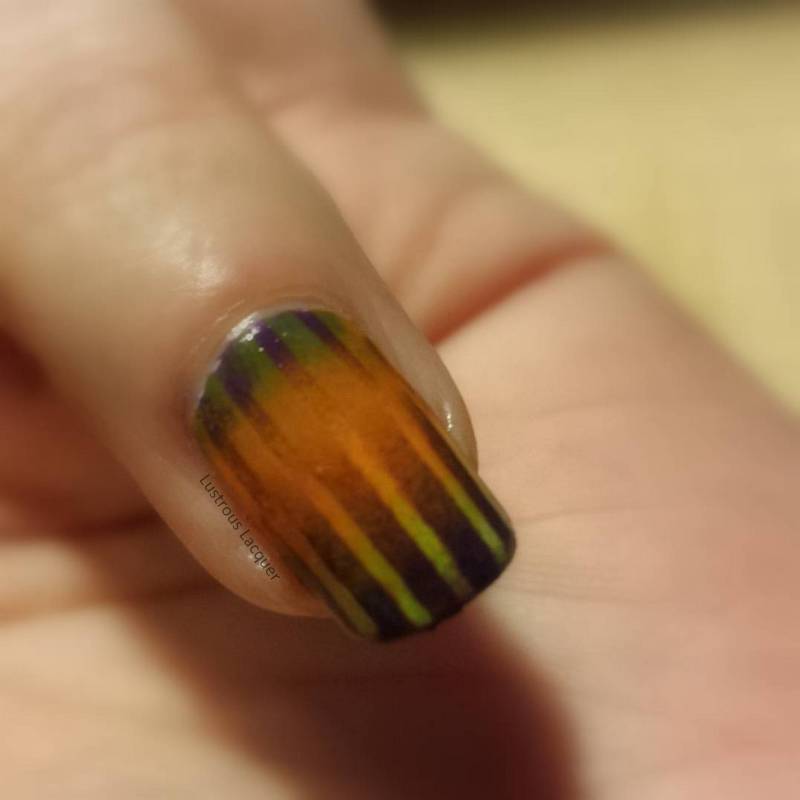
     This week my pattern was a tape manicure which made me giggle a bit because I already used tape for the stripes in my orange, purple and green manicure. This time I rotated my tape 45 degrees and created this look. 

Nail-art-using-striping-tape-grey-nail-polish

      I think this turned out pretty darn cool but Id love to hear what you think. I used Sinful Colors Midnight Blue as my base and 6 different China Glaze Grey polishes for the stripes.  From lightest to darkest they are:
 -Five Rules
 -Pelican Grey
 -Intelligence, Integrity & Courage
 -Elephant Walk
 -Cosmic Dust
 -Kiss my Glass


     I did find out the hard way that I needed to remove my tape as I went along. Otherwise the lightest grey dried too much and pulled off with the tape. And to avoid getting too much polish between the tape use a small nail art brush instead of a dotting too. My first attempt at this look was not a pretty picture!


      It's a good thing I've been working on my patience when it comes to nail art. I was almost in tears at this point because it took me forever to get my tape placed perfectly. You'll notice in my previous tape manicures I'm a little anal about the placement. 

     I am so glad that I didn't get frustrated and give up because for me nail art is about learning, growing and improving. And in the end I came up with the manicure I had pictured in my head. Which as a lot of us know doesn't always happen. 


      Id like to hear about things you learned from a failed manicure attempt and what you think about my finished look. I promise to try and think a little more out of the box for the remainder of the challenge and stay away from stripes for awhile. Also be sure to checkout the other looks created for today. Thanks for stopping by and Happy Polishing!


Friday, October 23, 2015

6:00 AM

40 Great Nail Art Ideas - Orange, Purple and Green


     Its time once again for another look from the 40 Great Nail Art Looks Challenge. For those of you who don't know, This challenge is set up a bit differently than most. For starters, there is the option to do weekly manicures with one week dedicated to themes, and one to colors. Or you can do every other week and stick with themes only or colors only. For the color portion of the challenge, each person is also assigned a pattern. The end result is 40 different looks all done in the same colors.  If you caught my Teal manicure a few posts back you already know that I picked the color/pattern option. If not don't worry there's still time for you to read it. 

    This week my pattern was stripes and I had an idea of what I wanted to do immediately, a reciprocal gradient! I used all Sinful Colors polishes for this manicure starting with a base of Snow me White.

    For the Gradient, I used Enchanted (purple) Clementine (orange) and Exotic Green. Once it was dry I placed striping tape vertically on my nail, rotated my sponge 180 degrees and repeated the gradient process. 


 Oh, wait, scratch that. That was my original idea for a mani but as you can see it didn't turn out as cool as it looked in my head. In fact, I only ended up doing one nail and then realized it wasn't going to work.  Having an odd number of colors throws off the reciprocal part, at least for me. The solid orange in the middle hides the fact that the stripes only go half way on the nail.   Good thing I had a backup idea.....


     Now, this is an orange, purple and green striped manicure don't you think! I kept my original gradient idea and the Sinful polishes, except for Snow me White. I switched it out for KB Shimmer Hexy Bikini


     Having a glittery base for this was a bit of outside the box thinking for me. I love glitter polishes, love the look when other people use them as bases for nail art, but never thought to reach for one to combine with a gradient. But I'm  really glad that I did because I love the finished look! It almost makes me forget about the mani fail from earlier.... almost.


    Now I don't know if it's the Halloween season, the color combo or the combination of both but when I look at this I'm reminded of those striped stocking associated with Witches. What do you think?  After you tell me your thoughts on that, be sure to check out the other looks created for the challenge. Thanks for stopping by and Happy Polishing!


Friday, August 21, 2015

10:38 AM

HPB presents - Neon Tape Manicure


     Every month the members of Hobby Polish Bloggers or HPB for short pick a theme and do a link up. This months theme is Neons and we were allowed complete creativity for these manicures. As soon as I heard the theme I knew I wanted to do a take on the nail art I did over Fickle Fairy Potions Hopelessly Devoted. Unfortunately the longer I had to think about the idea the less confident I became. So I took to my Facebook page to ask for opinions. 

     I originally wanted a black base for this manicure but I knew that the neon would pop better over white. After putting it to a vote on Facebook, a white base had won and I went with it. But I still wanted to know how it would look over black and had to include it on one nail. This is what I came up with. 


   I used 11 polishes and some striping tape to create this manicure. It took almost 4 hours to do because of all the dry time needed. Looking at it now I wish I would have gone with my original idea and just used a black base but the white isn't bad. 

     Ready for the list of polishes used?

  • Finger Paints Black Expressionism and Paper Mache
  • Orly Tropical Pop, Saturated, Ablaze and Hot tropics
  • China Glaze Towel Boy Toy and In the Lime Light
  • Milani Totally 80's,  Pink Rocks! and Dude Blue


      Besides being tedious the tricky part for me was putting a layer of white down under the neon parts of the accent nail. But that also happens to be my favorite part of the manicure. What do you think? Should I have stuck with my original idea and gone with a completely black base or do you like the white? Don't forget to check out what the other members of the group have come up with. Thanks for stopping by and Happy Polishing!


Wednesday, August 5, 2015

10:58 AM

Fickle Fairy Potions - Hopelessly Devoted


     Happy Hump Day! While going through my review notes I discovered that I had swatched a few polishes from Indies that are no longer making polish. A few have closed up shop completely and others are taking an extended leave. So I decided to dedicate this week to those indies who are no longer with us. 

     Fickle Fairy Potions is one of those indies who seems to have disappeared into the night. I had no idea they were no longer in business until I went looking to see if Hopeless Devoted was still available. I feel bad when I do a blog post on a polish that is no longer for sale sometimes. Like I've dangled this beautiful thing in front of you and then snatched it away. I hope you will forgive me for this and understand that I need to get through the polishes in my collection. With that in mind I'll try to make this post short and sweet. 

Fickle-Fairy-Potions-Hopeless-Devoted-purple holographic-nail-polish

     Hopelessly Devoted is a dusty purple with scattered holographic glitters. As you can see in my photos I've had this bottle for quite some time and it began to separate some in the bottle. After a few minutes of rolling the bottle around in my hand and I was good to go. Application was smooth with the first coat going on slightly sheerer that I was expecting. Hopelessly Devoted builds up nicely and 2 coats is all you need to reach full opacity.  Shown here is 2 coats plus top coat.


    I like the dusty purple base to this polish but it's a common color in my opinion, but the addition if the holo makes this polish one that I can see myself wearing again and again.  I like that the holo applied with nice coverage over the nail and didnt want to hide in the bottle or gather at my tips. 


     The darker purple isn't exactly a "summer color" but Hopeless Devoted works well as a summer shade with it's hints of sparkle and playful nature.  And while I have a slight tan on my hands right now ( I can thank my red headed father and Irish heritage for my inability to tan) I think the color plays nice with my skin tone and enhances the tan that I have. 

      Of course I wanted to try some nail art over this but didnt want to cover it up completely or do my traditional stamping so I attempted a look with my striping tape. 


     I used Sally Hansen Silver Sweep to create this fan look as an accent nail. The fan part got a little bigger than I wanted but still turned out ok I think. This was actually really easy to do and has given me an idea for a different nail art look that I hope to have up a little later in the month. 

      What do you think of Hopeless Devoted? Are there any indies out there that you love but have closed up shop? Thanks for stopping by and Happy Polishing!


Monday, June 29, 2015

6:00 AM

Patriotic French Tip Manicure


     I hope everyone had a good weekend! I had a few posts lined up for this week and then I realized that 4th of July is this weekend. Where or where does the time go lately? I decided that I would dedicate this week to different Patriotic nail art looks. That meant that I had to scramble to get this first one done but I love how it turned out! 

4th-of-july-nail-art


      I went for a twist on the typical French Manicure for this look. I almost wish I would have saved this look for last so I could wear it on the 4th. But it was simple enough to do so I can always recreate it.

     I started out with a layer of China Glaze Heaven and then free handed the "V" shape with Finger Paints Paper Mache. Once that was dry I taped off half of the "v" and used China Glaze Man Hunt to create the background for my stars. Which were also done with Paper Mache. 

Patriotic-nail-art

     To get my stripes a reached for my handy striping tape and taped off the edge of the blue, along with the edge of the white and then across the white. I really wanted to make sure my lines were crisp. For the red I used China Glaze Seeing Red which was part of the LE Giver Collection released last summer. 


     What do you think of this patriotic look? I'll have another one to share with you on Wednesday. I just have to come up with it first! =)  Thanks for stopping by and Happy Polishing!


Monday, January 5, 2015

10:51 AM

My top 10 nail art looks from 2014


     I thought I'd start 2015 off with a look back at some of my favorite nail art looks from the last year. Originally I was going to share my top 5 looks but I had a hard time narrowing it down so I went with 10.  It was fun to see how things progressed from an ok manicure to start out with to my all ti,e favorite nail art look. I hope you enjoy this stroll down memory lane and I'd love to hear which look you like the best.

     March brings us the first look of the year with some tiger stripes. This was part of a twin manicure that actually ended up being a triple manicure. 


     All the details for this look can be found at http://lustrouslacquer.blogspot.com/2014/03/twin-blog-post-tiger-print.html

     I finally attempted a Sugar Spun manicure as part of the Spring Renewal Nail Art Challenge in April. This was the look I put together for the Pastel Prompt.


     May was a slow month for nail art for me but I created 2 looks that I absolutely loved in June. Ironically both manicures were for weddings or wedding-related. The first look is a stamped gradient for one of my closest and longest friends in the world. 

    
     I wish I had a picture of the finished manicure. I ended up adding a layer of Fairy Dust after I had taken all my pictures. But there is a quick cell phone pic in the original post. You can find it here http://lustrouslacquer.blogspot.com/2014/06/stamped-gradient-for-alissa.html

     For the second wedding in June, I did the leadlight technique and matched my manicure to my dress. It was a big hit with my friends and I was pretty darn proud of my efforts.


     More pictures including one of the dress I wore can be found in the original post.  http://lustrouslacquer.blogspot.com/2014/06/leadlight-manicure.html

     July brought out some simple nail art from me. I did a few simple dotticures and this simple tape manicure. It just goes to show that not all nail art has to be extravagant. 


     This is also about the time that I started cropping all of my images to the same size and making them square. I like the more uniform look. Check out the full post to see if you agree.  http://lustrouslacquer.blogspot.com/2014/07/nail-art-tape-manicure.html

     August brought another nail art challenge to my blog. This was my Under the Stars look I created for the Let's go Camping nail art challenge. 


     This entire look doesn't thrill me as much as some of the other looks I created. But it's one of my favorites because of the way I was able to get the sky to look like it had Northern Lights in it. And it even glowed in the dark. http://lustrouslacquer.blogspot.com/2014/08/lets-go-camping-nail-art-challenge-day.html

     In September I was given the opportunity to do a guest post over at The Fancy Side. The theme was bridal since Amy was getting married and that's why she needed guest posts. 


     I was really in love with this look and ended up wearing it for almost a week. Find my original post and a link to the guest post here. http://lustrouslacquer.blogspot.com/2014/09/guest-post-at-fancy-side-bridal-manicure.html

     October was another busy month for nail art for me. And while I did like my Halloween manicure 2 others won out for the top 10 list. I did my first Chevron manicure at the beginning of the month. 


     The full post can be found by following this link. http://lustrouslacquer.blogspot.com/2014/10/my-first-chevron-manicure-fraturing.html

     Towards the end of October, I did another first on my blog. Well, 2 actually. I attempted Newspaper nails and Water decals for the first time in this vintage-vibed manicure.


     All the details including a funny story about the water decals can be found at http://lustrouslacquer.blogspot.com/2014/10/newspaper-nails-with-born-pretty-store.html

     Rounding out the year is my absolute favorite manicure. My Ugly Sweater nails for the 12 Days of Christmas nail art challenge. 


     This is also the manicure where I discovered how easy it was to create these looks using acrylic paint instead of just polish. I have a feeling my nail art is going to look a whole lot better in 2015 with this bit of knowledge. Find the full post here http://lustrouslacquer.blogspot.com/2014/12/the-12-days-of-christmas-nail-art_19.html

     I hope you enjoyed this little look back at my year in nail art. It's been a fun journey and I've learned a few things along the way. I have big hopes for 2015 and I'd love it if you'd come along for the ride. Thanks for stopping by and Happy Polishing!


Wednesday, December 10, 2014

6:00 AM

Holiday manicure ideas with the Pretty Woman Holiday Nail Kit


      As some of you might know on Monday I was given the opportunity to take over the Pretty Woman NYC twitter feed for their virtual holiday party. For 2 hours I shared some nail art, held a few giveaways, and talked about holiday trivia. It was kind of fun, but not very interactive. I think the time slot I had may have had something to do with that, though. (Middle of the day and just after lunch.)

    For the party I came up with 4 nail art looks using the 4 nail polishes that come in the Holiday Nail kit. I wanted to do designs that even a beginner could easily replicate, and I wanted them to have a holiday feel. Something you might wear for Christmas or New Years without being a traditional design.  These are the looks I came up with.

Argyle-Manicure

     I started out with an Argyle manicure using Just Peachy, Snake Charmer, and Gold Dust. This was actually a lot harder to do than I thought. An Argyle manicure has been on my to-do list for a few months and I was determined to get it right. It took me 3 different attempts to get the triangles looking decent, but in the end, it was worth it.

     I tried freehand painting them and that was a disaster. I used stripping tape, but the lines ended up being off. In the end, I used scotch tape and some creative placement to get the look I wanted. I did end up free handing the gold and that worked out much better than the triangles. After taking the pictures I didn't want to take this one off.

Half-moon-manicure-in-red-and-gold

      The next look I tried was a half-moon using Shirley Temple and Gold Dust. I thought this would be a more classic holiday look that would appeal to a wider audience. Specifically, people who aren't into wearing wild or intricate nail art. Oh and get this, that's one coat of Shirley temple on my nails. I couldn't believe I found a one coat red! 

     I actually freehanded this entire look and think it turned out pretty good. Especially considering I did the half-moon part with a dotting tool. In hindsight, I probably should have used some guides to get a more rounded look. But hey this is nail art looks for beginners so perfection was not required right?

New-years-eve-nail-art

     For this look, I had New Year's Eve in mind when I created it. Something a little more sophisticated and some bling. Using Snake Charmer and Gold Dust I recreated a look I did earlier this year with Mentality Tempest, this time with a twist. I chose a different finger to use as the accent and made that the plain nail keeping the focus on the negative space stripes.

     This is a really easy look to do, but it does require some patience. Something I usually don't have when it comes to nail art. But I knew if I wanted my stripes to work I had to wait for each layer to dry. It took a lot of sitting still and catching up on a few TV shows but I found my patience, and my stripes are good.  Ahh, the things we do for nail art, it's a tough job but somebody has to do it.

Holiday-Manicure-ideas

    For my final look, I wanted to go a bit more playful. Originally I wanted to do plaid nails. Something with a warm and comfy feeling to it for the cold winter days but this looks a bit more like presents to me. I used Just Peachy, Shirley Temple, and Gold Dust to create this look. And I'm proud to say that I freehand painted those stripes and they look pretty darn good.

     This was a fun little challenge for me. Coming up with holiday nail looks using only these colors, making it something I could be proud of and, something others could replicate without a lot of experience. It really made me focus on my techniques and helped tune a few nail art skills. I hope you enjoyed these looks, Id love to know which one was your favorite. If you'd like to purchase a kit for yourself or a gift they are available at PrettyWomanUSA.com.  The kits cost $7.99 and you have the option to have them gift wrapped. Thanks for stopping by and Happy Polishing!


Friday, October 10, 2014

6:00 AM

My First Chevron Manicure featuring the KBShimmer 6th Anniversary trio

  
     After doing reviews all week I decided to mix things up a bit today and share a little nail art with you.  I've loved the look of chevron manicures since the first one graced my computer screen, but they were a little daunting at the same time.
  
      Just thinking about making all those even, straight lines were enough to send me into a semi-panic. I know we all start at the beginning with nail art, and I've even posted a few of my failed manicures on my blog. But I also want to show you good nail art and I have some serious self-doubt when it comes to my own skills.  Thankfully there are decals that make this look a whole lot easier.


     For my first attempt at chevrons, I decided to start out slow doing only an accent nail. Even with this, I was a little worried. Even decals won't give you a flawless manicure.  First, you have to get them on straight and evenly spaced. I had visions of the decals not sticking properly and polish pooling underneath. Ugh, who knew a simple manicure could give someone so much stress. But I was determined to try this look, and I'm so glad that I did!

     For the accent nail, I used 2 layers of Hexy Bikini and then alternated Beach Please (pink) and Shore Thing (teal) on my other fingers and topped everything off with a generous coat of Pure Ice Girl on the Run top coat.  Once everything was completely dry I applied the chevron decals that came along with the trio and added another 2 coats of Shore Thing. I waited about 10 seconds and then removed the decals. Another generous layer of Girl on the Run and Viola my manicure was done.


    All that panic and stress was for nothing. This was easy peasy and I love the finished results. And about that vision of polish pooling under the decals...pfft nothing to worry about. Just make sure you push down the decals really well along the sides of your nails.  Thanks for stopping by and Happy Polishing!


Wednesday, July 16, 2014

6:00 AM

Nail Art-Tape Manicure

  
     Today I'd like to share with you some nail art I recently wore. It's nothing fancy and was actually really easy to do, but I ended up loving it and got quite a few comments about it.

Nail-art-Tape-Manicure
  
     I started out with a base of JulieG Rio De Janeiro from the Cruise Collection 2014. A deep berry pink creme polish that has found a home in my top 10 favorite polishes this year. Then I did an accent nail of Finger Paints Crystalline Crush from the Shredded Chromes Collection. I was lucky enough to win 3 polishes from this collection from Finger Paints and have been impressed with them so far.

JulieG-Rio-De-Janeiro

     I decided that just having the accent nail wasn't quite enough. I taped off my thumb and middle fingers an added a stripe of Crystalline Crush to each one. I liked it but something was missing.

Finger-paints-Crystalline-Crush

     The addition of the dots was just what this manicure needed. It added a little something without being too flashy and I was in love. I had to use 2 coats of top coat for this manicure to get a smooth finish, Crystalline Crush was a bit rough when dry.


Nail-Art-Tape-Manicure

     And here's the full manicure. I normally only do one accent nail, but I think I like this crossover between a skittles manicure and a double accent nail manicure. What do you think? Thanks for stopping by and Happy Polishing!


Wednesday, June 4, 2014

6:00 AM

Mentality - Tempest


     Today I have for you Tempest from Mentality. Tempest is from the Ombre Mattes Collection and is a blackened dark red with red shimmer. I was lucky enough to snag this beauty from a blog sale. The application process was smooth. I didn't experience any dragging like I have with other matte polishes. However, as you will notice the shimmer is hard to see once the polish dries. All pictures shown are 2 coats.

Mentality-Tempest-Matte
     
     I love the look of Tempest matte but wanted to see if I could get some more of the shimmer to show with top coat.

Mentality-Tempest

     You can start to get a glimpse of the depth that Mentality has with the addition of topcoat. Here's a Macro shot for a closer look.

Mentality-Tempest

     And now to share with you the reason for those 2 stripes on my ring finger. I decided to do some negative space nail art inspired by LacquerStyle. You can see her manicure here. This is my version.


Mentality-Tempest
     
     I used Essie Shine of the Times for my flakey strip and then topped everything off with a matte top coat. I really like how this turned out. It felt elegant and fun at the same time.

     I have a few more Mentality polishes on my wishlist but would love to hear some of your favorites or must haves. Thanks for stopping by and Happy Polishing!


Friday, March 14, 2014

6:00 AM

The Get Lucky Nail Art Challenge: Day 1 Shades of Green


     It's time for another nail are challenge hosted by Jessica of Be Happy and Buy Polish. Just in time for St. Patrick's Day, this is another one of those laid back challenges where you can hop in and out as your schedule permits. Once again I am hoping to participate on each day. If you'd like to join in on the fun but want to know more about it just check out the facebook group. 

     To be honest I had no idea what I wanted to do for the first day. I had so many partial ideas floating around in my head, but not one of them seemed to spark any excitement in me. Then while browsing Pinterest I came across an image and I knew that was going to be my inspiration.  The design was simple so I knew I could pull it off, yet it made an impact on me. I don't know about you but I love it when a manicure has those qualities.

    I started out with a coat of Finger Paints Paper Mache and then did a gradient with Paper Mache and Sinful Colors Exotic Green. I really liked how this turned out and was tempted to stop there, but I knew that I wanted more. After all aren't challenges supposed to take you a little out of your comfort zone and push you to do designs you wouldn't normally do?

Lustrous-Lacquer-Green-white-gradient

     After my gradient was dry I applied painters tape diagonally on my nails and used 2 coats of Sinful Colors Last Chance. I wasn't thrilled with the results. Last Chance was too dark compared with the rest of the manicure. So I freehanded 2 coats of Exotic Green over Last Chance and that seemed to pull it all together.

Lustrous-Lacquer-Green-white-manicure

     Please ignore my pinkie nail as I smudged it right before taking the picture and didn't have time to do that nail over again. All in all, I'm pleased with how this turned out. Now let's see what the other participants came up with for the first day of this challenge.


Wednesday, October 23, 2013

8:07 AM

Rimmel- Apple Berry Smoothie


     Well hello, again my lacquer loving friends. Today I have for you a manicure I did using Rimmel Apple Berry Smoothie from their Cocktail Colors collection. Unfortunately, I picked this color up on clearance and the collection has been discontinued.

   Apple Berry Smoothie is an aqua blue polish with blue and purple shimmer. The application took a little getting used to. I found out that less is more for smooth even coverage. And you don't want to "play around" when applying your first coat. Just let it be thin and streaky, trust me you won't be able to tell when you're all done.

Rimmel Apple Berry Smoothie, blue shimmer

     This is 3 thin coats plus top coat. I can now see a slight bald spot on my pinkie that wasn't noticeable to the naked eye. And trust me I was looking at my nails all day today at work trying to decide what I wanted to add to this manicure. 

      
     From this angle, the light was able to bring out more character in the polish and shows traces of the purple shimmer. I really wish it would have been nice out today so I could capture this polish in the sunlight. But winter is on it's way to Minnesota and my days of photographing polish outside are limited until next spring.

      So what did I decide to do with this manicure after thinking about it for 8 hrs today? I went with a quick and easy tape manicure.


     For the white, I used Milani White on the Spot and simply laid my tape at an angle to make the triangles. Originally I was going to use another blue for this but couldn't find just the right shade. That turned out to be a good thing because I'm really digging the high contrast here. Next time I won't be so heavy handed with the white though as it ended up a little thick. Oh well live, learn, and have plenty of acetone on hand right? :)

     I hope you enjoyed this post and thanks for stopping by. Happy Polishing!

Sunday, September 15, 2013

5:06 PM

A little Nail Art- A Vintage Rose Manicure


    Hello, my fellow lacquer lovers. Today I have some nail art for you that I have been wanting to try for a very long time. I finally attempted a vintage rose manicure. This one intimidated me a little bit but, I finally decided to just go for it. Besides, if I really screwed up there's always acetone, right?

     I started with a base coat of Revlon's Enamor. A vibrant shade of pink. I would say it's slightly darker than a bubblegum pink but not by much. The following picture is two coats of Enamor plus top coat.

Revlon Enamor

     Turning to my striping tape I added a coat of Revlon's Provence and one nail of China Glaze's For Audrey. The roses I made out of Revlon's Vintage Rose, Enamor, and my white striping polish. How appropriate is that name, Vintage Rose! I knew when I picked it up on Friday that I had to use it with this mani.

Vintage Rose Manicure, Nail Art, Striping tape


     Ironically my right hand turned out better than my left, and I'm right-handed. I wasn't able to get a good picture of it, but I was able to get a close up of my right thumb. It's actually the nail I'm most proud of and had to share it with you. 

Vintage Rose, Nail art, manicure


     While I still need some practice with my free hand nail art I like how this turned out. It has encouraged me to try doing more manicures like this.

     I hope you enjoyed this post and as always I love hearing your feedback. Happy Polishing!

Like what you see? Share it with your friends!