Showing posts with label Half-moon. Show all posts

Wednesday, June 17, 2015

6:00 AM

Vertical Rainbow Gradient


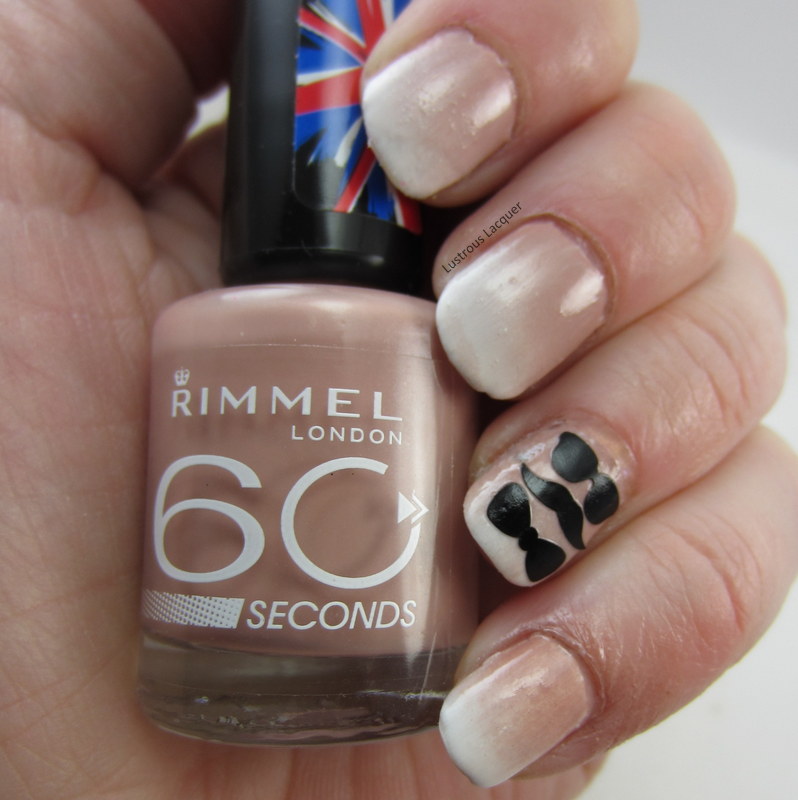
     As some of you may know I have been on a year-long no buy. And for the most part, I have been successful, 6 months without buying a single nail polish, nail art item, or stamping plate. I was feeling pretty darn good and was sure I would be able to last the year. That was until I saw the School's Out for Summer collection from Above the Curve. 

 Pool Parties & Barbecues, Scary Stories by the Fire, Are We There Yet?, Summer Camp Blues and Stop That (ice cream) Truck!
     Once I started to see photos of these I knew my resolve was lost. And before I even bought them I had this manicure in mind.


     The original idea was for this to be done just on the tips but as you may have noticed my pointer finger had a minor break. So I improvised and did a sort of half moon instead. 

     I used french tip guides to mark off my nails and added a layer of Finger Paints Paper Mache as undies and a layer of top coat. Even though I knew better I left the guides in place while I did the gradient. I knew I would never get a new set lined up correctly and wanted to avoid that thin white line that I ended up with anyway. Some of the polish came up with the guides when I removed them causing that issue. I tried to fix it with clean up but it wasn't going so well so I left it. 


     As much as that line bothers me I don't think it ruined the manicure.  And I'm not really sure how to avoid it in the future. Maybe if I try using the Crystalline Nail Veil since it has such a fine brush. What would you do to avoid this? 


    These colors are so fun and bright. I almost feel like this manicure doesn't do them justice. I plan on doing a review of each color once I get back from vacation.  (Which I am actually on as you read this.) And if my nails survive, I've cut them down some but I fear it might not be enough. I will be completely unplugged for the next week while I'm camping in the Boundary Waters Canoe Area with my kids. My blog and page will be pretty darn quiet until next Wednesday. I wanted to give you all a heads up in case you noticed my silence or were looking for the next post. 

    Before I sign off for the week let me leave you with one last photo of this manicure. I had to get at least one sun shot to share. Or at least as close to a sun shot as I could get between rain storms. Thanks for stopping by and Happy Polishing!


Friday, April 17, 2015

6:00 AM

Half Moon with a French Tip Nail Art


     Today I'd like to share with you a simple nail art look that anyone can recreate no matter what your skill level is. Honestly the hardest part of this manicure is waiting for each layer to completely dry before moving on to the next step.  I don't know if this look has an official name but I like to call it a half moon with french tips. 


     There are 3 steps to creating this look. Each step can be done free hand or by using guides like I did.

     Step 1: Paint your base color. I started off with a coat of China Glaze Heaven to give the illusion of a bare nail but also have even coloring in the half moons.

     Step 2: Create your half moon.  I placed hole reinforcements over the lower portion of my nails and added a 2 coats of Zoya Aubrey. 

     Step 3: Add the French Tip. Like I mentioned above I used tip guides to ensure a nice, even, crisp line. For my gilded tips I chose Orly Luxe


     Top everything off with a good top coat and you're good to go. Nice and simple right! There are a few tricks to getting everything just right though. This manicure took me twice as long as it usually does, simply because of dry time. I've ruined too many manicure by jumping the gun when it comes to applying tape or decals. The last thing you need is to be pulling up your base color when removing these items so just be patient. 

     Another tip is to apply the tape, decal, or guide to the back of your hand first to remove some of the stickiness and lessen the chance of smudges, smears, wrinkles, or complete removal of the polish beneath. All of which I have experienced and let me tell you it is a frustrating experience. I think it's even worse than bumping your nails while they are still wet and causing a little dent simply because that's typically an accident and rushing through a step is completely controllable. 

     So what are your thoughts on this look, is it one you would wear? What colors would you choose? Let me know in the comments. Thanks for stopping by and Happy Polishing!

Wednesday, December 10, 2014

6:00 AM

Holiday manicure ideas with the Pretty Woman Holiday Nail Kit


      As some of you might know on Monday I was given the opportunity to take over the Pretty Woman NYC twitter feed for their virtual holiday party. For 2 hours I shared some nail art, held a few giveaways, and talked about holiday trivia. It was kind of fun, but not very interactive. I think the time slot I had may have had something to do with that, though. (Middle of the day and just after lunch.)

    For the party I came up with 4 nail art looks using the 4 nail polishes that come in the Holiday Nail kit. I wanted to do designs that even a beginner could easily replicate, and I wanted them to have a holiday feel. Something you might wear for Christmas or New Years without being a traditional design.  These are the looks I came up with.

Argyle-Manicure

     I started out with an Argyle manicure using Just Peachy, Snake Charmer, and Gold Dust. This was actually a lot harder to do than I thought. An Argyle manicure has been on my to-do list for a few months and I was determined to get it right. It took me 3 different attempts to get the triangles looking decent, but in the end, it was worth it.

     I tried freehand painting them and that was a disaster. I used stripping tape, but the lines ended up being off. In the end, I used scotch tape and some creative placement to get the look I wanted. I did end up free handing the gold and that worked out much better than the triangles. After taking the pictures I didn't want to take this one off.

Half-moon-manicure-in-red-and-gold

      The next look I tried was a half-moon using Shirley Temple and Gold Dust. I thought this would be a more classic holiday look that would appeal to a wider audience. Specifically, people who aren't into wearing wild or intricate nail art. Oh and get this, that's one coat of Shirley temple on my nails. I couldn't believe I found a one coat red! 

     I actually freehanded this entire look and think it turned out pretty good. Especially considering I did the half-moon part with a dotting tool. In hindsight, I probably should have used some guides to get a more rounded look. But hey this is nail art looks for beginners so perfection was not required right?

New-years-eve-nail-art

     For this look, I had New Year's Eve in mind when I created it. Something a little more sophisticated and some bling. Using Snake Charmer and Gold Dust I recreated a look I did earlier this year with Mentality Tempest, this time with a twist. I chose a different finger to use as the accent and made that the plain nail keeping the focus on the negative space stripes.

     This is a really easy look to do, but it does require some patience. Something I usually don't have when it comes to nail art. But I knew if I wanted my stripes to work I had to wait for each layer to dry. It took a lot of sitting still and catching up on a few TV shows but I found my patience, and my stripes are good.  Ahh, the things we do for nail art, it's a tough job but somebody has to do it.

Holiday-Manicure-ideas

    For my final look, I wanted to go a bit more playful. Originally I wanted to do plaid nails. Something with a warm and comfy feeling to it for the cold winter days but this looks a bit more like presents to me. I used Just Peachy, Shirley Temple, and Gold Dust to create this look. And I'm proud to say that I freehand painted those stripes and they look pretty darn good.

     This was a fun little challenge for me. Coming up with holiday nail looks using only these colors, making it something I could be proud of and, something others could replicate without a lot of experience. It really made me focus on my techniques and helped tune a few nail art skills. I hope you enjoyed these looks, Id love to know which one was your favorite. If you'd like to purchase a kit for yourself or a gift they are available at PrettyWomanUSA.com.  The kits cost $7.99 and you have the option to have them gift wrapped. Thanks for stopping by and Happy Polishing!


Monday, December 1, 2014

6:30 AM

Loki's Nail Vinyls

     
     For my second post today I have the pleasure of reviewing a brand new nail vinyl company, Loki's Nail Vinyls. I'm sure you have heard of Lokis Lacquer around the nail art community. It's actually run by a girl named Tara and she has an amazing blog that I can get lost in for hours.  Well after getting many questions about nail vinyls over the last 12 months she has decided to start her own line. And guess what, her shop opens today with worldwide shipping!

    I decided to create 2 looks with the vinyls that I was sent to share with you today. The first one is a gradient so I could test out the nail aprons. I really wanted to do this one first because I have a feeling the nail aprons will be a big seller. They are available in 2 sizes and what makes them different is that they come in 2 pieces. That means you can get a better fit around your nail. No more gaps where you had to bend or crease the wrap to get a proper fit.


     Another great feature of the wraps is that they are reusable. I used the same set for my entire manicure.


     Because of the proper fit, you get hardly any clean up as you can see here by this poorly done gradient. Just a tip, don't try to do a gradient on a bare nail it's a PITA. I probably would have had even less clean up if I had added a base coat of white first. Then I wouldn't have tried using so much polish on the sponge to get coverage.

     For my finished look, I used these cute vinyls to create the silhouette of a man as an accent to my manicure. I used Sinful Colors Snow Me White and Rimmel Caramel Cupcake as my gradient colors.


     All nail vinyls are made from a plastic product and will melt over time when a solvent-based liquid is put over them. A quick dry top coat is best to apply when leaving them on like stickers. Tara recommends Seche Vite after testing out a few. I actually used Out the Door and had no issues after wearing the vinyls for 24 hours.

     For my next look, I used the French tip guides for a sideways half moon manicure with an art deco feel. The colors I used for this look are Orly Luxe, OPI 4 in the Morning and a white striper.


     The vinyls are quite sticky, if you use them as stencils I recommend sticking them to the back of your hand a few times to remove some of the tackiness. Otherwise, you run the risk of pulling off your base color when trying to remove them. Trust me on this one.  Also, I noticed these vinyls are thicker than others that I have used, making them better quality, and easier to reposition without damaging the shape.

     All of Loki's nail Vinyls are available at http://lokisnailvinyls.storenvy.com and come in your choice of color. (With the exception of the basic chevron and French tip) Eventually, there will be an option of a custom service for designs, but there is already a wide variety to choose from. I hope you like the designs I created. I'll have more in the next coming weeks to share with you. Thanks for stopping by and Happy Polishing!


Friday, May 24, 2013

1:12 PM

Bachelorette Movie Inspired Manicure


     Hello everyone. Finally, inspiration has struck and I feel slightly out of my polishing rut! I was watching the movie Bachelorette the other day and found myself staring at Lizzy Caplan's nails for most of the movie. If you haven't seen it don't worry you're not missing much. Its one of those movies that doesn't really have a point, but lets you tune the world out for little over an hour. It did have a handful of funny one-liners but that's about it. But this isn't a post about a movie review so I'll try to get back on topic.

    So what is this amazing manicure that had me mesmerized the entire movie you might ask? Why it was a simple half-moon manicure that made a big statement. At least in my humble opinion that is. Now I've kept away from the half moon mani in the past because I think it tends to make nails look shorter. But I knew I had to try it once I saw this one.


    Ok ok enough suspense, it's time to reveal the manicure that inspired me to not only polish my nails again but to try a technique I had sworn off. So, ladies and gentlemen, I give you.....


Image courtesy of google search
    I scoured the Internet for a good hour trying to find a really good image to use and this was the best one I could find. I just fell in love with how this manicure packs a big punch without being too busy. I also liked that it's a manicure that I could easily replicate.  Want to see my version?

    I put together a little picture tutorial showing the colors I used and the steps I took to create this look. First, you will want to gather your materials. For this manicure, I used Milani White on the Spot and Kleancolor Bite Me.

     After applying my base coat and letting it dry I added 2 coats of my base color and waited for it to dry completely. You want this polish completely dry so when you are ready to remove the reinforcement stickers they won't pull the polish up. This is the hardest part of nail art for me. I'm always in a hurry to move on to the next step.


     Once the polish is dry it's time to apply the stickers. I used basic hole reinforcement stickers I picked up in the office supply section at Target. You want to make sure the edges of the sticker are firmly pressed down along your nail so polish won't leak under. Another tip is to make sure the stickers are centered on your nail. As you can see the one on my pointer finger is offset to the right a bit.


    After the stickers are secure and you have them placed where you want them it's time to apply your top color of choice. I did 2 coats for the best contrast. I didn't get a picture of this next step because I wanted to get the stickers off before the polish dried. My sincerest apologies on that. Remove the stickers, wait a minute, apply a top coat and enjoy your manicure.

    
     Not too bad for my first attempt at a half moon manicure. I learned a few things along the way so my next one will be even better. I'm not so sure I like the accent nail being opposite from the others yet, but it might grow on me. What are your thoughts? Anyone have any tips or tricks to share?


Thanks for taking the time to check out my blog. =)


Like what you see? Share it with your friends!