Showing posts with label Konad. Show all posts

Friday, December 16, 2016

6:00 AM

Frozen Snowflakes


     Well, the temperature has dropped to below zero here on quite a few occasions lately. It was -14 when I woke up yesterday morning. Which means winter is in full effect, my nails and skin are suffering from the extreme cold and Christmas is just around the corner. That means it's time to break out some seasonally inspired manicures! I thought with the severe cold and snow predicted to hit my area over the weekend it was only fitting to share with you the frozen snowflakes manicure I wore this week.

Frozen-manicure-stamped-snowflakes-glitter-nail-polish

     With there still being 10 days left until Christmas I wanted to steer away from the traditional colors, and go with something wintery instead. And I honestly thought this might be an original idea with the blue snowflakes stamped on a blue base but they are all over Pinterest right now. I'm not sure if I saw one and didn't completely remember it, or if I've finally been on trend with my manicure!


     I started with a base of Lollipop Posse Slipping out of time, a Catalina blue nail polish with holographic flakes. Then I mattified it because let's be honest I don't use my matte top coat as often as I should. And maybe because I thought the holographic flakes would look really cool that way.

     For my snowflakes, I pulled out every image plate I own with a snowflake image and went to town! Now I don't remember which plate had which image on it but if you see one you just need to know about let me know in the comments and I can look through my plates and let you know. I can tell you the ones that I used are UR Beautiful 16, Konad M59, Bundle Monster BM-319 and BM-323 and Winstonia Meery X'Mas. (Yes it's spelled meery that's not a type-o on my part)


          For stamping polishes, I used Snowed In and Blue-tiful from Hit the Bottle and really like how it turned out. The blue wasn't quite as easy to see as it looks here which was kind of a bummer at first but as the week went on I really liked the subtleness. Well, that's all I've got for you today. I hope you enjoy your weekend and for those of you in the colder climates, I hope you stay warm. Thanks for stopping by and Happy Polishing!


Monday, August 24, 2015

6:00 AM

Parallax Polish - The Brain Scan Collection Part 1 Linear Holos


     This week on the blog I will be sharing with you the upcoming Brain Scan Collection from Parallax Polish. This 7 color collection will be available for purchase in 3 finishes ( matte, scattered holo and soft linear holo) for a total of 21 polishes. Yes, you read that right 21 polishes! No I won't be showing you all 21, I'm not sure my fingers could handle that much acetone, but I do have a nice variety of the 7 colors. I've decided to break this review up into 3 posts with each post focusing on the 3 finishes available. First up is the Soft linear holos, and a little behinds the scenes info about this collection. 


     Now you'll notice in the above graphic that the finish does affect the color some as well as the price, so make note of that when it comes time to order. 

Parallax-Polish-Brain-Scan-Collection

     Nystagmus is a white polish that leans silver in the soft linear holo version. I thought of it as an icy silver when I first put it on. 


     The application was smooth and even with surprising opaqueness on the first coat. Shown here is 2 coats plus top coat.  


     The linear holo is subtle but you will get that coveted flash in certain lighting. Out of the 3 polishes, I'm showing you today Nystagmus had the strongest flash for me. I absolutely love this color and will be breaking it out at Christmas time for some festive manicures. 


Parallax-Polish-Brain-Scan-Collection

    Amygdala is a bright medium pink with soft linear holo. It appears that the color is pretty consistent throughout the 3 finishes but since I don't have all 3 to compare Id recommend looking up swatches before ordering. 


     The application was again smooth and even. While not quite as opaque on the first coat and Nystagmus it builds up nicely. Shown here is 2 coats plus top coat.


     The macro shot shows that while not very strong you still get a slight flash with Amygdlala. I might be a bit bias being a pink nail polish lover but I think this is a gorgeous color even without a strong flash. 

Parallax-Polish-Brain-Scan-Collection

     On-Off Cells is a highlighter yellow polish that leans green in the soft holo version. While it will look green in all of my photos there where moments when applying it that I was reminded of a yellow highlighter. 


     Again I was surprised by how opaque this was on the first coat. The application was smooth and even. I did experience some slight streaking when I used a thin coat on my pinky, but regular application would give you no trouble. Shown here is 2 coats plus top coat.


      Out of the 3 polishes, this one had the least amount of holographic flash. I was able to see it at times but could not capture it on film. I wasn't so sure I would like this color at first to be completely honest but I do. Its fun, bright, and looks good with nail art. 

     Speaking of nail art, I've got some to show you. Some of you may have seen a few sneak peeks floating around Instagram already but here are the details. 


     To dress up Amygdlala I used OPI DS Extravagance and Konad plate M70.  The accent nail on Nystagmus was done with Konad plate M51 and the OPI sheer tints. And finally, I added China Glaze Don't Make me Wine and Konad plate M60 to On-Off Cells with a rhinestone just because. 

     At the time I'm writing this there is no official release date for this collection but a little birdie told me an announcement would be made sometime on Monday, Aug 24th so I will keep you posted. IN the meantime I'd love to hear which one is your favorite of these 3. Make sure you stop back Wednesday where I will be showing you the scattered holo colors and don't forget to check out Parallax Polish for updates. 


     If you'd like to see other colors available for purchase check out my previous reviews of The Women in Science Collection, Krypton, Marshall, Big Bang, and The SeCience Collection. Thanks for stopping by and Happy Polishing!

***UPDATE***
     I've just been informed that this collection will be available for purchase on Saturday, August 29th.


Monday, July 13, 2015

6:00 AM

Carpe Noctem - Cinna-Mocha


     It's Monday again! How the heck did that happen? I swear it was just Friday! Well, the weekend is over and I hope everyone had a good one. I spent most of mine taking care of a sick child. Thankfully he is on the mend and I'm back to reality. Which means back to work for the first time since early June. One of the perks of working for a school is having most of the summer off, the downfall is not getting paid 2 months out of the year. (ouch!)  But I am looking forward to getting back to work almost as much as I was looking forward to wearing Cinna-Mocha from Carpe Noctem Cosmetics. Which is unfortunately discontinued. 

     I have been seeing so many swatches of this great cocoa, chocolate brown polishes lately,  drooling over them, and cursing my lack of a paycheck along with my no buy and then I remembered I had Cinna-Mocha in my collection. A gorgeous milk chocolate brown with subtle shimmer. 

2 coats no top coat

     Application on the first coat was a little sheer, but even and full opacity was reached after 2. Like most shimmer finish polishes, Cinna-Mocha suffers from brush strokes. Although they aren't quite as obvious as my camera would lead you to believe. 

2 coats no top coat

    A nice layer of top coat makes most of the brush strokes disappear. It's not a 100% fix, but enough so that I wasn't as bothered by them. 

2 coats plus top coat

     I really like the color of this polish and I can see myself wearing it again in the fall, it seems to have a cozy feel to it and had me in the mood for my favorite sweater, a good book, a glass of wine, and a fire. But it is only July and I'm not quite ready for all of that yet so I decided to spice things up and try multi-colored stamping for the first time. 


     Using Sinful Colors Snow me White and Skylark I created this look with Konad plate M70.  I originally wanted to use a bold pink and a white because I love the combination of brown, pink and white together but I couldn't find a pink that would show up nicely against Cinna-Mocha. This look is more subtle but I really liked it. 


     After looking at my nails for a while I realized that if I switched up the colors this image would totally work for a camouflage manicure. Which might come in handy for a nail art challenge down the road, who knows.  Either way, I'm really happy with how this manicure came out, and that I was able to satisfy my obsession with chocolate colored polishes without having to dig in my couch for spare change. How do you feel about brown nail polish?  Thanks for stopping by and Happy Polishing!


Wednesday, June 10, 2015

6:00 AM

Silver Nail Polish Stamping Comparison


     Happy Humpday everyone! How's your week going so far? My kids keep telling me that they have run out of things to do and are constantly bored. I guess we are in for a long summer. While I brainstorm ideas to keep them entertained why don't you take a look at today's blog post. I've compared 4 popular silver nail polishes to see how well they work for stamping. The polishes I tested are Sally Hansen Silver Sweep (Insta-dry line), Zoya Trixie, Essie No Place Like Chrome, and Sally Hansen Celeb City (X-treme wear line). Just how well do these silver polish staples work for stamping? Let's take a look.


     Using L'Oreal After Hours as my base I set to work, choosing an image that had some larger spaces as well as some intricate designs from Konad plate M51.  As you can see all 4 polishes worked very well, but they have 2 different finishes. No Place Like Chrome and Silver Sweep have more of a chrome look to them, while Celeb City and Trixie have a shimmery finish. For this particular image, I like the delicate sparkly look of Trixie and Celeb City. But there is something to be said about the bolder look of No Place Like Chrome and Silver Sweep.


     While working on this post I think I may have found 2 sets of dupes, but I will get more into that in another post. So make sure you come back! 

     Id say depending on the look you're going for its users choice as far as which one to reach for. Generally, the Sally Hansen polishes are a bit more budget-friendly, and easier to get your hands on. But those seem to be the only real differences when it comes to these 3 brands.  I hope you enjoyed this post and found it helpful. Thanks for stopping by and Happy Polishing!


Monday, March 16, 2015

10:14 AM

White Nail Polish Stamping Comparison


     I hope everyone had a great weekend. The weather was so nice here that some friends and I got together for a BBQ and outside games. I might have even gotten a slight tan! I love the warmer weather and everything that it brings. For today's post I'm doing a comparison of white nail polishes and how well they stamp. You might remember my previous post about black nail polishes or you might not it was quite a few months ago. I sort of got sidetracked when it came to making this a series. oops! 

     For this comparison I used Konad stamping white, Sinful Colors Snow me White, Milani White on the Spot and Finger Paints Paper Mache and image plate SH213 from Shandy. Just like last time I wanted a design that had a lot of detail to it to really see just how well the polishes would work.  Let's take a look at my results. For this test I used Sally Girl Curfew as my base color. 


     As you can see there are a few patchy spot in the Konad design. This is due mainly to user error. I scraped a little too hard and removed a lot of polish. I didn't notice it until after the image was already on my nail.  Not the most accurate for testing I know but I think you can still get a good idea of how it works so I decided to not re-do it. 

     All 4 polishes stamp well but they have different opacity to them. Surprisingly the Milani has the most opaque image even though it was the thinnest when applying it on the stamp. Sinful colors did the next best job as far as a crisp clear image goes.  The Konad and Finger Paints seem to be equal in opacity.

    
   Over all based off of this experience Id have to say that Milani White on the Spot is the best nail polish for stamping out of these 4. Even beating out the stamping specific polish from Konad. Impressive considering it's also the oldest of the 4. I've had this bottle for almost 3 years now. What so you think of these results? Are you surprised at which one's stamped the best?  Do you have a favorite white polish to stamp with? Thanks for stopping by and Happy Polishing! 

Wednesday, December 3, 2014

6:00 AM

The 12 Days of Christmas Nail Art Challenge Day 2 : Christmas Trees

     
     It's the Second day of the Christmas Nail Art Challenge and today's theme is Christmas trees. I had a heck of a time trying to come up with an idea for today's theme.  I wanted to go for something different again and attempted a few different ideas. But fancy nail art was just not in the cards for me today. After 4 failed manicures I finally settled on a French twist with stamping.


     I'm actually pretty proud of how this turned out considering how frustrated I was when I started it. And for some reason, I can freehand a French tip in my sleep, but I can't paint lines to make a tree to save my life. Funny how that works.

     Enough of my nail art skill ponderings, back to the manicure. I started off with a layer of Simply Smooth. I wanted even color for the "nude" part of the nail along with a smooth surface to work with. The French tips are Ho Ho Holly from Color Club and a sparkly red striping polish I picked up at Sally's. I stamped with Finger Paints Paper Mache and Konad plate M12. Add in some gold accents with Orly Luxe and viola my manicure is completed!


     I wish the Merry Christmas was a little easier to read, but I still think it looks cute. Festive but not over the top  I guess. The next prompt is snowmen and I hope I don't have as many issues coming up with a manicure for that one. While I'm off thinking up ideas why don't you check out the other manicures in the challenge.  Or check out what I did for last years Christmas Tree prompt. Thanks for stopping by and Happy Polishing!


Monday, August 4, 2014

6:00 AM

KB Shimmer - Rollin' With the Chromies

   
     Ugh, It's Monday. Who here wasn't ready to go back to work? I'm hoping today's post will help take some of the edges off of those Monday Blues. Why? Because it's the gorgeous multi-chrome, linear holo also known as KB Shimmer's Rolling with the Chromies.
    
Mulit-Chrome-Linear-Holographic-Nail-Polish

     Rollin' with the Chromies is a breeze to apply. You get perfect control as the polish flows off the brush. Shown here is 3 coats alone, but you can easily layer 1 coat over black. The color shift is amazing. Shifting from Cyan to blue, reddish-orange to burgundy, purple and more. 

mulit-chrome-linear-holographic-nail-polish

     Wouldn't this be a great color to use as a base in a galaxy manicure! Half the work is already done for you.  Sadly I wasn't able to get any pictures outside to really capture the linear holo side for you. Mother Nature can be bloggers enemy at times.  But I did do a little stamping that I can share with you!


multi-chrome-linear-holographic-nail-polish-with-stamping

     I used Konad plate m51 and Finger Paints Paper Mache for this accent nail. I like how the white creates a stark contrast.

     Now I know what you're thinking... This looks an awful lot like another polish I shared with you last week. Guess what, you're right! Look for that comparison post later this week. Until then, I'd love to know what you think about Rollin' With the Chromies. Thanks for stopping by and Happy Polishing!

Friday, August 1, 2014

6:00 AM

Black Nail Polish stamping comparison

     Welcome to Friday! What do you think of the new look to my blog? It's so much brighter now. I wanted to make sure you noticed it. Anyway on to today's post.

     Most of us love the look of a stamped manicure. But when you're first starting out it can be hard to do. I know one of the problems I had was finding a good polish to use.


     In this post, I've compared 4 black nail polishes to see which one works the best. I tried to use a variety of price points so that everyone could find one to fit their budget. The polishes I used in order from pointer to pinky are Konad Stamping Black, Finger Paints Black Expressionism, Pure Ice Black Rage and Zoya Black Swan.


      I started out with a base of Finger Paints Paper Mache. The plate I used is Lilly Anna 08 from Messy Mansions.   (For a full review of this plate just click on the link)

      
     The results were slightly surprising. I expected the Konad Stamping black to perform the best. After all, it's sole purpose is to be used for stamping. Zoya Black Swan gave the cleanest image but was also the lightest. Finger Paints Black Expressionism is the darkest black, but as you can see it had some smearing. 

     All 4 polishes are opaque enough to stamp with so there are no winners or losers here. Out of all 4 though I'd say that Zoya Black swan is the one I'd go with for the sharpest image possible. Which one would you choose?

     On a side note while putting this post together I discovered that I don't own a black polish from China Glaze, or Sinful Colors. Which are the two brands I own the most polish from.   I'm still trying to decide if I need to remedy this, or if I've got enough black polishes in my collection.

      If you'd like to see another color group compared like this just let me know in the comments. Thanks for stopping by and Happy Polishing!


Monday, July 21, 2014

6:00 AM

Ellagee- Stained Glass Collection Part 2

      Today I have for you the second part of the Ellagee Stained Glass collection. Don't worry if you missed Part 1 you can catch up here. For this post I have Milk Glass, Ruby Glass and Cobalt Glass to share with you.

     First up is Milk Glass. A very shiny slightly creamy transparent polish that is perfectly named.

Ellagee-Stained-Glass-Collection-Milk-Glass

     The application was smooth and easy with the polish flowing nicely off the brush. Shown here with 3 coats alone it really does look like I dipped my fingers in milk.


Ellagee-Stained-Glass-Collection-Milk-Glass
   
     Just look at how soft and squishy it looks on the nail. Of course, I had to do some stamping between layers again.

Ellagee-Stained-Glass-Stamping-Milk-Glass

     I stamped with Red Angel plate RA-116 and Sally Hansen Color Foil Rose Copper. I really like the way this turned out but I think the image was a little too big for this to look right. Shown here is 4 coats of Milk Glass

     Next I have Ruby Glass. A shiny transparent hot pink jelly polish. Don't let the hot pink part scare you away though. After 2 coats Ruby glass started to deepen to a nice rich berry color.

Ellagee-Stained-Glass-Collection-Ruby-Glass
   
     The application was again smooth and easy. Here I have Ruby Glass shown with 2 coats alone.

Ellagee-Stained-Glass-Collection-Ruby-Glass

     As you can see after 2 coats there is barely a visible nail line. Out of the 3 polishes in this post, Ruby Glass had the highest opacity level with the least amount of coats.


Ellagee-Stained-Glass-Stamping-Ruby-Glass


     For the stamping here I used Knoad stamping white and Red Angel plate RA-111. This image fit nicer on my nail than the first. I have a feeling that if Id placed them a little closer together it would look like a shadow. Shown here is 3 coats of Ruby Glass.

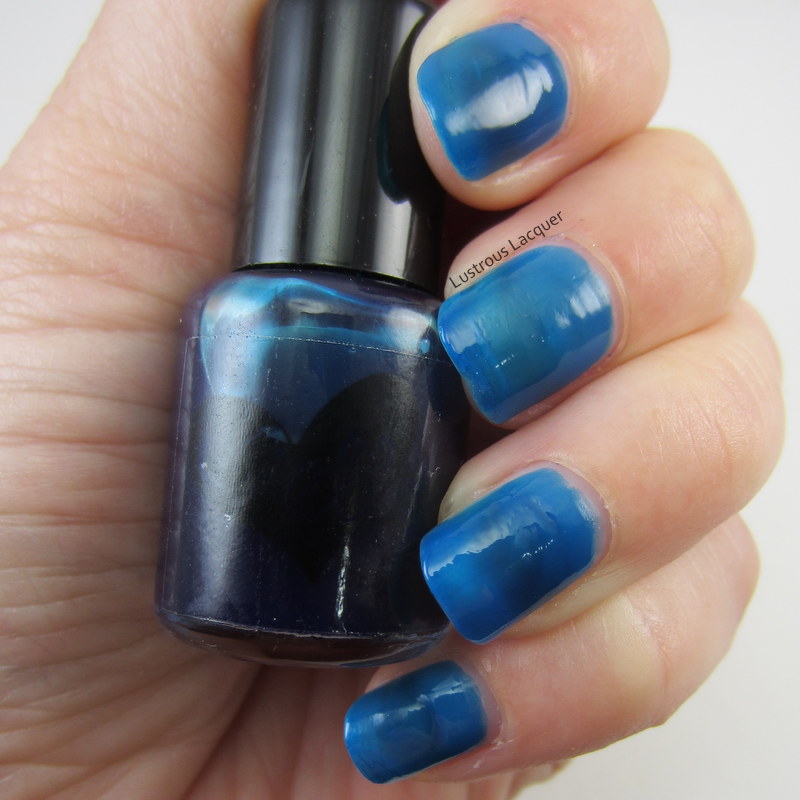
     And last but not least we have my favorite of these three. Cobalt Glass is a shiny transparent blue that darkens with each coat.

Ellagee-Stained-Glass-Collection-Cobalt-Blue

     Just look at that beautiful blue color. It reminds me of the ocean! Shown here with 3 coats again I had a perfect application.

Ellagee-Stained-Glass-Collection-Cobalt-Glass


     So pretty. I'm glad I waited to swatch this one last because then I could continue to wear it. And it looks even better with some stamping set between layers.

ellagee-Stained-Glass-Stamping-Cobalt-Glass
 
     Again I used Knoad stamping white but this plate is Red Angel plate RA-109. Shown here is 4 coats of Cobalt Glass without top coat.

     So there you have it 3 more polishes from the Stained Glass collection by Ellagee. There are still a few more polishes in this collection and I look forward to sharing those with you a little further down the road. Thanks for stopping by and Happy Polishing!


Wednesday, June 25, 2014

6:00 AM

Leadlight Manicure

  
     Today I'm sharing with you a manicure I wore to a wedding last weekend. No not the wedding of my good friend Alissa who you might remember from my recent gradient post, but another friend who got married. I knew I wanted to do a fun, special manicure that went with my dress.

My inspiration
     I knew I had to do something special for this night. The girls that I was going with take a very active interest in my manicures and I wanted to impress them. Well the most impressive nail art technique currently for me is the leadlight technique.
     For those of you unfamiliar with leadlight it's really quite simple. It's just like coloring pictures in a coloring book but with a stamped image and sheer nail polish.

leadlight-manicure
   
     I started off with a base of Finger Paints Paper Mache, then stamped with Konad special black using Bundle Monster plate BM-318. The flowers reminded me of the flowers on my dress without matching them exactly. I then took my smallest dotting tool and filled in the centers of the flowers with OPI I'm Never Amberrassed from the sheer tints collection.

leadlight-manicure

     While my stamping still isn't perfect I really love how this turned out. And what did the girls think? Well, they were impressed, which made me feel really, really good. I don't tend to do a lot of nail art so when it comes together, I'm overly giddy about it and want people to notice it.

     I got especially giddy about this manicure. It turned out just like I wanted it to and I matched the dress pretty darn well if I don't say so myself.  What do you think?


     I hope you give the leadlight technique a try. I think it's an easy way to get a great outcome. If you do try it out, please share your manicures with me either on my facebook page or in the comments here. Thanks for stopping by and Happy Polishing!


Friday, January 31, 2014

6:00 AM

Ellagee- Stained Glass Collection Part 1


    Happy Friday everyone. Today I have the pleasure of reviewing 3 polishes from Ellagee's Stained Glass Collection. I was able to purchase these polishes at a discounted rate in exchange for my honest opinion. And I have to tell you I am in love. I plan on picking up the rest of the collection at a later date and will review those as well. hence the "part 1" portion of the blog title. Since I don't own the other polishes yet parts 2  and 3 will be at a much later date. =( Warning, this post is going to be pretty picture heavy.

Ellagee-Manganese-Glass-Sulphur-Glass-Obsidian-Glass-Stained-Glass-Collection

     Application of all 3 polishes was the same throughout the group so I'll talk about that at the end. Now let's get to the polish!

     First up I have Sulphur Glass. An orange jelly polish that builds in opacity with each coat. While being super shiny this polish is never meant to reach full opacity on its own.

Ellagee-Sulphur-Glass


     Show here is 3 coats if Sulphur Glass without top coat. Just look at that shine! Now I'm not usually an orange polish person but I picked this one up because I saw a ton of possibilities with it. I'm very glad that I did, it looks so soft and squishy on my nails. The Picture on Etsy showed a stamped image between layers. I thought it looked so cool that I had to do my own version.

Ellagee-Sulphur-Glass-With-Stamping

     I used my Konad polishes in Black and White with Bundle Monster plate BM01 for this look.The black polish actually looked brighter and more define layered between the polish. The white had the opposite effect. I'm not sure which look I like better. This is 4 coats of Sulphur Glass for the finished mani without top coat.

    Next up is Obsidian Glass. A Super shiny transparent black jelly. Obsidian glass also deepens in color as it's layered and with 3-4 coats, full opacity *should* be reached. I say should because I only used 3 thin coats total in my manicure and I still have slight VNL.

Ellagee-Obsidian-Glass

     Here I have 2 coats of Obsidian Glass without topcoat. Again we have an extremely shiny squishy polish.


Ellagee-Obsidian-Glass

     I knew the minute I saw this polish that I had to have it in my collection. There's just something about this black jelly that called to me. Maybe it was because it reminds me of the smoked glass table I had in my first apartment, or maybe it was because it's unlike any other polish I have come across. Whatever it was, I'm glad I followed my gut and snagged this one.

Ellagee-Obsidisn-Glass-with-stamping

     For the stamping with this one, I knew that black wouldn't show up. For fun, I compared Color Club's Cloud Nine and Konad White. I wanted to see what a holographic polish would look like sandwiched between jelly layers. The image is from Bundle Monster plate BM206. Cloud Nine gives a softer subtle stamped effect while the white still looks pretty cool. Can you tell I'm slightly hooked on the stamped sandwich! This look has a total of 3 layers of Obsidian Glass without topcoat.

     And last but not least we have my favorite of the 3, Manganese Glass. A transparent purple jelly. Like Sulphur Glass it's not meant to reach full opacity on its own.

Ellagee-Manganese-Glass

     When I first got my bottle I thought there might have been a mistake. It's so dark purple it almost looks black and I was slightly worried. As you can see I had absolutely nothing to worry about. Here I have 2 coats of Manganese Glass without topcoat.

Ellagee-Manganese-Glass

     Would you look at that shine! And that shade of purple! Dying I love it so much. It's not quite plum, but maybe a watered down version of plum. I know that description doesn't make it sound appealing, but I'm having a hard time describing it. Maybe a smokey purple haze? However you choose to describe it, it's stunning.

Ellagee-Manganese-Glass-with-stamping-stained-glass-collection

     Of course, I had to include another layered stamp. I used Bundle Monster plate BM14 with my Konad Black and White. Even though there isn't as much contrast in images with the black, I like it more than the white. It seems to blend in and stand out at the same time. The white still gives an amazing effect though. This final look is 3 coats of Manganese Glass without top coat.

     Now about that application.... it appears to be streaky at first and you might be tempted to go over your nail multiple times to even things out. Don't. These polishes are self-leveling, and they even out to a flawless, streak-free finish all on their own. Sulphur Glass was a little light for me after 2 coats and ended up needing a third for my personal taste while the other two reached the desired look after 2. All in all, I was extremely happy and as I stated earlier will be getting the rest of the collection.

     If you'd like to pick up your own bottle they can be purchased on Esty where a full sized bottle will run you $8.75. And don't forget to check out Ellagee on Facebook so you can keep up with new releases and all the fun polish news.

     Whew...that was a long post! Thanks for sticking with me till the end and as always, Happy Polishing!

*The products in this post were provided to me at a discounted rate in exchange for my honest review. All photos and opinions are my own and I am not affiliated with Ellagee Polish in any way*


Like what you see? Share it with your friends!