Showing posts with label Robin Moses Inspired. Show all posts

Tuesday, June 19, 2018

6:00 AM

Inspired by Robin Moses - 80's Funky French


     I've got another Robin Moses inspired look to share with you on the blog today. While this isn't my best work or something that I'm particularly proud of I think it's important to share it. It's important to me because I want to inspire others to try nail art, I want people to see that even though I've been at this for a few years now I still create manicures that aren't perfect and am always learning. I might be getting really good at stamping, or watermarbling but a technique that I consistently come up a bit short on is my freehand painting. And that's what you'll see in this 80's themed funky french manicure.


     Now normally I would use a polish that looked like my natural nail color as a base but this time around I skipped that step. Thankfully it worked out alright, it seems my base coat is doing a great job of keeping my nails stain free. For the "french tip" I used Sally Hansen Black Out in a diagonal pattern. While I'm a fan of the traditional French manicure I like to put my own twist on it from time to time. 


    The Not Really Neons Collection from Polish 'M came in handy for the lines. I used Harlequin (green) Royal (blue) Tangelo (orange) and Rosé (pink) I should have used Lemonade for the yellow but I wasn't sure it would show up so I went with an acrylic paint instead. I topped everything off with a glossy top coat. 


      I do like how this turned out, I need to work on my angles and painting straight lines. Which is what I meant earlier when I said my freehand skills come up just a bit short. But that doesn't stop me from trying, in fact, it makes me want to do more so that I can get better. 

     After looking at this mani for a bit in a glossy state I decided to see what it would look like matte. 


     I used the matte top coat from Pure Ice just to see how well it worked and I have to say I'm pleased with the results. 


     While I love my indie polishes, we all have a budget and mine is a bit tighter than most plus I like to be able to run out and get a product if I'm in a crunch, so I'm always on the lookout for less expensive alternatives from brick and mortar stores to use. My favorite matte topcoat is Matterial Girl from Blush Lacquer because it gives a true matte look instead of the semi-matte looks you can get from other top coats. The Pure Ice matte top coat also gives a true matte appearance.

     Which look do you like better the glossy or matte? Do you have a technique that you struggle with a bit? Let me know in the comments and as always Thanks for stopping by and Happy Polishing! 

Tuesday, December 12, 2017

6:00 AM

Christmas Ivy Nails


     Hello Everyone, how has December treated you so far? Are you done with your Christmas shopping or still on the hunt for that perfect gift? Perhaps you need a little push to get you into that Christmas spirit? If that's the case have I got the perfect manicure to share with you today! This Christmas Ivy manicure recently popped up in my news feed from Robin Moses and I knew right away that I wanted to try it.  

     I've been wanting to work on my free hand nail art skills for some time and this manicure looked simple enough that I felt it was a good way to practice. Of course, all the great nail artists out there make these manicures look so easy and effortless but to be honest this one was actually pretty easy to do. Now by no means is mine anywhere in the ballpark of being as good as the original but I'm very happy with how it turned out.I even have a new found enthusiasm to keep working on my free hand skills.


      I started out with Sally Hansen Satin from the Smooth and Perfect line. Typically I would use China Glaze Heaven as my naked nail color but I wanted to see if I had other option in my collection already. Turnes out Satin is the better option of the two and has become my go-to polish when I want this effect. 

     I hand painted my french tips with Sally Hansen Wild Strawberry from the Crayola collab earlier this year. I don't know why but I have always been able to do a decent freehand french tip. I wish I could take that skill and transfer it to other aspects of my nail art. Especially when it comes to brush control when hand painting designs. 


     For my Ivy, I used acrylic paint in various shades of copper and gold. I picked a true gold for the vine and a darker bronze for the leaves. Then I went in with a light gold to add some highlighting and try to add depth. Painting curving lines is a huge hurdle for me that I can't quite seem to get over but my hand painted leaves have improved. 


     The glitter on my tips is Fantasy Makers Once Upon a Time. I started off by just brushing it on but noticed that I was getting more of the blackened base than I wanted. To fix that I applied the polish to a sponge and that dabbed it on my nail. I like the sponged option much better, don't you?  I topped everything off with Darling Diva's Preformance Enhancing top coat to give it a super glossy finish.

     Anyone remember the very first mani I tried to recreate from Robin Moses? I had an awful time getting the angles right and things just looked off. I haven't mastered the angles yet but see improvement in those tiny little leaves. It's those little victories that I want to share with others, especially those just starting out with nail art, in hopes that it inspires them to not give up, or try something new.  It's the very reason I started this blog in the first place and I'm glad I'm getting back to that after losing my focus for awhile.

     I hope you enjoyed today's post and maybe were inspired to tackle a nail art technique or look you haven't quite mastered yet. Thanks for stopping by and Happy Polishing!


Wednesday, July 2, 2014

6:00 AM

Lightning Nials and a tutorial


     Today I have a Lightning Nails tutorial for you inspired by Robin Moses. To be honest, mine look more like stained glass than lightning to me though. I decided to give this look a try after watching this video. I thought it was a great way to use some of my pretty sheer polishes that get no love. This post is quite picture heavy but I hope you enjoy it.
  
     The products I used for this are, base and top coat, Finger Paints Black Expressionism, Sinful Colors Fire Fly, Sally Hansen Black, and Blue and Byte, OPI Totally Tangerine and a Gold Striping polish.


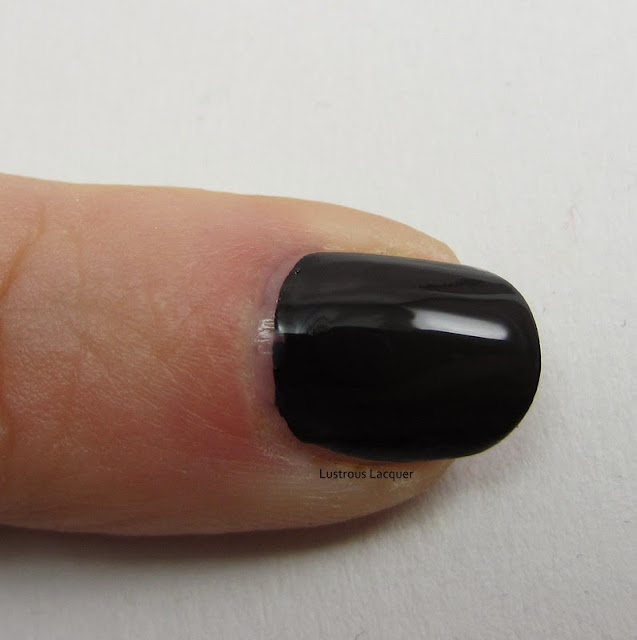
     Start off by applying your base coat, once that's dry apply your black polish over the entire nail and allow to dry.


Finger-Paints-Black-Rxpressionism-Lightning-Nails-Tutorial
     
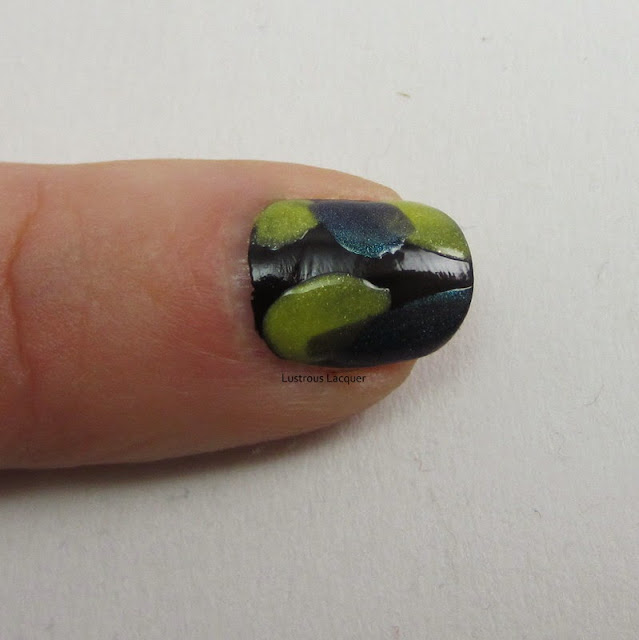
     With your yellow polish add 2-3 spots on the nail. I used Sinful Colors Fire Fly. You don't want to be very controlled with this. The more randomness you can get the better.

Lightning-Nails-Tutorial
   
      Next go in and add 2 spots with your blue polish. I used Sally Hansen Black and Blue from the Complete Salon Manicure series. Again you want this to be random, but also touching the edges of your yellow spots. This particular blue was very sheer so I ended up adding 2 layers to my spots.

Lightning-Nails-Tutorial
  
     Continue by adding in a few spots with your orange/copper color. I used OPI totally Tangerine which ended up having a golden tint to it when layered over the black.

Lightning-Nails-Tutorial
     
     Going in with your Pink polish, fill in any remaining black space on your nail. I used Sally Hansen Byte from the HD series of polishes. This is where I wished my nails were a little longer so I could have more room for the pink.

Lightning-Nails-Tutorial
 
      Lastly, you want to take your striping polish and go over the natural lines where the polishes meet. This is where having an unsteady hand can be your best friend. I found that the less "structured" the lines look the better this manicure looks. Also, you want your lines to be thin, mine got a little heavy-handed for my taste.

Lightning-Nails-Tutorial

     Wait a few minutes for everything to dry and finish off with your favorite top coat. I used a generous coat of Seche Vite.


     The best part about this manicure is how it sparkles in the light, and gives off a different look depending on the angle. Do you agree with me that mine look like a stained glass window rather than lightning?

     Here's a quick collage of each step in case you want to see everything together. If you attempt this look Id love for you to share it with me. Please post your pictures on my Face Book page.


Lightning-Nails-Tutorial

     So there you have it, an easy way to do some nail art with all those sheer polishes that you don't know what to do with. Id love to hear your thoughts on this look. Or any feedback you have about this tutorial. Id like to do more in the future and want them to be as helpful as possible. Thanks for stopping by and Happy Polishing!


Sunday, January 13, 2013

6:26 PM

My First Robin Moses inspired design

I know I'm not alone when I say I sit in awe of Robin Moses's work. I see pictures of her nail art and my jaw hits the floor and I think "how?" Well, I sat down the other day and actually watched one of her videos for the first time. It was the one for the Japanese Flower Vase.
The video can be found here if you'd like to check it out.
Well naturally she makes it look so easy I found myself thinking "well even I can do that."
So I set out to see if I really could. First I started with my base coat. So far so good, I can paint plain black onto a nail wheel.  I didn't take a picture of that I'm counting on your imagination for this part.


     Then came time to sponge the gold glitter onto the nail. Ok it's not exactly like Robins but I can work with it..This is good, Ive got the second step done and no major mistakes. Im still on track and this is going to be amazing when it's done!


 Next it was time to make my "stems". Ive mixed my green and white acrylic paint to just the right color. Hmmmm I swear I made the same strokes she did but mine look nothing like hers...not to worry I can still see this looking fabulous when done. Flowers don't grow in straight lines after all right.


      Onward to the leaves still feeling confident in my attempt. I added a bit more green for contrast and placed my leaves along the stems. Well, this isn't looking quite right but I'm on a roll now and just keep on going.


Now you'll have to forgive me here. I was on such a roll at this point that I forgot to take pictures of the next steps but that is where I started to go slightly wrong. Once again placement is my enemy and my finished product ended looking like the first feebled attempt that it is. But I know what I did wrong and how to fix it and that's what's important. I am no Robin Moses but I look forward to trying this design again and am thankful I was able to learn from my mistakes so that next time it can be even better. Are you ready for the finished product? Ladies and Gentleman, I give you.......


What do you think of my first Inspired by Robin Moses Attempt? Is this a design you would try?

Like what you see? Share it with your friends!