Showing posts with label advanced stamping. Show all posts

Thursday, March 29, 2018

6:00 AM

Lustrous Lacquer's Quarterly Favorites Round-up


     I've decided to try a new feature on my blog this year in the form of a round-up. Every three months I'll look back and share some of my favorites looks from those months. This way I will be able to really see how I've progressed as a nail artist and also see if I tend to lean more towards one technique or do a good job of mixing them up. I haven't decided yet if I'll just do nail art looks or incorporate swatches also. I'm kind of doing this on the fly and hoping for the best. So, what are my Favorite looks from January, February, and March? Let's take a look.


    January started off with some nail art featuring the Orly Darlings of Defiance Collection. While I created two looks for that post one really stuck out in my mind. The gradient I created using Penny Leather and Champagne Shushe.


     There was just something about this color combination that I really liked. This combination was also a bit out of my comfort zone and I'm proud of the fact that I'm starting to branch out a bit. Even if it is just a small amount. More photos of this look can be found in my Nail Art with Orly Darlings of Defiance post. 

     January also saw the start of the Untried A-Z Challenge, another new series for my blog this year that I hope you are all enjoying. I've mixed things up a bit with this challenge and have done some swatches, shown two polishes and shared a bit of nail art. My next favorite look is from the second week of the challenge, Letter B week


     This is some of the cleanest, crispest stamping I have ever done and that is the reason I've chosen this as one of my favorites. Not to mention I have a little obsession with geometric nail art right now. I've gotten away from sharing nail art in the latest posts of the Untried A-Z challenge but will be getting back into it as the challenge progresses. Speaking of the Challenge, next week starts letter G week and I'd love to see more people participate. This is a come and go kind of challenge where you can do as many or as few prompts as you like so feel free to join in. Even if you didn't mention the challenge in your post but used a polish with a G in the brand name or polish name add it to the link up! Help me get the word out and let's get through those untried polishes together. 

     February was a short month but I was still able to squeeze in a few different looks and some new techniques. I started out with a technique I'm very comfortable doing and ended with one I've been trying to master for years. This first look was my Groundhog Day prediction manicure which sadly turned out to be wrong and winter is still hanging on.


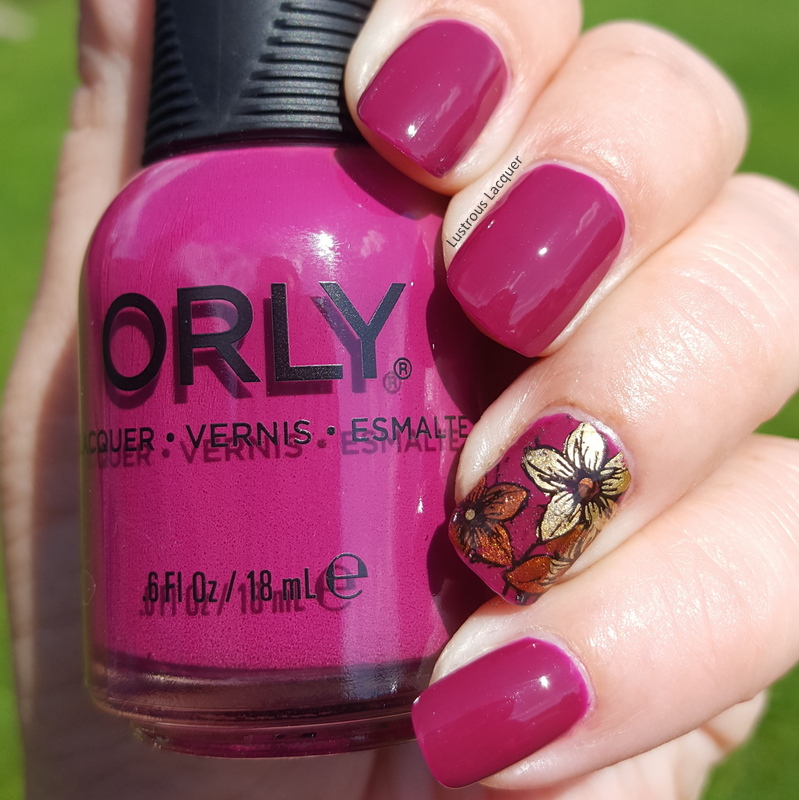
     I am full on head over heels in love with this look. I love the bold vampy base color, I love that it's got flowers, the contrast between the gold and berry wine is gorgeous and I want to wear this look again. Plus it was so easy to do using the advanced stamping technique. It is my absolute favorite look so far this year. 

    This next look while not quite as pretty as my floral image is one that I am very proud of. For years I've been admiring the needle drag manicures that pop up in my news feed, and have attempted the technique a handful of times with horrific results until now. 


     This was the first look I created for Valentine's Day and my first successful needle drag manicure. I know it's not much but for me finally getting this technique to work was huge! What was the secret to my success? You'll have to read the original post to find out, I'm not giving away all my secrets today. 

      I haven't attempted to do another needle drag yet this year but have a few ideas in mind, plus I'd like to do a full hand look instead of just the accent nail. And I think colors with a bit more contrast will give a more interesting look.

     The beginning of March brought a lot of green nail polishes to my blog for St. Patrick's Day and has ended with some softer shades and we ease into spring. I have to giggle at the "ease into Spring" part because as I'm writing this post they are predicting another 9 inches of snow to fall tonight. Hopefully, it will all be melted when this post goes live. *Fingers crossed*


     My first look from March is the drip marble I did for St. Patrick's day. I shared this look is both a glossy and matte version. While I like both looks the matte version won my heart and is my second most favorite look so far this year right behind the Ground Hog day floral. 

     Finishing up my quarterly favorites is the art deco look I shared last week. This was a blogger meet up manicure featuring the reverse stamping technique and my second geometric manicure this year. Did I mention I have a slight obsession with geometric manicures?


    This is the first manicure I can remember doing where I mixed two different techniques on one nail. The first being a smoosh manicure and the second a reverse stamped look. I really like the classy, elegant feel this accent nail has which is why it made it into my top 6 looks this year. mixing two techniques together is a great look and need to remember to do this more often. I know gradient and stamping are commonly mixed together but I have yet to do a manicure like that. Maybe I'll have one in my next quarterly favorites post? 

     I hope you enjoyed this look back at the first 3 months of blog posts.  I hope a few of you decide to join in on the Untired A-Z Challenge, full details can be found at the Facebook Event.  If you decided to recreate any of these looks please share them with me on my Facebook page or tag me on twitter. Thanks for stopping by and Happy Polishing. 

Which look is your favorite?

Friday, February 2, 2018

6:00 AM

Groundhogs Day Prediction 2018 - I'm hoping for spring!


     I'm posting outside of my regular schedule for a special reason today. The members of The Stamping Shop group on Facebook have gotten together for a fun little collab for Groundhogs day and I thought it was a fun idea. Everyone who participated did a manicure with what they thought Punxsutawney Phil’s prediction would be. If they thought he would predict 6 more weeks of winter you did a winter themed manicure, if you thought he would predict an early spring you did a spring themed manicure. I am desperately hoping for an early spring. I've got the urge to go camping already and am over the cold temps of my Minnesota winter. It's been a mild one for snow but the temps have been brutally cold. And I'm cheating a little bit because I did this manicure back in early November but didn't have an appropriate time to share it until now. Hence the lush green grass for my background and beautiful sunlight to capture the shimmer. Oh, spring....hurry up and get here, I miss you!


     For this manicure, I started with a base of Black Cherry from the Orly Velvet Dreams Collection. This deep rich color was the inspiration for my entire manicure and has started a slight obsession of polishes similar to this. You might remember I recently shared with you Con Artist from Nvr Enuff another polish in this color family. Plus I may have ordered a few more recently that will be on the blog soon.


      For my accent nail, I went with the advanced stamping technique using Hit the Bottle As Black as Night and a plate I ordered from Amazon called Flowers 01 by Meidus. Sadly this plate is currently out of stock with no date for when it will return.


     To fill in my flowers I used Maybelline Bold Gold and Milani Bijou Bronze. I just love this color combo! Sadly it was really humid in my house when I did this and it caused my top coat to bubble. I guess I learned my lesson about painting my nails when the dryer has been running all day. For clarification, my office now has to share space with my laundry room. We recently bought new machines, they are bigger than our previous set and no longer fit in the same space. Our solution was to flip the hookups to the other side of the wall and move them into my office. The result is no more swatch fests on laundry day. That's all I've got for you today, Thanks for stopping by and Happy Polishing!


Wednesday, September 28, 2016

6:00 AM

Leadlighting, Reverse and Advanced stamping. What are they and what's the difference?


     You hear a lot of terms in the nail art community. Cindy hand, glitter bomb, ruffian, smoosh manicure to name a few. If you're just starting out it can be a bit overwhelming. Heck even if you aren't a newbie some of these terms may still confuse you. For me, my biggest issue is remembering the difference between leadlighting and reverse stamping. And that got me thinking that maybe I'm not alone and a blog post might be helpful. So I sat down, did a bit of research, watched some youtube videos and asked questions. This  is what I found.


Leadlighting - is the technique of using transparent jellies, alcohol inks, or watercolors to color in open images stamped in a darker opaque polish. This can be done directly on the nail, onto a mat (Like making your own decal) or directly on the stamper head itself.  The effect is a stained glass look allowing you to "see through" to the base color. Below is an image of a leadlight manicure I created to wear to a wedding. 


     For this look, I opted to stamp directly onto my nails and then color in the flowers with a sheer yellow polish. (full details can be found in my Leadlight post

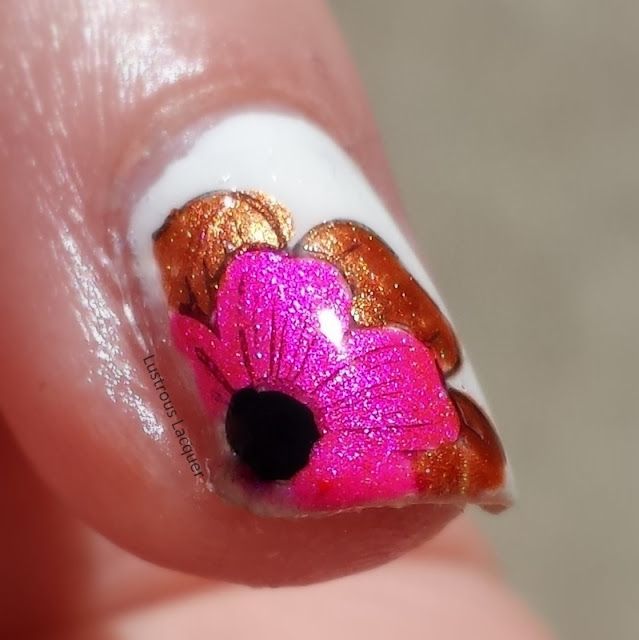
     Reverse Stamping- is a lot like leadlighting in the sense that you are stamping an image and filling in the open space. The big difference is that you are using opaque colors to fill in effectively covering up your base color. This technique can be done on a mat or a stamper and sealed with top coat. Once dry the image is peeled off, flipped over and placed on the nail. The easiest way for me to remember this is to think in terms of coloring in the opposite side of the image than what you will see in the finished manicure. I recently shared a reverse stamped look in my Queen of Hearts manicure. But my favorite reverse stamped look was a floral manicure I created for a Hobby Polish Bloggers link up. 


You can find all the details for the polishes, and image plate I used by following this link. Because you are filling in the back side of the image for this technique it can not be done directly on the nail. 

     Advanced Stamping - is a lot like reversed stamping but you do this one entirely on the stamper head. You start out by painting your nails the desired color, but do not apply top coat. Then stamp the image onto the stamper and color it in. Let the image dry for about 30 seconds. While the image is drying apply your top coat. Once your top coat is tacky to the touch,  firmly press your stamper onto the nail. 

     This is one technique that I have yet to try myself but I found a detailed blog post and a video for you to check out. Maybe it will help you decide if you want to try this technique out for yourself.

Blog Post: Advanced stamping by Didolines Nail & Co. There is a video linked within this post 

or check out the video

Video : Advanced stamping by Opal Hazlett I just love the butterfly she created. 

     I hope you found this post to be helpful and that I answered some of the questions you may have had. Have you tried any of these techniques? Which one is your favorite, or which one intimidates you? Let me know in the comments if there are any other terms or techniques you're unsure about and I'll do my best to answer your questions. Thanks for stopping by and Happy Polishing!


Like what you see? Share it with your friends!