Showing posts with label Water Marble. Show all posts

Thursday, April 5, 2018

6:00 AM

Watermarble manicure featuring Bee's Knees Lacquer


     Hey everyone, I've got a quick post to share with you today featuring a watermarble I did with a few polishes from Bee's Knees Lacquer. You might remember I recently reviewed Which Witch Trial? and I'll be using that polish again in today's look.  


       Last November my daughter was playing around making watermarble designs and I'd just received my order of Bee's Knees polishes. Yes, you read that right, I originally did this look in November and am just now getting around to sharing it. Anyway, after she was finished creating her designs I decided to see if my new polishes would work in a watermarble this is the results. 

     
     I used the Illuminating base coat from Sinful Colors as my base and Bee's Knees polishes in Which Witch Trial?, House on Haunted Chill and Salty Anon for the design. Because I was just playing around I dipped all 4 fingers in at once which caused the design to get a little messy and filled with bubbles, but I still like the results. By the way, I wouldn't recommend dipping all 4 fingers at once. It did save a little time but not enough to sacrifice the finished look.


     What do you think of the end results? That's all I've got to share today, now I need to go finish packing for my first trip to Las Vegas. We are flying out this weekend for a friends wedding and I can't wait! WHich reminds me I'll still be in Vegas when my post goes live on Tuesday. I won't be able to do much sharing of that post because that's the wedding day but I'd love it if you all came back for that and if you like what you see give it a share. You can share it easily by using the buttons located all the way down at the very bottom of my post. 

    I've got one last bonus shot to share with you before I go.  This one was taken in the sun and really shows off all the sparkle. Thanks for stopping by and Happy Polishing!


Tuesday, November 28, 2017

6:00 AM

Watermarble with Julie G Bohemian Dreams Collection


     Now that the Thanksgiving dinners and Black Friday shopping hustle and bustle are over it's time to get back to my regular blogging. Until I start my Christmas posts that is. And while there is no snow on the ground and the sun has popped back out you could say I'm not exactly in the Christmas spirit yet. That's why today I'm bringing you a look that leans more towards an autumn feeling featuring the Bohemian Dreams Collection from Julie G. 


     The Bohemian Dreams collection consists of 6 polishes, all gorgeous muted creme shades. The colors are Aria, Eden, Faith, Harmony, Henna and, Karma. The collection was released this summer but I felt the colors lend themselves better towards fall especially with how dark they look in a watermarble.


     These polishes work perfectly for this technique. They spread beautifully and I was able to get 24 rings of polish before creating my design. I'm pretty sure that's a record for me! Also, I should mention that I only applied a layer of base coat, there are no undies for this look and I still have a very opaque design. The tiny bubbles you see were caused by my top coat. I was trying to use a bottle that has started to thicken up a bit and didn't notice the bubbles until it was time to photograph.


     In order to avoid the messy clean up that typically comes with doing a watermarble, I decided to try letting the design dry in my cup and then apply it like a decal.  This worked out pretty well for me. As you can see there are a few quirks I need to work out. Like the small wrinkles I have at the edges of my nails. But that will come in time just like when learning any other technique. 

     I also need to figure out a way to remove the design from the water without letting it fold inwards on itself. So if you have any tips for that I'd be appreciative. That's all I've got for you today. As always thanks for stopping by and Happy Polishing!

Wednesday, August 9, 2017

11:14 AM

Pastel Watermarble with Sinful Colors


    You might remember awhile back I shared with you the Sinful Colors Get Bright Back to School Collection. 6 pastel neon shades that dried to a demi-matte finish but had only so so formulas. While I'm a fan of the colors in this collection I'm not a fan of the application issues I had but didn't want the collection to just sit in my helmers unloved. That's where today's post comes in. I've had success in the past getting Sinful polishes to watermarble and wanted to know if this collection would as well and guess what, they do!


     Now If you'll remember from my last post I wore these without undies, and they were still pretty vibrant for neons. Well as vibrant as a pastel shade can be I guess. Well, I did the same thing with my water marble, I simply put down a base coat and marbled directly over it.

      As you can see I have a few bald patches but I think that was caused by the extreme heat we had here at the time and no AC in my home. The warms temps made the polish slow to spread and it dried very quickly thanks to the matte finish so my pattern broke up a bit as I was creating it. 


     I topped everything off with my Pure Ice Matte top coat because it dries the closest to a demi-matte out of all the matte top coats I own. What do you think of the finished look?

     I really like how these colors flow together and I'm sure I will use them for a watermarble again, especially now that I've installed central air in the house so the temperature shouldn't be a problem. I used to do watermarbles all the time but got away from it because I could never make those patterns that everyone does.

     I've discovered thanks to watching a ton of youtube videos that the bowl I use for watermarbling is much larger than what other people are using. This might be why I have such a hard time making consistent patterns. The outer rings are completely dry before I even get to them and the center is too big to make that nice flower center. Now I just need to find a better container to use. If you watermarble what type of container do you use? Thanks for stopping by and Happy Polishing!


Wednesday, March 29, 2017

6:00 AM

Oil Slick nails with Watermarble


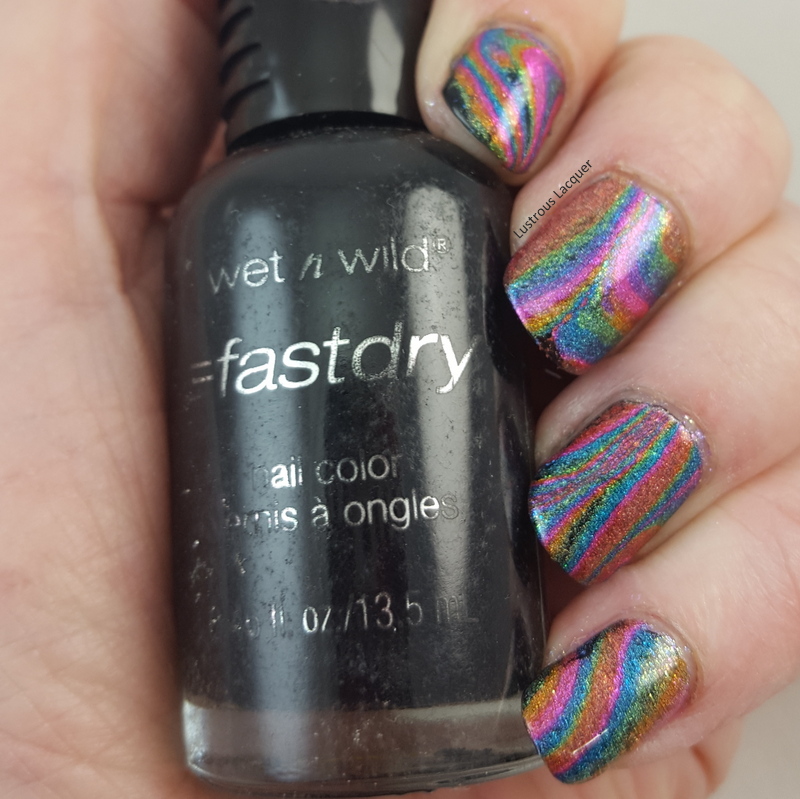
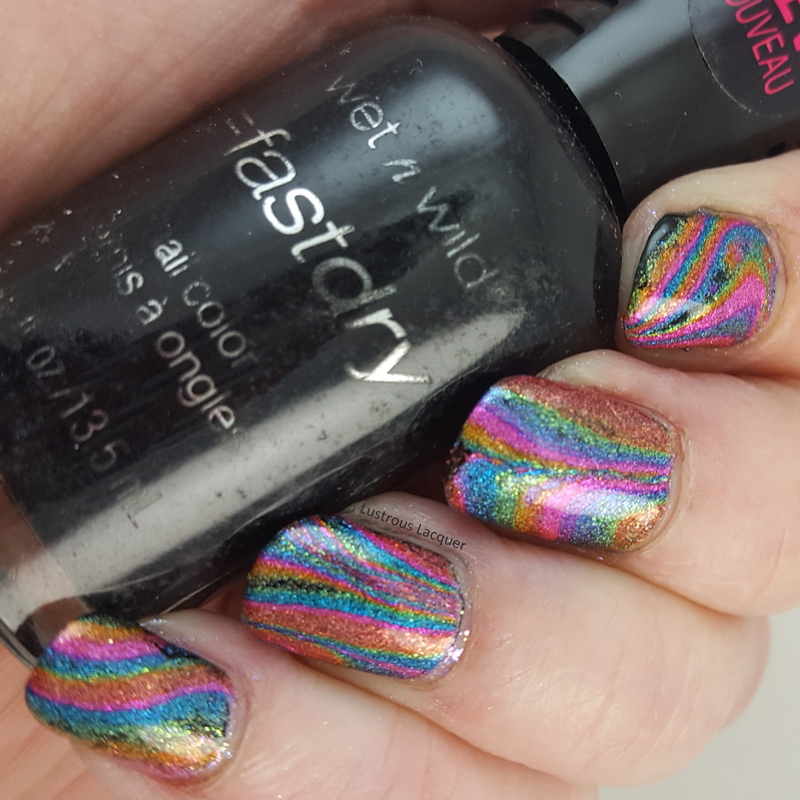
     Today  I have some gorgeous nail art to share with you thanks to the amazing generosity of my very supportive fiance. He has told me several times that he'd like to pick up some polish for me but has no idea what  I already owned. One day when he made this statement I casually threw out that I didn't own anything from Cupcake polish. Well, he took me at my word and ordered me the entire Luau collection and because his favorite color is purple a polish called Lilac You Mean It.which will have its day on my blog in the near future. But for now, I want to focus on the Luau Collection and how well it worked for water marbling.

     You may have stumbled upon my previous post about oil slick nails from last year and be thinking why am I sharing this same look again. That answer is simple, the oil slick look is one that I'll never get tired of, and this is another way to get a similar look.


     To create this look I started out by creating the water marble design using Cupcake polish The Tiki To My Heart, Hula Do You Love?, Sand By Me, Here Today, Gone to Maui, Be More Pacific and Lei Me Down. I didn't have a specific pattern in mind, I just sort of moved my toothpick in random lines until I liked what I saw.

     I will mention that the polish wanted to dry quickly and I to move fast. I'm not entirely sure if that was because the polish is a bit thinner than your typical creme or if it was because I was working in a corner with a cold draft.


     While I waited for my design to dry in the cup I applied my base color using Wet N Wild Ebony Hates Chris and a layer of top coat.  My go to Quick Dry lately is Pure Ice's Girl on the Run. After about half an hour I removed the design from my cup and cut it into quarters. 

     Just a tip, I think a non-quick dry top coat is the way to go when doing this technique because I had a really hard time getting my water marbled "decals" to stick to my nails. After a few minutes of struggling I got it to work and thankfully I'm happy with the finished results.


       Because my attitude lately is matte all the things I added a layer of MatterialGirl top coat from Blush Lacquers. 


     Now I know you shouldn't matte a linear holographic polish because you lose that signature rainbow flash but there was a method behind my madness. You've all seen those manicures that look like they have little droplets of water on them right. I've wanted to do one for awhile now but never seemed to have the right manicure until today.


     I went in with my largest and smallest dotting tools and placed drops of my Glossy Girl on the Run top coat to create the water drops. As you can see that was not the best way to do this as some of the drops have dimples in them. But you still get the overall effect. The next time I try to create this look I will just use drops straight from the brush to see if I can avoid the dimples.

     So now I've shown you two ways to create an oil slick look on your nails and id like to know which one you like best. Also if you have any tips on how to get the water drops to look like drops, or the decals to apply to my nails easier I'd love to hear them. Thanks for stopping by and Happy Polishing!

Friday, January 22, 2016

6:00 AM

40 Great Nail Art Ideas- 3 Shades of Purple


     It's Friday, which means it's time for another look from the 40 Great Nail Art Ideas Challenge. For those of you not familiar with this challenge here's a quick recap...This challenge is set up a bit differently than most. For starters there is the option to do weekly manicures with one week dedicated to themes, and one to colors. Or you can do every other week and stick with themes only or colors only. For the color portion of the challenge each person is also assigned a pattern. The end result is 40 different looks all done in the same colors. I opted to do the color challenge and you can see my previous looks using Teal, Orange, Purple and Green, Black and White, Grey, Glitter toppers, and Pale Blue.  This week we are using 3 shades of purple and the technique I have is water marble. 

    Water marbling is one of the reasons I got into nail art, and was the first look I tried. So this was a fun week for me with remembering the excitement I felt back then and how proud I was when it turned out to be a success. I still haven't mastered how to get all my nails to look the same and probably never will to be honest. But I sorta like having each nail similar but not exact. And that's just how this manicure turned out. 

nail-art-water-marble-manicure-purple

    I used 3 colors from Sinful Colors in my water marble because I have had the most success with this brand so far. And I don't feel as guilty about wasting so much polish because of the overly wallet friendly price. The colors are Mesmerize, Sweet Tooth and Winterberry. 


     To make the colors more intense I used Milani White on the Spot as my base color. As a general rule I have a layer of white under all my water marbles actually. I think it stems from that first water marble attempt, where the polish looked so thin in the water and I was convinced it wouldn't be opaque on my nails. Now it's just habit I guess. one of those weird quirks us nail bloggers develop over time. Id love to hear about yours in the comments...hint hint. 


    Well I've run out of things to say about this manicure, and to be honest I not really sure there is more that could be said. So now it's time for you to leave me your thoughts in the comments because I love reading them. And then check out the other looks for this weeks challenge. Thanks for stopping by and Happy Polishing!

Friday, April 3, 2015

9:31 AM

Spring Manicure with Water Marble


     I've got a real quick post for you today. You may remember that I recently broke a nail on my swatching hand. Well it broke down pretty low and I had to resort back to super nubbins. When my nails are short I tend to be uninspired when it comes to painting my nails. Which also means that I didn't have anything lined up to post about. Enter my impromptu visit to a salon/spa yesterday to get my nails nicely shaped and painted. Why go to a Salon when I paint my nails all the time for free? Well the answer is simple. No matter how much I try or how patient I am I can never get my nails shaped nice and even on my own and usually end up with much shorter nails than I want. 

     My experience at the salon was so much different than it normally is. For one and I mean no disrespect to anyone when I say this but the girl painting my nails was not of Asian descent and I didn't have to try and navigate a heavy accent when asked questions. And I was asked a lot of questions. Before she even touched my nails we had a lengthy discussion about how I wanted my nails done. She asked about length, shape, my typical nail polish practices. And double checked that everything was to my liking every step of the process. I felt very involved and in charge of my manicure even though I was not the one doing the work. Even though this Salon is 45 minutes away from where I live I know I will be going back there. 

     This particular Salon only uses CND polishes which is a brand I have never used before. I wanted something springy so I picked out one called Desert Poppy from the Vinylux line. A pretty coral with subtle shimmer.  Like all coral polishes this one was hard to photograph and get the true color. In the picture below the color on my pinky in most accurate. 


    I love the color of Desert Poppy but I needed something else, since starting my blog I have a hard time wearing just one color on my nails. 

     I haven't done a water marble in a long time and I think they are actually kind of fun to do. Time consuming but fun so I added one as my accent nail. I used Citrus Collide and Ultra Violet from the Maybelline Bleached Neons collection, Sinful Colors Snow me White and a Wet N Wild clear for the design. 


    That's all I've got for you today. I told you this post would be a quick one. Although it got a little bit longer winded than I had planned on. Thanks for stopping by and Happy Polishing!
Like what you see? Share it with your friends!