Showing posts with label Themed Manicures. Show all posts

Thursday, August 30, 2018

6:00 AM

The Nail Challenge Collaborative presents Pink and Blue


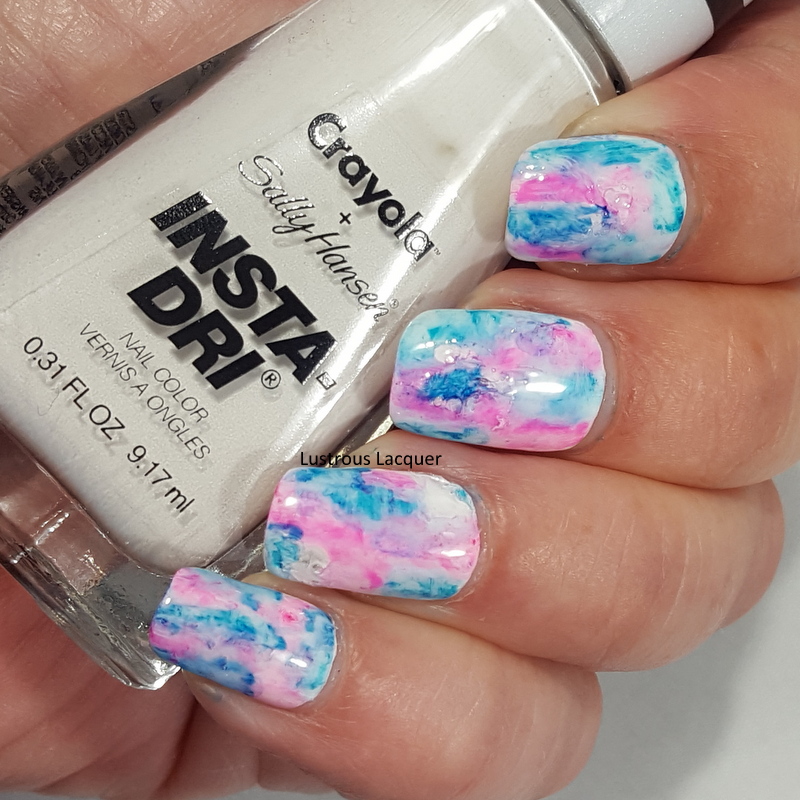
     I recently joined the facebook group Nail Art Collaborative. The Nail Challenge Collaborative is a monthly nail art challenge group free for anyone to join! Each month there is a new theme and the members create 2-4 manis and share with the rest of the group. Even though I've only been a member for two weeks I've been anxious to join in on the fun. The theme for the month of August is Pink & Blue and while I only had time to do one mani, It's one that I really like.


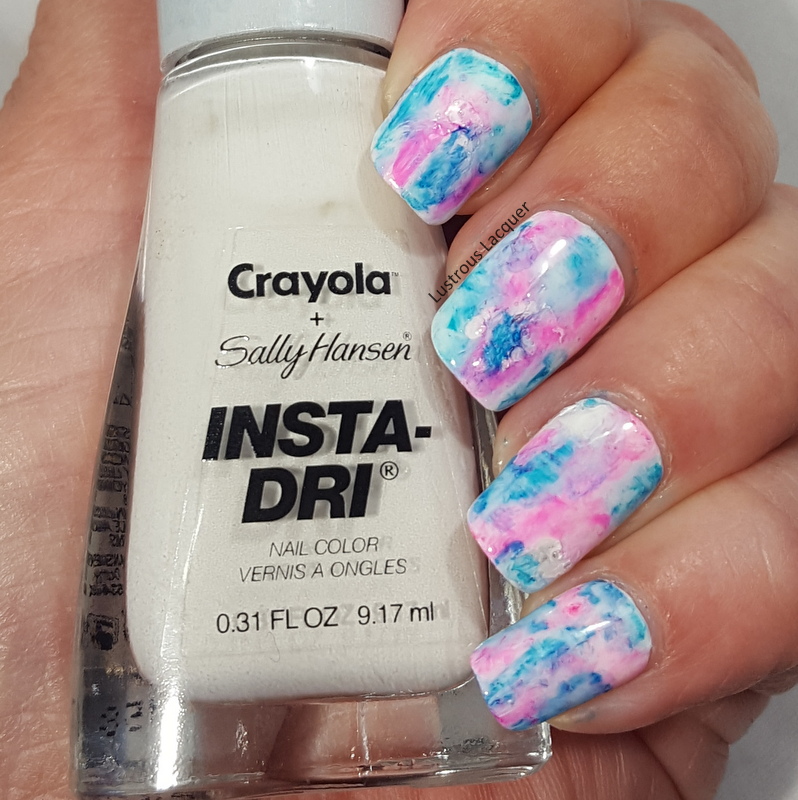
    I started with a base of White from the Sally Hansen Insta-Dri Crayola collab. This is a seriously great white. It covers evenly and had minimal streaking. I know a lot of whites start out awesome and then get goopy as you use them, I'm hoping that's not the case with this one.

     After letting the polish dry completely I added a glossy top coat for strength, and then a matte top coat so the sharpies had something to stick to.


    To create the marbled effect I randomly drew patches on my nails with sharpie markers. I went one nail at a time since I didn't know how quickly the marker would dry. Once I was happy with the patches I dipped a nail art brush into acetone and dabbed it onto the nails which caused the marker to spread and bleed. At first, I tried rubbing alcohol but it didn't seem to have any effect on the marker. That could be because my bottle of rubbing alcohol is only 50%.

     You can repeat this step until you get the look that you like, just remember to let the acetone evaporate off your nails completely before going back in with the sharpie. I was a little impatient and found out the hard way that even a small amount of acetone will dry out your sharpie.


   I really like the way this turned out but as I looked at it I had the strong urge to add some nail art. Nothing too extravagant, I didn't want to take away from the marble base.


     I decided to add some subtle stamping using image plate Creative shop 96 and China Glaze Intelligence, Integrity and Courage and Cosmic Dust as an accent.


     I really expected Cosmic Dust to be a bit darker and was hoping it would stand out more to be a truer accent. I guess when applied thinly like in stamping form it lightens up a bit. The hint of sparkle does add a little something and it isn't over the top like I was wanting.


    What do you think of this sharpie marbled look? Do you like it better with or without the stamping? I had a ton of fun creating this for the August prompt and can't wait to see what the September prompt is. Make sure to check out the other looks from the talented ladies in the group and be sure to stop back next Tuesday for letter R week in the Untried A-Z Challenge. Thanks for stopping by and Happy Polishing!


Tuesday, July 3, 2018

6:00 AM

4th of July Marbled Nail Art with Beauty Big Bang


     I can't believe it's already July, I feel like summer just began and that it's flown by me at the same time. But with the new month brings us 4th of July and a ton of nail art celebrating the holiday. I wanted to do something unique this year but was stumped when it came to ideas. Then one night while I was trying and failing to fall asleep an idea came to me. Fluid nail art is very popular these days and while I love the look I had a feeling a few people would be taking that route, so I went for an old-school technique using rubbing alcohol in a spray bottle. The first time I tried this technique was over 3 years ago and I figured it was time to revisit it again. 

     This is a very messy technique much like watermarbling so it's important to protect your skin to limit clean up. Usually, I'd use liquid latex for this but I wanted to give the latex free nail protectors from Beauty Big Bang a try. 


     These nail tapes are a bit more awkward to apply than liquid latex but I was pleased with how snuggly they fit around my nails. 


   I did use a little silicone tool to press down the edges around my nails to make sure they were firmly in place and that no polish would seep underneath. You could probably skip this step if you want to as they seemed snug and tight on their own. 


     As you can see they worked out really well. My only complaint would be that they didn't cover farther up my finger but that's more personal preference than a problem with the product. If you'd like to order a set for yourself be sure to use code LUSTROUS for 10 % off your order. 

marbled nail art using red white and blue

    As I mentioned above I used rubbing alcohol in a spray bottle to create this look. My base color is Sinful colors Whiteboard from the School Goals collection released the the fall of 2011. To get the layered effect I used one color at a time from darkest to lightest. The Blue is Sinful Colors Endless Blue from the 2013 Buff to Bright collection. Ruby Ruby was released in 2011 as part of the go plaid collection and was the perfect shade of red. Another layer of Whiteboard gave a lighter feel to the manicure and I topped it off with a glossy top coat. 


     Now my original idea had the cells being much larger and the final result is a bit more muddled than I wanted but I love the finished results. It's a greater marble effect than intended but it works.


      I thought it might be fun to take a look back at some previous 4th of July looks I've created over the years. It's a fun way to see how I've progressed with my nail art and who knows it might inspire someone. So here they are from oldest to newest.


    I hope you enjoyed that stroll down memory lane as much as I did. I'll admit there were a few cringe-worthy manicures in there, but we all start somewhere right. Now just in case, I haven't given you enough manicures to look at it's time for the link up. Check out the fine work of some fellow bloggers below. And feel free to add your own link if you'd like. Thanks for stopping by and Happy Polishing!


Thursday, March 15, 2018

6:00 AM

St. Patrick's Day Drip Marble Manicure

*Nothing to Disclose*

     It's that time of year when people start seeing green. No, I'm not talking about money, I'm referring to St. Patrick's Day. The time of year when everyone is a little bit Irish, city's colors their rivers green, our beverages turn green and for me, it's my nails. But this year I was stumped on how to paint them until I remembered the beautiful drip marbles that Kerry from Painted Fingertips creates. So thank you, Kerry, for inspiring my St. Patrick's Day nail art this year.


     I have to say I am in love with how this turned out!  And it looks great both glossy and matte although the matte version ended up being my favorite. Which one do you prefer? 


     I used polishes a variety of polishes to create this look, Sally Hansen's Granny Smith Apple, Sinful Colors White Board and Wet n Wild Poison Ivy and Deadly Dose.  The brush in the Wet n Wild polishes is wider and made dripping the polish very easy but even the smaller brush in the Sinful works for this type of nail art. 


     The first time I did a fluid nail art like this I used my nail art mat.  This time around I took a page out of Kerry's book and used the top to an old sour cream container. The top is a stiffer plastic than the mat which made controlling how the polish moved a bit easier to manage. 


     For those of you wondering how I created this look, it's actually very easy. I just placed random drops of each polish on my lid, making sure that they overlapped and started to run together. Then I simple tipped and turned the lid until the polish had spread out evenly on the lid. I let the design dry for about an hour and a half before continuing on to the next step. Kerry actually created a video on how to do this if you want to see how it's done in real time. 


     Easy right? Well, the one trick is choosing the right polishes. A nice mix of finishes and colors is key to getting a good marbled effect. I'd avoid polishes with larger glitters because they seem to be too heavy and the base is a bit thick but micro glitters seem to work well.


     After my design dried all that was left was to peel it up, but out the parts of the design I wanted and apply them. The best way I've found for applying homemade decals is using a layer of Orly Bonder and letting it dry about 90%. that way it's still a bit tacky but not so wet that your decal dissolves. A little trimming, some cleanup and I you're done.  


    So there you have my St. Patrick's Day nail art for this year. What do you think of the drip marble technique, will you be trying it out? I hope you enjoyed today's post and if you try this technique I'd love to see them. Feel free to share your creations with me on my facebook page.  I'll be back next Tuesday with another post in the Untried A-Z Challenge but until then, Thanks for stopping by and Happy Polishing!


Tuesday, February 13, 2018

6:00 AM

Love nail art for Valentines Day


     I'm back with another nail art look for Valentines Day and once again I used a few nail polishes from Sally Hansen that I picked up on clearance. As some of you may have noticed Sally Hansen has had redone their displays and colors in stores clearing out a ton of colors. I have taken full advantage of this and added more to my collection than I'd like to admit. Because of my recent purchases and procrastination at putting them away, I've found myself reaching for them when it's time to paint my nails. Hence all the Sally Hansen posts lately. I will get back to posting other brands soon I promise. Now for today's nail art. 


     For this color combination, I was inspired by one of my fiance's friends. She sent me a message asking about pink and gray polishes that went well together. Her daughter is starting to get into nails and nail art which I think is really cool. I also liked the idea of pairing pink and gray together as a semi non-traditional valentines look. 

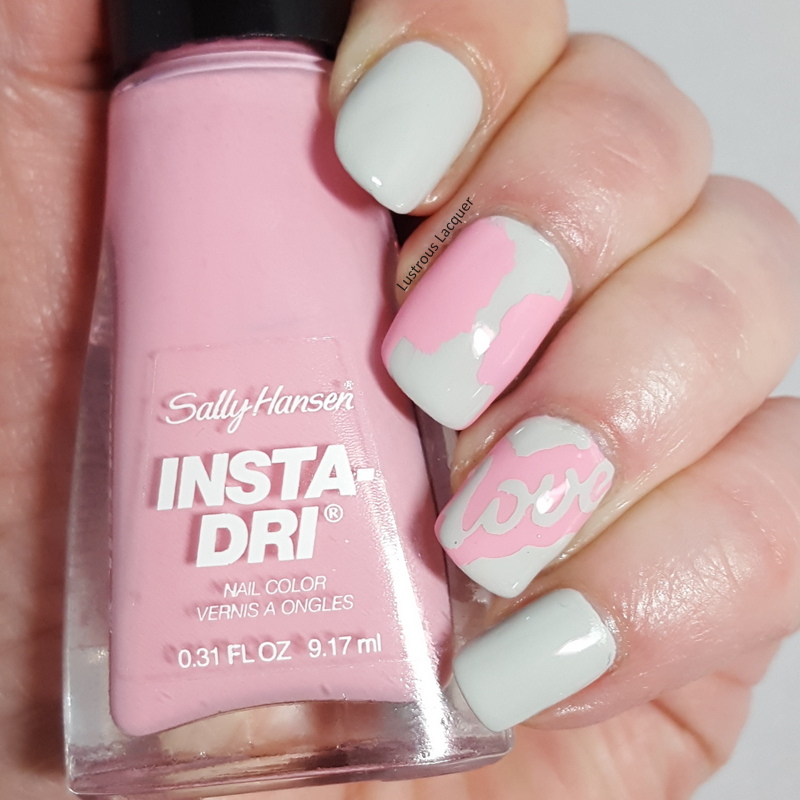
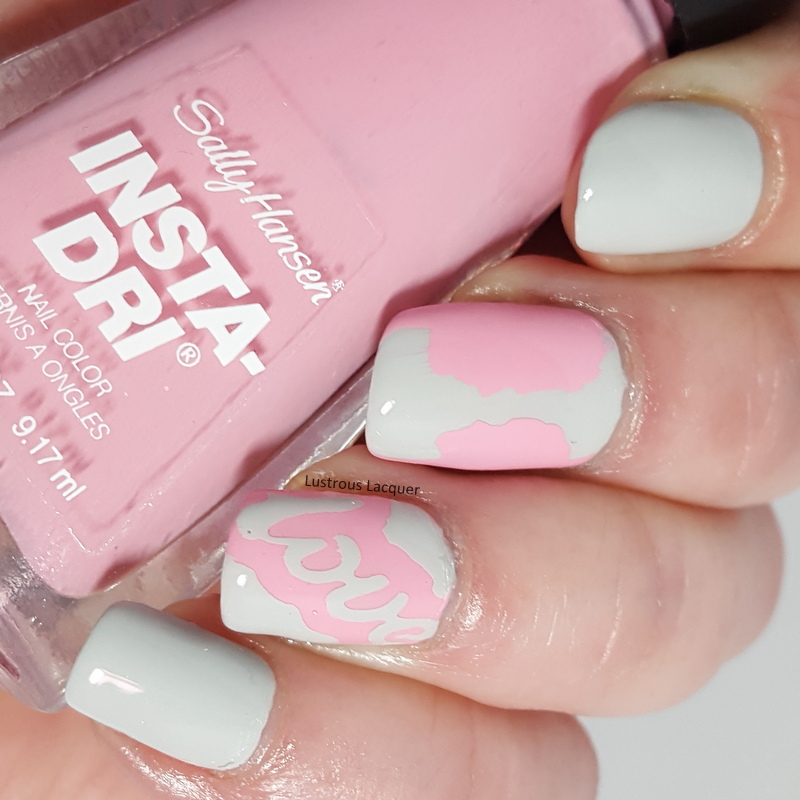
    Pink Blink is a bubblegum pink polish that I used as the base color on my ring finger.My main manicure color is Seize the Gray, a lighter gray than I had envisioned but has a great formula and nice opacity. 


    For my ring finger, I used What's Up Nails Vinyl written with love (wv215) and then painted Seize the Gray over it. The middle finger was done using What's Up Nail Vinyl Profiles (wv219) and Pink Blink. Both sets of Vinyls are still available at What's Up Nails if you'd like to get some for yourself.


    I found that this was a quick and easy way to create my Valentines look and I like the color combo. I'm so glad it was suggested to me. Have you used vinyls before? Where is your favorite place to get them? I hope you have a lovely Valentines Day, Thanks for stopping by and Happy Polishing!

Thursday, February 8, 2018

6:00 AM

Dark and Vampy Valentines Day Manicure


     It's the beginning of February and that means it's time for Valentine's nail art looks. I missed out on doing any last year and I want to make up for it this year. Don't worry I won't be dedicating the entire month to Valentines I only have 2 looks to share with you. The first one is a needle drag look that has subtle valentines feel to it that I'm kind of proud of. 


     For years I have attempted the needle drag technique without success. I must have a heavy hand because no matter how lightly I tried to be with my dotting tool I ended up putting gauges in my polish instead of beautiful swirling designs. That was until I tried using a nail art brush instead of my dotting tool. A little tip, you want to use a striping brush with long bristles and the lightest amount of pressure possible. 


      The polishes I used I recently picked up on clearance from Target. Who doesn't love a bargain right! My main color is Ruby Do from the 2017 Berry Chic Collection. I accented it with Clean Slate which is part of the 2016 fall collection. Both polishes are extremely opaque and have great formulas. To create my hearts I used a medium sized dotting tool and a few drops of Ruby Do. The brush in the complete salon manicure line is great for painting my nails but it too big when it comes to wanting small drops of polish. You'll want to move quickly when doing the needle drag technique so that your polish doesn't have time to dry. I had my dotting tool ready to go before adding my second coat of clean slate which I think was also part of why I was able to do this successfully. A quick swipe with my striping brush through the polish and I had my heart pattern.


     I'm super excited to finally get this technique to work and can't wait to try it out with other colors and designs. Have you had success with this technique? Do you have any other tips or tricks? I hope you enjoyed this simple Valentines nail art look. I'll be back with another look soon until then, Thanks for stopping by and Happy Polishing! 


Tuesday, December 12, 2017

6:00 AM

Christmas Ivy Nails


     Hello Everyone, how has December treated you so far? Are you done with your Christmas shopping or still on the hunt for that perfect gift? Perhaps you need a little push to get you into that Christmas spirit? If that's the case have I got the perfect manicure to share with you today! This Christmas Ivy manicure recently popped up in my news feed from Robin Moses and I knew right away that I wanted to try it.  

     I've been wanting to work on my free hand nail art skills for some time and this manicure looked simple enough that I felt it was a good way to practice. Of course, all the great nail artists out there make these manicures look so easy and effortless but to be honest this one was actually pretty easy to do. Now by no means is mine anywhere in the ballpark of being as good as the original but I'm very happy with how it turned out.I even have a new found enthusiasm to keep working on my free hand skills.


      I started out with Sally Hansen Satin from the Smooth and Perfect line. Typically I would use China Glaze Heaven as my naked nail color but I wanted to see if I had other option in my collection already. Turnes out Satin is the better option of the two and has become my go-to polish when I want this effect. 

     I hand painted my french tips with Sally Hansen Wild Strawberry from the Crayola collab earlier this year. I don't know why but I have always been able to do a decent freehand french tip. I wish I could take that skill and transfer it to other aspects of my nail art. Especially when it comes to brush control when hand painting designs. 


     For my Ivy, I used acrylic paint in various shades of copper and gold. I picked a true gold for the vine and a darker bronze for the leaves. Then I went in with a light gold to add some highlighting and try to add depth. Painting curving lines is a huge hurdle for me that I can't quite seem to get over but my hand painted leaves have improved. 


     The glitter on my tips is Fantasy Makers Once Upon a Time. I started off by just brushing it on but noticed that I was getting more of the blackened base than I wanted. To fix that I applied the polish to a sponge and that dabbed it on my nail. I like the sponged option much better, don't you?  I topped everything off with Darling Diva's Preformance Enhancing top coat to give it a super glossy finish.

     Anyone remember the very first mani I tried to recreate from Robin Moses? I had an awful time getting the angles right and things just looked off. I haven't mastered the angles yet but see improvement in those tiny little leaves. It's those little victories that I want to share with others, especially those just starting out with nail art, in hopes that it inspires them to not give up, or try something new.  It's the very reason I started this blog in the first place and I'm glad I'm getting back to that after losing my focus for awhile.

     I hope you enjoyed today's post and maybe were inspired to tackle a nail art technique or look you haven't quite mastered yet. Thanks for stopping by and Happy Polishing!


Monday, July 3, 2017

6:00 AM

4th of July Manicures


    I've got a very quick post to share with you today as I've got holiday plans to get back to. But I really wanted to share a few nail art looks I did for the 4th. I realized recently that it's been 2 years since I've shared a 4th of July manicure and that just wouldn't do.

     The first look I did is super easy and can be done by pretty much anyone who has access to nail polish and some sort of dotting tool, whether it's an actual dotting tool or a toothpick.


     For this look, I used the American Bundle from Different Dimensions. The bundle contains a cuticle oil that smells amazing and 3 polishes in Red, White, and Blue.  


     The white is called One Heart, One Hand which I used for my base color. Once that dried I went in with my dotting tool and placed random dots along the tips with One Flag, One Land (Red) and One Nation Evermore (blue) and One Heart, One Hand.  All 3 colors are holographic and really sparkle in the sun! 


     I need to work on my random dot placement a bit but overall I liked the way this turned out. It a patriotic take on the French manicure, and as I mentioned above super simple to do. 

     Now for the look that I'm actually wearing for the 4th. This one was a bit more complicated and took quite a bit of time but I absolutely love it. I wanted to do something a little outside of the box instead of the typical fireworks or flags but still, have that 4th of July feeling. And I'm pretty excited about how it turned out. 

    Once again I used Different Dimensions One Heart, One Hand as my base color and let it dry. 


      I just received the mandala plate (Cjslc-18) from Clear Jelly Stamper and thought the designs looked a little like exploding fireworks but with a twist and was anxious to use it. Honestly, I'm a little obsessed with this plate right now so you'll probably see it quite a few times on the blog. There are just so many looks you can create its mind blowing.


     For the stamping colors I used Hit the Bottle Poison Apple, Snowed In and I Blue it all on Polish. They worked great! I was able to get all the details in the images to transfer, even the super small inner circles which is really impressive. 


     So there you have it. 2 looks I created with the 4th of July. Which one is your favorite and what are you wearing on your nails for the holiday? I've got to run, there's a BBQ calling my name but as always Thanks for stopping by and Happy Polishing!

Friday, December 16, 2016

6:00 AM

Frozen Snowflakes


     Well, the temperature has dropped to below zero here on quite a few occasions lately. It was -14 when I woke up yesterday morning. Which means winter is in full effect, my nails and skin are suffering from the extreme cold and Christmas is just around the corner. That means it's time to break out some seasonally inspired manicures! I thought with the severe cold and snow predicted to hit my area over the weekend it was only fitting to share with you the frozen snowflakes manicure I wore this week.

Frozen-manicure-stamped-snowflakes-glitter-nail-polish

     With there still being 10 days left until Christmas I wanted to steer away from the traditional colors, and go with something wintery instead. And I honestly thought this might be an original idea with the blue snowflakes stamped on a blue base but they are all over Pinterest right now. I'm not sure if I saw one and didn't completely remember it, or if I've finally been on trend with my manicure!


     I started with a base of Lollipop Posse Slipping out of time, a Catalina blue nail polish with holographic flakes. Then I mattified it because let's be honest I don't use my matte top coat as often as I should. And maybe because I thought the holographic flakes would look really cool that way.

     For my snowflakes, I pulled out every image plate I own with a snowflake image and went to town! Now I don't remember which plate had which image on it but if you see one you just need to know about let me know in the comments and I can look through my plates and let you know. I can tell you the ones that I used are UR Beautiful 16, Konad M59, Bundle Monster BM-319 and BM-323 and Winstonia Meery X'Mas. (Yes it's spelled meery that's not a type-o on my part)


          For stamping polishes, I used Snowed In and Blue-tiful from Hit the Bottle and really like how it turned out. The blue wasn't quite as easy to see as it looks here which was kind of a bummer at first but as the week went on I really liked the subtleness. Well, that's all I've got for you today. I hope you enjoy your weekend and for those of you in the colder climates, I hope you stay warm. Thanks for stopping by and Happy Polishing!


Wednesday, August 10, 2016

6:00 AM

40 Great Nail Art Ideas - Violet


     Ok, so I've got a super quick blog post for you today because it's playoff season for me and I'm working on borrowed time as it is. For those of you who don't know I play on a softball team and we were on the field until after 11 pm Monday night for playoffs. Yay, we are winning but boy am I tired. Being the glutton for punishment that I am I agreed to help out 2 different friends on their Volleyball teams for playoffs which are Tuesday and Wednesday night. I'm either going to be in great shape after this on unable to move. I guess time will tell on that one.

    Anyway back to the reason you're here, the nail art! I have fallen so hopelessly behind on the 40 Great Nail Art Ideas challenge that I know I will never catch up, but I'm determined to finish it! I'll have all my posts done, albeit months behind but the inlinks are no longer open so I won't be able to share the other looks with you. However, if you're reading this post and participating in the challenge please feel free to leave a link to your post in the comments.  So just what is the 40 Great Nail Art Ideas Challenge? Well, it's simple really, This challenge is set up a bit differently than most. For starters, there is the option to do weekly manicures with one week dedicated to themes, and one to colors. Or you can do every other week and stick with themes only or colors only. For the color portion of the challenge, each person is also assigned a pattern. The end result is 40 different looks all done in the same colors. As most of you know I opted to do the color challenge and you can see my previous looks using TealOrange, Purple and GreenBlack and WhiteGreyGlitter toppersPale Blue , 3 shades of PurpleTurquoise and 3 shades of Green

    For this prompt the color is Violet and I was given the pattern Aztec. Well, I sort of screwed up and thought it was tribal so feel free to use your imagination on this one. Or since my "tribal" manicure from a few months ago ended up looking more "Aztec" let's just say that I did this on purpose to give each pattern their 15 seconds of fame on my blog. Yeah, that sounds better than me just being scatterbrained and mixing them up!


    So this look was very easy to put together and I want to toot my own horn a bit about that image placement. Look at how centered they are on my nail!! That will probably never happen again so bask in its beauty while you can. 

    For my base colors, I used Sally Hansen Lively Lilac and Sinful Colors Snow Me White. For the image, I used NNail plate B97 and Hit the Bottle As Black as Night. The accent nail I stamped with Lively Lilac to tie it all together. After a layer of top coat, this manicure was complete. Just like this post is about to be. I hope you enjoyed this look. I will be back Friday to share more of my hectic life with you. Thanks for stopping by and Happy Polishing!

Friday, March 25, 2016

6:00 AM

Hobby Polish Bloggers presents Spring


     It's time once again for the monthly link up brought to you by the Facebook group Hobby Polish Bloggers. This month's theme is spring! Now I know there are a lot of options to choose from and I could have done any number of things for this prompt but I just cant pass up an opportunity to do a floral manicure.  Now there isn't a whole lot to say about this manicure so this post is going to be short and sweet. Just what we need on a Friday right? 


    I decided to go with something simple yet classy for this manicure. I really like the clean look this manicure gave me. I started with a base of L'Oreal Charmed, I'm Sure and a generous layer of top coat. A neutral shade with just a hint of shimmer


     The rose is a water slide that I picked up from Born Pretty Store a few years ago and sadly, is no lover available. But I just checked their site and there are quite a few floral options to choose from. I don't know about you but I really like this finished look.  I think there is just enough contrast between the polish and the decal to keep it from being boring, but it's not in your face either.  I was tempted to add the flowers to each nail but I'm glad I kept it to just one. Anything more and I'd have lost the clean, classic look I was going for. 

     Well That's all I have for you today. I told you this post would be short and sweet. If you're looking for more information on Charmed, I'm sure I'll have that for you in a post next week. So be on the look out for that. And if you're going to place an order from Born Pretty Store be sure to use code LAUNX31 to get 10% off your entire order! In the mean time why don't you take a look at the other manicures included in the link up? Thanks for stopping and Happy Polishing!


Friday, March 18, 2016

6:00 AM

40 Great Nail Art Ideas - 3 shades of Green


      Happy Friday to everyone! I'm finally back with another look for the 40 Great Nail Art Ideas Challenge. This week is 3 shades of green! How appropriate with yesterday being St. Patricks Day. Hmmm that was some clever planning by The Crumpet huh. Or do you think it was just the luck of the Irish?

     Now if you're new here you might be wondering what the 40 Great Nail Art Ideas Challenge is all about. So first of all welcome, I'm so glad you're here! And secondly, here's a little bit about what this challenge actually is. This challenge is set up a bit differently than most. For starters there is the option to do weekly manicures with one week dedicated to themes, and one to colors. Or you can do every other week and stick with themes only or colors only. For the color portion of the challenge each person is also assigned a pattern. The end result is 40 different looks all done in the same colors. As most of you know I opted to do the color challenge and you can see my previous looks using TealOrange, Purple and GreenBlack and WhiteGreyGlitter toppersPale Blue , 3 shades of Purple and Turquoise.  Whew we've done a lot of looks so far! Now for today's manicure.

    My "pattern" for today was an accent nail. I know not really a pattern but it is a nail art look so it still fits the theme. And is a really easy look to pull off! After thinking way too hard about what I wanted to do for my manicure I decided on the seran wrap technique.

      If you have ever done this technique you know it makes a mess. And there's nothing worse than cleaning up green nail polish from your skin right? Well blue and red polish are right up there too I guess.  I used my new bottle of Simply Peel latex barrier from My Bliss Kiss to keep the mess at bay and was very happy with the results. Plus it makes your skin sparkly when it dries and who doesnt like to sparkle?

Seran-wrap-manicure-St.-Patricks-Day-nail-art

    Using Zoya Tracie as my base color I dabbed on Sinful Colors Exotic Green and China Glaze Cast a Spell. Exotic green is a rich avocado green polish with a creme finish.  It really blended in but can be seen towards the cuticle on my middle finger. Cast a spell is a dark green with hints of gold glitter polish that seemed to take over the entire manicure. Leaving me with much less depth to this look that I originally wanted. 


   The best blending I was able to get is shown here on my ring finger. And because of this I decided to switch up my accent nail and shift it over to the middle finger. Which I'm still not entirely sure I like honestly. I think it's just because I'm so used to seeing the accent on the ring finger. 

   
     For the finished look I used Hit the Bottle To Have and To Gold with Red Angle plate Ra-116. Sadly with all the stamping plates I own the St. Patricks themed images were slim pickings. And this clover was really my only option.  But can we take a minute to ohh and ahh over who well this gold polish stamps! Just look at how bold it is over the dark base. I am so so so glad that I finally ordered a few of these polishes to try out. And now I am anxiously awaiting a restock so I can grab a few more. Ekkk Im so excited to stamp now, which is awesome because I haven't felt like even painting my nails in over a month. So be on the look out for those new posts coming up in the future, That's all I have for now. Make sure to check out the other amazing looks from today's challenge. Thanks for stopping by and Happy Polishing!


Friday, February 5, 2016

6:00 AM

40 Great Nail Art Ideas- Aqua or Turquoise


     It's time for another look from the 40 Great Nail Art Ideas Challenge! I don't know if you know this but I am actually really enjoying this challenge. Normally I get stressed during a challenge and struggle to get my looks done. But not this time! And you want to know why? This challenge is set up a bit differently than most. For starters there is the option to do weekly manicures with one week dedicated to themes, and one to colors. Or you can do every other week and stick with themes only or colors only. For the color portion of the challenge each person is also assigned a pattern. The end result is 40 different looks all done in the same colors. As most of you know I opted to do the color challenge and you can see my previous looks using TealOrange, Purple and GreenBlack and WhiteGreyGlitter toppersPale Blue and 3 shades of Purple.  This posting every other week is just my speed and helps keep me relaxed and stress free for the challenge. 

     This week the color theme is Aqua or Turquoise  and my pattern prompt is water color. The water color technique is one that I love but have been afraid to attempt until now. And to be completely honest this is one look that I didn't nail, but now I have a little more confidence and look forward to trying again. After I watch a few more YouTube videos on how's it's done of course. 


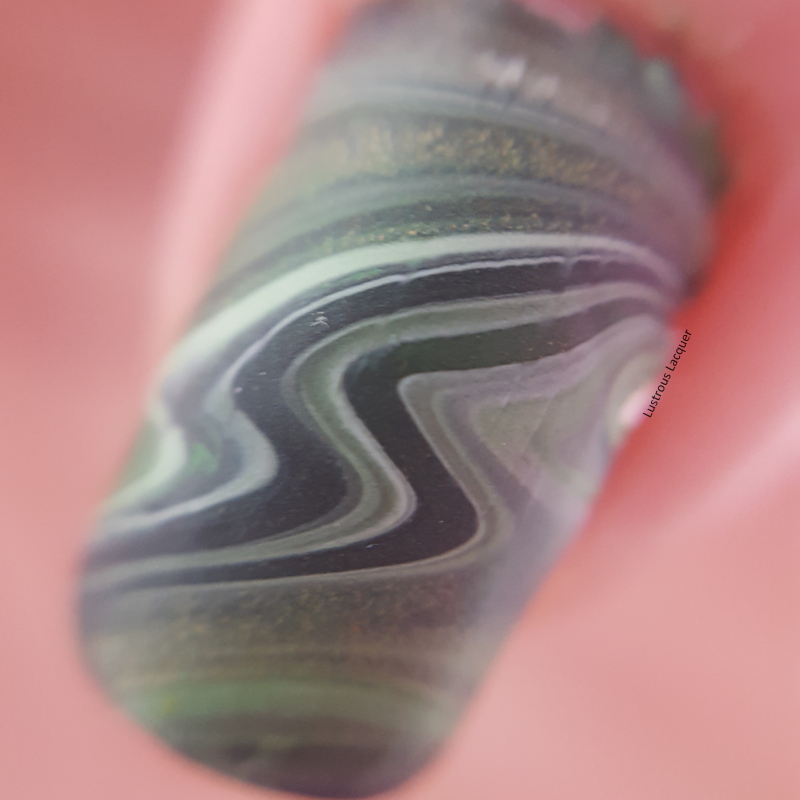
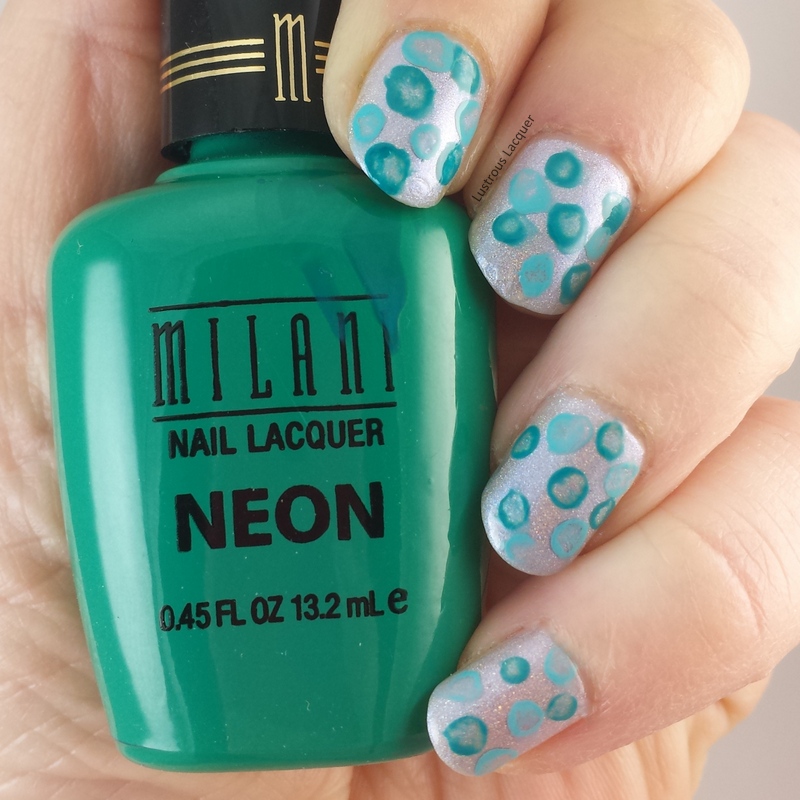
     For this manicure I started with Parallax Polish Arctic Ice from the newly released Secret of the 7 Seas Collection. You know how I mentioned watching some Youtube videos on how to do the water color manicure, yeah I probably should have watched a few before I attempted this manicure. I had no idea really what I was doing, but I jumped right in! I used the same technique as I did for my black and white swirl manicure from earlier in the challenge. 


    Doing one nail at a time I placed random dots of Milani Fresh Teal and Maybelline Day Glow Teal on the nail. Then I took a nail art brush dipped in acetone and dabbed at the center of the dots. I was going for a more translucent look for the centers rather than removing the color completely but as you can see that didn't work out. And I knew the more I tried the more frustrated I would become and end up ruining the whole thing. We've all had days like that right?

    
     While this manicure didn't turn out exactly as I planned I still like it. Its kinds funky and fun, and very different from any manicure I've done before. Next time I try a water color manicure I'll be sure to use a few more colors and overlap the dots a bit more. See if I can get it to look a bit more like floating bubbles. For those of you who have successfully done this technique, do you have any words of wisdom or tips for the water color novice? Let me know in the comments and then be sure to check out the other looks created for the Aqua or Turquoise challenge. Thanks for stopping by and Happy Polishing!


Friday, January 22, 2016

6:00 AM

40 Great Nail Art Ideas- 3 Shades of Purple


     It's Friday, which means it's time for another look from the 40 Great Nail Art Ideas Challenge. For those of you not familiar with this challenge here's a quick recap...This challenge is set up a bit differently than most. For starters there is the option to do weekly manicures with one week dedicated to themes, and one to colors. Or you can do every other week and stick with themes only or colors only. For the color portion of the challenge each person is also assigned a pattern. The end result is 40 different looks all done in the same colors. I opted to do the color challenge and you can see my previous looks using TealOrange, Purple and GreenBlack and WhiteGrey, Glitter toppers, and Pale Blue.  This week we are using 3 shades of purple and the technique I have is water marble. 

    Water marbling is one of the reasons I got into nail art, and was the first look I tried. So this was a fun week for me with remembering the excitement I felt back then and how proud I was when it turned out to be a success. I still haven't mastered how to get all my nails to look the same and probably never will to be honest. But I sorta like having each nail similar but not exact. And that's just how this manicure turned out. 

nail-art-water-marble-manicure-purple

    I used 3 colors from Sinful Colors in my water marble because I have had the most success with this brand so far. And I don't feel as guilty about wasting so much polish because of the overly wallet friendly price. The colors are Mesmerize, Sweet Tooth and Winterberry. 


     To make the colors more intense I used Milani White on the Spot as my base color. As a general rule I have a layer of white under all my water marbles actually. I think it stems from that first water marble attempt, where the polish looked so thin in the water and I was convinced it wouldn't be opaque on my nails. Now it's just habit I guess. one of those weird quirks us nail bloggers develop over time. Id love to hear about yours in the comments...hint hint. 


    Well I've run out of things to say about this manicure, and to be honest I not really sure there is more that could be said. So now it's time for you to leave me your thoughts in the comments because I love reading them. And then check out the other looks for this weeks challenge. Thanks for stopping by and Happy Polishing!


Like what you see? Share it with your friends!