Showing posts with label Marbled Nails. Show all posts

Thursday, September 27, 2018

6:00 AM

Lustrous Lacquer's Quarterly Favorites Round-up Vol. 3


    It's time for the third installment of my quarterly round-up. I hope you enjoy this look back at the previous 3 months as I do. I've decided to shake things up a bit this time around and share more than just my favorite nail art looks.  Mainly because there are so many things that inspire me, teach me and shape who I am as a blogger and I feel they are worth sharing. Plus I feel that it's nice to get to know a little about the person behind the blog. I know I'm more likely to leave a meaningful comment or even just search out the latest blog post if I feel like I know the person behind the screen a little bit. 

     In July I continued my quest to get through my polish collection and found myself reaching more for older polishes while also sharing the new Wild at Heart Collection from Sinful Colors. It was a slow month for nail art with only 3 looks but they are looks that I really loved. It was hard to narrow down a favorite but I decided on the look I created for the 4th of July.


     I revisited an old technique to create this look while still following the fluid nail art trend and was very pleased with the results. If you want to see my second favorite look from the month check out my Dichotomy post from 1850 Lacquer.  Dichotomy is a thermal polish and I added an accent nail that has a "disappearing" image on it.

     In July I decided to try and take my blog to the next level and see if I could make a small income with a few affiliates. You may have noticed the addition of a few banners in my sidebar, if not take a look and see if there's anything that catches your eye. I've got the ever so popular Born Pretty and Beauty Big Bang banners that people are familiar with. And then I got lucky and was able to become an affiliate with Sally Beauty Supply and Planet Beauty.  I'm not looking to be able to quit my day job but it would be nice to make enough to be able to pay for my blog fee's from it. And a girl can always dream, can't she?

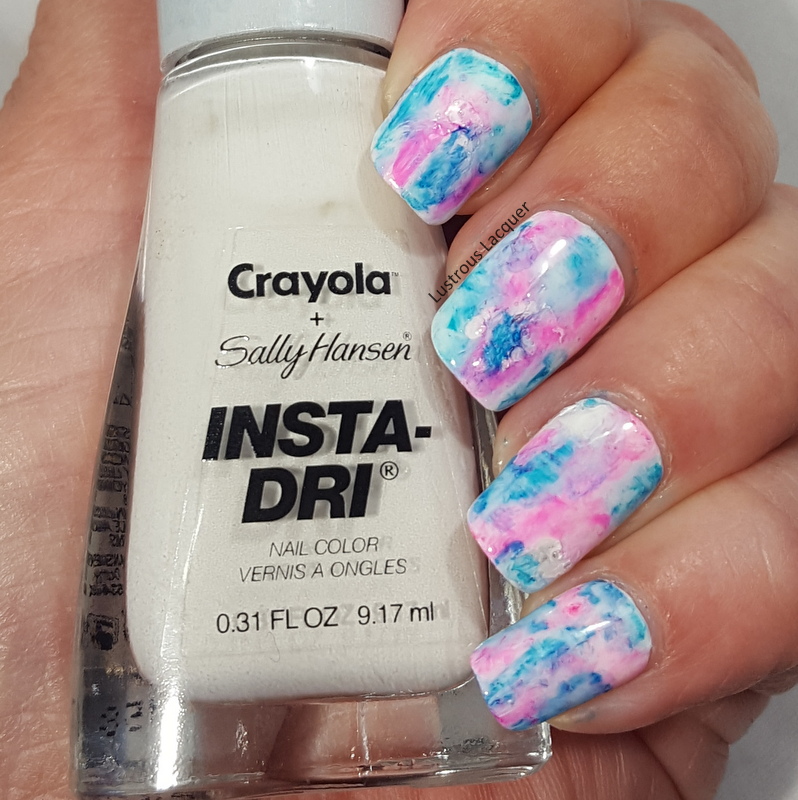
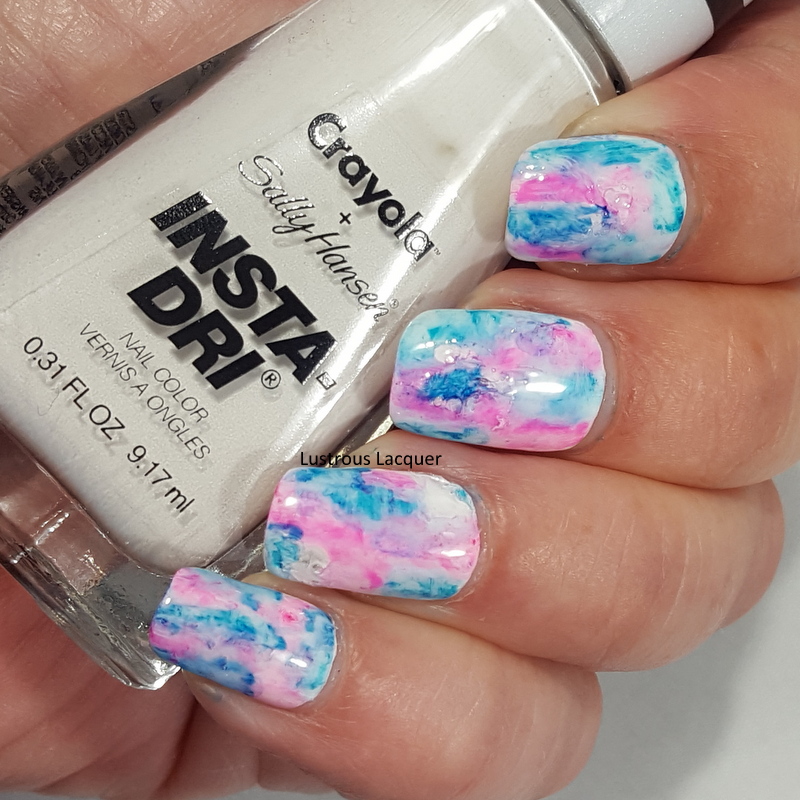
    August saw a new opportunity for me when I joined the Nail Challenge Collaborative group on Facebook. I know art is supposed to be personal and come from the artist's heart but sometimes it's nice to be given a direction. The direction I was given for August was simply Pink and Blue. That inspired my first ever manicure using Sharpie Markers.


    My daughter also got to share her nails on my blog again with her baseball inspired look. She was so happy about this post and checked my site every day for weeks just to see if her post was still in the top spot on my popular posts list. I should probably thank her for all those page views.

     In August, I discovered Naio Nails on Youtube and have become fascinated with the nails that she creates. They are generally over the top and completely inappropriate for my lifestyle but I love them. And I feel like I've picked up a few things that will help my skills.

     September saw me heading back to work and ended up being a slow month for nail art. I only shared one look with you, but it's my favorite one in this round-up. My stone marble nails not only made me proud but actually turned out the way I pictured them.


     I am hoping to have more fun looks to share with you in October, including some techniques that I have never tried or haven't used in years.  Do you ever go back and revisit old techniques? What trends do you wish would come back? Thanks for stopping by and Happy Polishing!

Tuesday, September 11, 2018

6:00 AM

Marbled and Floral Manicure


    You guys, it's already the second week of September! How the heck are we almost halfway through the month already? It's my third week back to work and I feel as if my summer vacation just started. I suppose that's because I was off and running for almost 3 months straight with lots of little trips and visiting with friends. My life is just as busy now as it was then but I'm still finding time to blog which makes me very happy. Typically by this time of year I'm a bit burnt out and end up pushing blogging to the very bottom of my to-do list. Not this time, this time I have a nail art look to share with you that I am very proud of! 

     I have been trying for months to do a marbled nail look that actually resembles stone marble. I thought I was on the right track with my Neutral Marbled nails manicure but once that was completed I realized it was too uniform looking and really wasn't what I wanted. I've come close to the effect I wanted with my Holiday Fluid Nail Art but it still wasn't quite right. Then I remembered the glitter topper nails I did a few years ago for a challenge and decided to try a spin on the technique I used for that manicure and it worked!


     What do you think?  I am so happy that I didn't give up because I am still floored by how this turned out.  And it was so simple to do in the end, but quite messy if I'm being honest. 


    I started out with one coat of Sally Hansen Whited from the Crayola collab in the Insti-dri line. To protect my skin and help with clean up I used UN-Frog-gettable cuticle cover. I then painted a very thick layer of the Sally Hansen White onto my nail art mat and placed random drops of polish onto the wet surface. The polishes I used were all from China Glaze in the colors Elephant Walk, Cosmic Dust, Kiss My Glass and Stone Cold. 

     Using my squishy stamper from Creative Shop I placed it on the polish and gave a slight twist. This swirled the colors giving the marbled effect which I was able to stamp directly onto my nails. I've found that a squishy stamper works best for this because it allows you to really press down firmly on your nail without distorting the design. You will also want to press the stamper straight down onto your nail, and pick it straight up, there will be a lot of polish on the stamper and will most likely slip and slide if you try rolling it. 


    If there are any portions of your nail that seem to have too much solid color you can do the process again and use the edge of the stamper head to fill in that area rather than stamping the entire nail again. I ended up doing this to a few nails and it worked out really well. 

    I've been watching a ton of nail art videos on youtube lately, mostly from Naio Nails and she always does these extreme nails which inspired me to add some nail art on top of the marble. Now I do floral manicures all the time because they are my favorite but they are usually stamped and I haven't done any hand painted roses since 2013 and figured it was time to give it another go. 


     I tried to strategically place the roses over parts of the marble that were my least favorites which put them on the sides of my nails. Not the best placement I know because it seems sort of unbalanced to me but overall I really really love how this turned out. 


    I used acrylic paint in red, green and white to paint my roses. The pink and light green you see was created by adding a small amount of white to the red and green. The veining I did with a gold glitter striper from Jordana I picked up on clearance several years ago. 


    I have mixed feelings about the glitter. I think it was needed for the marble effect but maybe not quite so much. What do you think? 


     That's all I have for you today. Be sure to stop back on Thursday when I'll be unveiling a Minnesota Nice collab that is releasing this Saturday at Polishcon Minneapolis from 4 Minnesota makers. Also, I will be attending Polishcon again and hope to meet a few of you there. Until then, thanks for stopping by and Happy Polishing!


Thursday, August 30, 2018

6:00 AM

The Nail Challenge Collaborative presents Pink and Blue


     I recently joined the facebook group Nail Art Collaborative. The Nail Challenge Collaborative is a monthly nail art challenge group free for anyone to join! Each month there is a new theme and the members create 2-4 manis and share with the rest of the group. Even though I've only been a member for two weeks I've been anxious to join in on the fun. The theme for the month of August is Pink & Blue and while I only had time to do one mani, It's one that I really like.


    I started with a base of White from the Sally Hansen Insta-Dri Crayola collab. This is a seriously great white. It covers evenly and had minimal streaking. I know a lot of whites start out awesome and then get goopy as you use them, I'm hoping that's not the case with this one.

     After letting the polish dry completely I added a glossy top coat for strength, and then a matte top coat so the sharpies had something to stick to.


    To create the marbled effect I randomly drew patches on my nails with sharpie markers. I went one nail at a time since I didn't know how quickly the marker would dry. Once I was happy with the patches I dipped a nail art brush into acetone and dabbed it onto the nails which caused the marker to spread and bleed. At first, I tried rubbing alcohol but it didn't seem to have any effect on the marker. That could be because my bottle of rubbing alcohol is only 50%.

     You can repeat this step until you get the look that you like, just remember to let the acetone evaporate off your nails completely before going back in with the sharpie. I was a little impatient and found out the hard way that even a small amount of acetone will dry out your sharpie.


   I really like the way this turned out but as I looked at it I had the strong urge to add some nail art. Nothing too extravagant, I didn't want to take away from the marble base.


     I decided to add some subtle stamping using image plate Creative shop 96 and China Glaze Intelligence, Integrity and Courage and Cosmic Dust as an accent.


     I really expected Cosmic Dust to be a bit darker and was hoping it would stand out more to be a truer accent. I guess when applied thinly like in stamping form it lightens up a bit. The hint of sparkle does add a little something and it isn't over the top like I was wanting.


    What do you think of this sharpie marbled look? Do you like it better with or without the stamping? I had a ton of fun creating this for the August prompt and can't wait to see what the September prompt is. Make sure to check out the other looks from the talented ladies in the group and be sure to stop back next Tuesday for letter R week in the Untried A-Z Challenge. Thanks for stopping by and Happy Polishing!


Tuesday, December 19, 2017

6:00 AM

Holiday Fluid Nail Art


     The Holiday manicures continue today on the blog. This time I'm bringing you a look that takes minimal effort but a bit of patience. Sound familiar? It's almost the exact opening line I used for my last fluid nail art look. The difference is, this time it's even easier to create the look! And all it takes is a few colors of nail polish, a nail art mat and time.


     Doesn't it look neat? I just love how this turned out and it was so so simple to do! I used 4 different polishes from Sinful Colors It's a Wrap (gold) Under 18 (red) Whipped Frosting (white) and HD Nails (green) to create this look. 


    Now for the easy part of the manicure. All I did was place random drops of each polish on my mat. I'd recommend using one of the mini mats for this technique simply because it's easier to work with than the full sized ones. Make sure the drop are close enough to run together, making sure to cover approximately a 2-inch by2-inch area. You may need to cover more area if your nails are really long. If you don't get the entire area covered with polish don't worry, a few bare spots can be fixed in the next step. 

     After you're satisfied with the polish drops, all that's left is to pick up your mat and fold it in half twice. Once horizontally and once vertically. This step helps fill in any blank spots you might have and, smooshes the polish together to create a really cool marble effect. Plus it's much easier than tilting the mat back and forth. Now comes the tough part, waiting for the design to dry so you can move on to the next step. 

     I allowed the polish to dry for about 2 hours, this time around I skipped the step of applying topcoat before peeling the polish off my mat. This helped cut down on dry time and made it easier to cut out nail sized pieces.  


     After you've cut your decals down to the right sizes all that's left is to apply them to the nail. I used a base of Orly Bonder and let it dry to a tacky state but not fully dry before placing my decal on the nail. After that, all I had left to do was a little cleanup and to add a layer of top coat. My go-to is Girl on the Run by Pure Ice but any top coat will work. 

      Have you tried the fluid nail art look yet? What do you think about this technique vs the other technique I used to get the same effect? I hope you've enjoyed this post, thanks for stopping by and Happy Polishing! 


Wednesday, July 12, 2017

6:00 AM

Fluid Nail Art - Desert Sunset


     Today I have a fun nail art look to share with you using a new technique. It's called fluid Nail art and is super easy to do. It's just a bit time consuming, but totally worth it. The finished look is a cross between a watermarble and a needle drag but with much less skill required. Seriously this look is so simple I'm kicking myself for not doing it earlier.


     What do you think? Pretty cool looking huh! And all it took to create this was some nail polish, a silicone mat and some time.

     The polishes I used for this look are Hidden Treasure, Paparazzi, Black and Blue, Haute Chocolate and Raisin the Bar from the Complete Salon Manicure line. All 5 polishes have a shimmer finish and a gemstone tone to them.


     To create this look I started by putting random drops of each polish on my mat making sure that they overlapped and covered about a 2in X 2in area. Once I was happy with the coverage I picked up my mat and tilted it side to side and back and forth until I was happy with how the polish mixed and flowed. Then came the hard part for me, patiently waiting for the whole thing to dry. Thankfully I got the bright idea to try this technique at about 11 pm so instead of sitting there watching my polish dry I went to bed. The next morning I added a layer of Sally Hansen Double Duty top coat and ran some errands while it dried. See what I mean about this technique taking some time...

      When I got back I was able to peel everything off my mat and cut it into nail sized pieces. A quick layer of Orly Bonder on my nails and I was ready for application.


     The toughest part about this manicure for me was the cleanup. The "decal" is a bit thicker than regular nail decals which makes them more flexible but also a little tougher to cut away the extra. And it doesn't help that my little nail scissors is pretty much on its last leg and the darker polishes wanted to stick to my cuticles. But I love the way this turned out and I will be trying this technique again with other color combinations.

     What do you think of my finished look? Have you tried the fluid nail art technique yourself? Also, don't forget to check out my previous post. There might be a prize in it for you if you do. Thanks for stopping by and Happy Polishing!

Like what you see? Share it with your friends!