Wednesday, September 28, 2016

6:00 AM

Leadlighting, Reverse and Advanced stamping. What are they and what's the difference?


     You hear a lot of terms in the nail art community. Cindy hand, glitter bomb, ruffian, smoosh manicure to name a few. If you're just starting out it can be a bit overwhelming. Heck even if you aren't a newbie some of these terms may still confuse you. For me, my biggest issue is remembering the difference between leadlighting and reverse stamping. And that got me thinking that maybe I'm not alone and a blog post might be helpful. So I sat down, did a bit of research, watched some youtube videos and asked questions. This  is what I found.


Leadlighting - is the technique of using transparent jellies, alcohol inks, or watercolors to color in open images stamped in a darker opaque polish. This can be done directly on the nail, onto a mat (Like making your own decal) or directly on the stamper head itself.  The effect is a stained glass look allowing you to "see through" to the base color. Below is an image of a leadlight manicure I created to wear to a wedding. 


     For this look, I opted to stamp directly onto my nails and then color in the flowers with a sheer yellow polish. (full details can be found in my Leadlight post

     Reverse Stamping- is a lot like leadlighting in the sense that you are stamping an image and filling in the open space. The big difference is that you are using opaque colors to fill in effectively covering up your base color. This technique can be done on a mat or a stamper and sealed with top coat. Once dry the image is peeled off, flipped over and placed on the nail. The easiest way for me to remember this is to think in terms of coloring in the opposite side of the image than what you will see in the finished manicure. I recently shared a reverse stamped look in my Queen of Hearts manicure. But my favorite reverse stamped look was a floral manicure I created for a Hobby Polish Bloggers link up. 
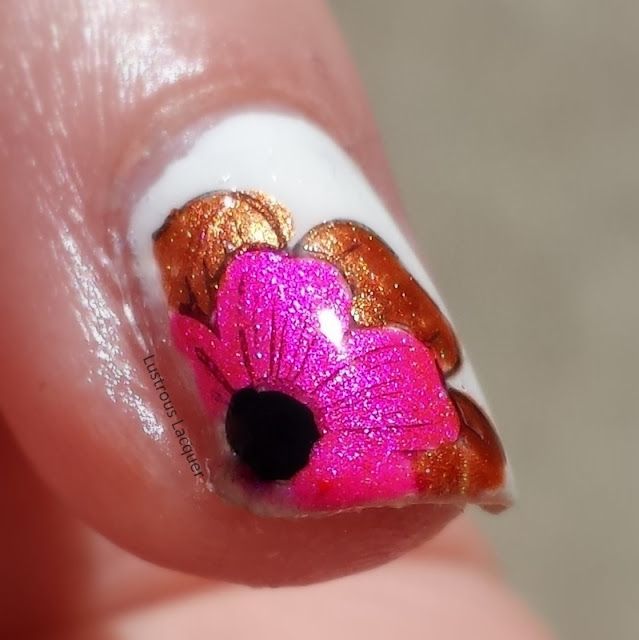

You can find all the details for the polishes, and image plate I used by following this link. Because you are filling in the back side of the image for this technique it can not be done directly on the nail. 

     Advanced Stamping - is a lot like reversed stamping but you do this one entirely on the stamper head. You start out by painting your nails the desired color, but do not apply top coat. Then stamp the image onto the stamper and color it in. Let the image dry for about 30 seconds. While the image is drying apply your top coat. Once your top coat is tacky to the touch,  firmly press your stamper onto the nail. 

     This is one technique that I have yet to try myself but I found a detailed blog post and a video for you to check out. Maybe it will help you decide if you want to try this technique out for yourself.

Blog Post: Advanced stamping by Didolines Nail & Co. There is a video linked within this post 

or check out the video

Video : Advanced stamping by Opal Hazlett I just love the butterfly she created. 

     I hope you found this post to be helpful and that I answered some of the questions you may have had. Have you tried any of these techniques? Which one is your favorite, or which one intimidates you? Let me know in the comments if there are any other terms or techniques you're unsure about and I'll do my best to answer your questions. Thanks for stopping by and Happy Polishing!


Sunday, September 25, 2016

9:00 AM

MoYou London - Layered Plates (Press Release)


     MoYou London looks like they are jumping on the latest stamping trend with their newest collection. At the beginning of the year everyone went crazy for the clear stampers and the layered images that could be created while using them. Not wanting to be left in the dust MoYou has created 5 image plates for our stamping needs. Check them out below.


Friday, September 23, 2016

1:38 PM

Cirque Colors -The Facets Collection and Fall/Winter release (Press Release)


     Cirque Colors is releasing 2 stunning collections for your shopping pleasure plus a huge giveaway! (Make sure you read all the way to the bottom for those details.) Muted cremes and sparkly jewels are just a few words to describe what Cirque has in store. Check out the swatches below.
Cirque Colors
Metropolis FW2016

Our long-running Metropolis Collection is a seasonal release of creme-finished lacquers inspired by New York City. This fall we introduce 6 sumptuous colors ranging from moody blue-gray to luscious milk chocolate rose. These "dusty" shades compliment a variety of skin tones and feature our distinctive smooth, opaque formula that applies in 2 easy coats.
Tanzanite
STORM KING
A light blue creme with gray undertones
(previously released)
Cosmopolitan
COSMOPOLITAN
A dusty orchid creme
Bond St
BOND ST
A bold berry red creme
Central Park After Dark
CENTRAL PARK AFTER DARK
A soft olive green creme
Dakota
DAKOTA
A blushing pink-nude creme
Fast Fashion
FAST FASHION
A medium tan-rose creme
The Facets Collection

The finest semi-precious stones are now at your fingertips (literally).

Introducing The Facets Collection: A limited edition release of 6 translucent "jelly" lacquers packed with sparkling holographic flakes. Inspired by a recent trip to the famedTucson Gem Show, these colors pack a punch in direct lighting, mimicking the sparkle and scintillation of these unique gemstones and minerals. Go bold with our eye-catchingTanzanite or romanticize your look with our peachy sweet Morganite.
Tanzanite
TANZANITE (LE)
Limited Edition: A brilliant "blurple" with holographic flakes
Morganite
MORGANITE (LE)
Limited Edition: A peachy pink with holographic flakes
Paraiba
PARAIBA (LE)
Limited Edition: An intense cyan-green with holographic flakes
Morganite
SMOKY QUARTZ (LE)
Limited Edition: A deep brown-black with holographic flakes
Garnet
GARNET (LE)
Limited Edition: An opulent burgundy red with holographic flakes
Dioptase
DIOPTASE (LE)
Limited Edition: A darkened teal-blue with holographic flakes
Retails for $13 each. Launching October 7 at CirqueColors.com. Check your local retailerfor delivery dates.
GIVEAWAY
Fall 2016 Giveaway
Want a chance to win one of our fall collections? We are giving away
5 sets of our Metropolis FW2016 Cremes and 5 sets our limited edition Facets Collection(that's 10 prizes total). For details, see our latest blog post and scroll down to access the raffle form.
Fall 2016 Giveaway
Ends Friday, Oct 7, 2016. Good Luck!

    Thanks for stopping by and Happy Polishing!
12:04 PM

Pretty & Polished - Fall 2016 Collection (Press Release)


     Today Pretty & Polished has released the 2016 Fall Collection. The collection consists of 10 polishes and is sure to have something for everyone. Check out the swatch photos below.

Pretty & Polished Fall 2016 Collection

This 10 piece collection has a little something for everyone! We have added to our Dusty Creme line as well as provided festive fall shades with flakes, glitter, and thermal color changing properties! 


Fuzzy Sweater
15 mL $8.50
6 mL $4.50


Dark Magic
15 mL $8.50
6 mL $4.50


I Done Plum Had It!
15 mL $8.50
6 mL $4.50

Patch
15 mL $7.50
6 mL $4.25


Creme de la Creme
15 mL $7.50
6 mL $4.25


Fall in Love a Latte
15 mL $9.00
6 mL $5.00


Lavendarling
15 mL $9.00
6 mL $5.00

Taupe Me Off and Leaf!
15 mL $8.50
6 mL $4.50


Heavy Metal
15 mL $8.50
6 mL $4.50


Riverside Drive
15 mL $8.50
6 mL $4.50

Get the full 10 piece Collection for $78 (qualifies for free domestic shipping) and get a free base coat and Fall nail stickers shipped with it! 


Don't forget to sign up for the Pretty & Polished Rewards on the website. You get 250 points automatically just for signing up!
And check out our Facebook Fan Group!


     Which colors are your favorite? Right now I'm eyeing up Fuzzy Sweater, Dark Magic and I done Plum Had It. Thanks for stopping by and Happy Polishing!

Like what you see? Share it with your friends!