
Oil Slick nails with Watermarble
Today I have some gorgeous nail art to share with you thanks to the amazing generosity of my very supportive fiance. He has told me several times that he'd like to pick up some polish for me but has no idea what I already owned. One day when he made this statement I casually threw out that I didn't own anything from Cupcake polish. Well, he took me at my word and ordered me the entire Luau collection and because his favorite color is purple a polish called Lilac You Mean It.which will have its day on my blog in the near future. But for now, I want to focus on the Luau Collection and how well it worked for water marbling.
You may have stumbled upon my previous post about oil slick nails from last year and be thinking why am I sharing this same look again. That answer is simple, the oil slick look is one that I'll never get tired of, and this is another way to get a similar look.

To create this look I started out by creating the water marble design using Cupcake polish The Tiki To My Heart, Hula Do You Love?, Sand By Me, Here Today, Gone to Maui, Be More Pacific and Lei Me Down. I didn't have a specific pattern in mind, I just sort of moved my toothpick in random lines until I liked what I saw.
I will mention that the polish wanted to dry quickly and I to move fast. I'm not entirely sure if that was because the polish is a bit thinner than your typical creme or if it was because I was working in a corner with a cold draft.
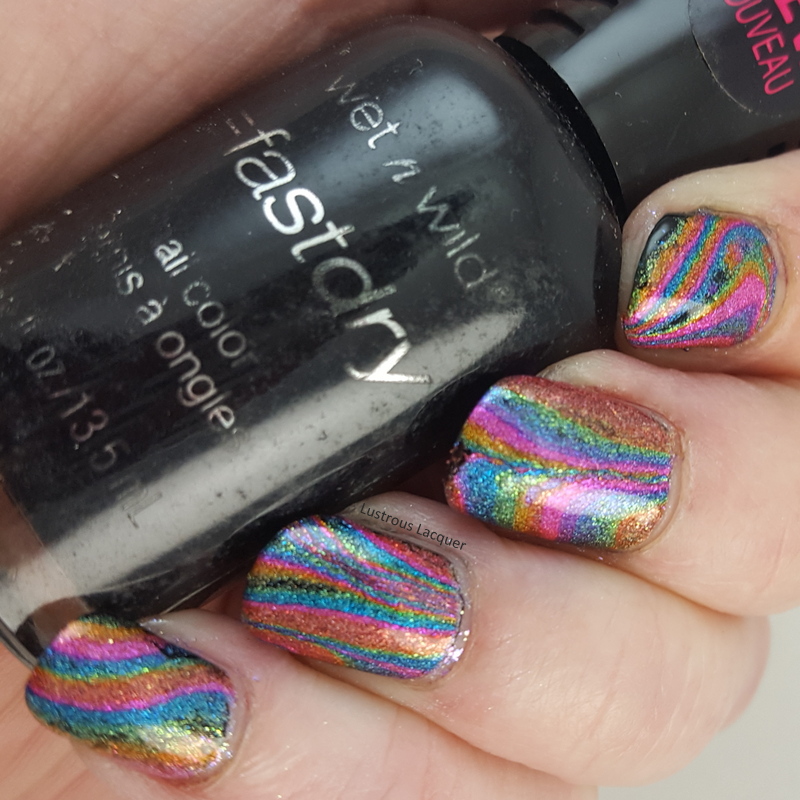
While I waited for my design to dry in the cup I applied my base color using Wet N Wild Ebony Hates Chris and a layer of top coat. My go to Quick Dry lately is Pure Ice's Girl on the Run. After about half an hour I removed the design from my cup and cut it into quarters.
Just a tip, I think a non-quick dry top coat is the way to go when doing this technique because I had a really hard time getting my water marbled "decals" to stick to my nails. After a few minutes of struggling I got it to work and thankfully I'm happy with the finished results.

Because my attitude lately is matte all the things I added a layer of MatterialGirl top coat from Blush Lacquers.

Now I know you shouldn't matte a linear holographic polish because you lose that signature rainbow flash but there was a method behind my madness. You've all seen those manicures that look like they have little droplets of water on them right. I've wanted to do one for awhile now but never seemed to have the right manicure until today.

I went in with my largest and smallest dotting tools and placed drops of my Glossy Girl on the Run top coat to create the water drops. As you can see that was not the best way to do this as some of the drops have dimples in them. But you still get the overall effect. The next time I try to create this look I will just use drops straight from the brush to see if I can avoid the dimples.
So now I've shown you two ways to create an oil slick look on your nails and id like to know which one you like best. Also if you have any tips on how to get the water drops to look like drops, or the decals to apply to my nails easier I'd love to hear them. Thanks for stopping by and Happy Polishing!


No comments:
Post a Comment