
Leadlighting, Reverse and Advanced stamping. What are they and what's the difference?
You hear a lot of terms in the nail art community. Cindy hand, glitter bomb, ruffian, smoosh manicure to name a few. If you're just starting out it can be a bit overwhelming. Heck even if you aren't a newbie some of these terms may still confuse you. For me, my biggest issue is remembering the difference between leadlighting and reverse stamping. And that got me thinking that maybe I'm not alone and a blog post might be helpful. So I sat down, did a bit of research, watched some youtube videos and asked questions. This is what I found.


Leadlighting - is the technique of using transparent jellies, alcohol inks, or watercolors to color in open images stamped in a darker opaque polish. This can be done directly on the nail, onto a mat (Like making your own decal) or directly on the stamper head itself. The effect is a stained glass look allowing you to "see through" to the base color. Below is an image of a leadlight manicure I created to wear to a wedding.

For this look, I opted to stamp directly onto my nails and then color in the flowers with a sheer yellow polish. (full details can be found in my Leadlight post)
Reverse Stamping- is a lot like leadlighting in the sense that you are stamping an image and filling in the open space. The big difference is that you are using opaque colors to fill in effectively covering up your base color. This technique can be done on a mat or a stamper and sealed with top coat. Once dry the image is peeled off, flipped over and placed on the nail. The easiest way for me to remember this is to think in terms of coloring in the opposite side of the image than what you will see in the finished manicure. I recently shared a reverse stamped look in my Queen of Hearts manicure. But my favorite reverse stamped look was a floral manicure I created for a Hobby Polish Bloggers link up.
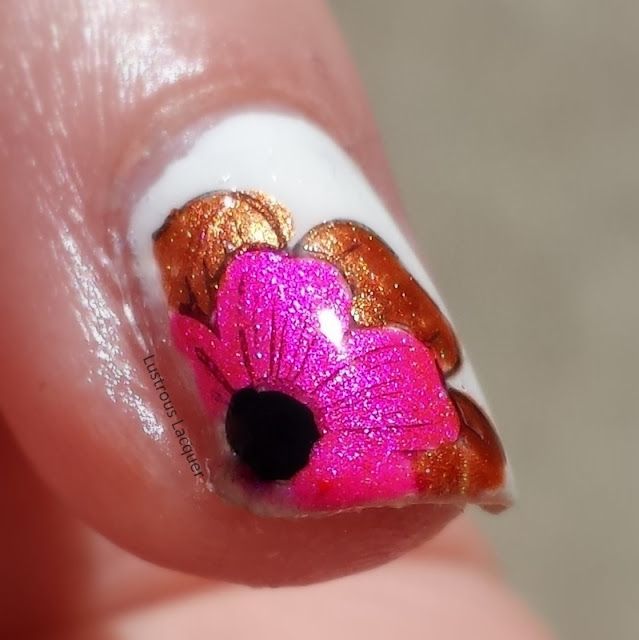
You can find all the details for the polishes, and image plate I used by following this link. Because you are filling in the back side of the image for this technique it can not be done directly on the nail.
Advanced Stamping - is a lot like reversed stamping but you do this one entirely on the stamper head. You start out by painting your nails the desired color, but do not apply top coat. Then stamp the image onto the stamper and color it in. Let the image dry for about 30 seconds. While the image is drying apply your top coat. Once your top coat is tacky to the touch, firmly press your stamper onto the nail.
This is one technique that I have yet to try myself but I found a detailed blog post and a video for you to check out. Maybe it will help you decide if you want to try this technique out for yourself.
Blog Post: Advanced stamping by Didolines Nail & Co. There is a video linked within this post
or check out the video
Video : Advanced stamping by Opal Hazlett I just love the butterfly she created.
I hope you found this post to be helpful and that I answered some of the questions you may have had. Have you tried any of these techniques? Which one is your favorite, or which one intimidates you? Let me know in the comments if there are any other terms or techniques you're unsure about and I'll do my best to answer your questions. Thanks for stopping by and Happy Polishing!


No comments:
Post a Comment