Friday, July 28, 2017

6:00 AM

OPI - Teal the Cows Come Home


     I've just got a quick post to share with you today as I'm sure everyone is anxious to start their weekends. I know I've got a laundry list of things to do and I'm hoping to throw some fun in there somewhere. 

      OPI's Teal the Cows come home is just one of the polishes I snagged back when Copious was a thing. Anyone remember when everyone was going gaga for Copious back in 2012? I was able to get tons of Klean Color polishes for just a penny and then they offered OPI duos for super cheap. I don't remember the exact price off the top of my head but I want to say it was under $10.


     Released in 2006 as part of the Brighter by the Dozen Collection Teal the Cows Come Home is a pale blue polish with iridescent shimmer. I can't quite tell though if the shimmer is a lighter shade of blue or silver. I know by now that's something I should be able to recognize right off the bat but this one has me stumped. It looks blue in one lighting and then I shift my hand and it looks silver. Either way, it makes this polish sort of sparkle subtly on my nails.


     The Application process was a breeze with the polish applying more opaquely than expected but I would still consider sheer. The formula was smooth with the polish flowing nice and evenly onto my nails and also builds up nicely. Shown here is 2 coats plus top coat.


     I decided to dress things up a bit and went for a little tone on tone stamping to see if I could get some nice contrast. I used the creative shop 02 plate and Heathers Hues Coruscate from the You've got to be Shiftin' Me Collection part 2.


     I like the contrast of colors, I just wish I wasn't in such a hurry when I did this. Then I would have gotten a much cleaner image when I stamped.  But I guess they can't all be masterpieces of nail art. That's all I've got for today. I hope you enjoyed this blast from the past polish. Thanks for stopping by and Happy Polishing!


Wednesday, July 26, 2017

9:10 AM

Laser Lace Nail Art


     Today I have a fun new product to share with you from Dollar Nail Art. It's called Laser Lace and when I saw it on their website I knew I wanted to try it. I thought to myself that I might finally be able to share a completely new product with all of you and ordered a sheet in every color. The pictures they showed looked absolutely stunning and unique to any of the nail art looks I've seen from others. Now I still might be able to share with you a brand new product but it's not an easy product to work with. Let's take a look.


    For my first look, I used the Raspberry Laser lace over a base of Sinful Colors Snow Me White. I wanted to do full coverage on an accent nail and then random pieces on each additional nail. Well, I did it but it didn't turn out how I wanted.


     For starters, the laser lace is extremely delicate and once it was cut into pieces it wanted to separate. So instead of getting nice little strips on my nails, I ended up with random splotches. I do like how my pointer finger turned out, it's almost like the veins in marble. Which if you've been reading my blog for the last year you'd know that's a look I love but haven't mastered yet.


     I wasn't ready to give up just yet so I decided to try the lace over a darker base just to see if it made a big difference.


     This time around I used Cult Nails Black Out as my base and the Sky Blue Laser Lace. Yes, I know it doesn't look blue at all, yet it did before I cut it into smaller pieces. I'm not sure exactly why it has changed. I thought maybe I applied it upside down but that wasn't the case. Either way, I do like the contrast between the lace and the black. But I am disappointed I didn't get the pale blue color.


     As you can see my second attempt was not a success. I think at this point I was getting frustrated, especially since my blue lace didn't look blue at all! 


     So here are some tips I learned while trying the Dollar Nail Art Laser Lace. I hope if you decide to try this product they will help you. Also, I should mention quickly that removal was easy. The lace came right off with regular remover.

 1. Have your pieces cut and ready to apply right after applying your top coat as it is not self-adhesive.
 2. Work on one nail at a time!
 3. Have a soft brush or similar item handy to push the lace onto your nail. That way you can avoid using too much pressure and ruining your base color.
 4. After applying the lace use a good top coat to cover it because there will be a LOT of texture. I recommend one made specifically for chunky glitter. If you don't own one it will take at least 2 thick coats of a regular top coat to smooth it out. And even then you'll still have aome slight texture.

      I definitely need more practice with this product. Maybe I'll have better luck when my nails are longer since I always seem to have trouble with nail art when my nails are nubbins. So what do you think of the laser lace? Do you have any other tips that might make my next attempt more successful? Have I scared you away from trying this product? Let me know in the comments and as always Thanks for stopping by and Happy Polishing!

Monday, July 24, 2017

8:59 AM

KBShimmer Summer Vacation Collection (Press Release)


     I don't know about you but it's been a long time since I've gotten really excited about a collection because it offered something unique. Sure there are those collections where you like the color, or you have to have because you collect the brand. But in my opinion, there hasn't been anything recently released that had quite as unique of feeling to it that the new Summer Vacation Collection from KBShimmer.

       KBShimmer Launches Summer Vacation Collection 

     School is out, the weather is hot, and it is pedicure season! Now that the countdown for summer is over, we are throwing back to the summers of our youth with 8 beach bag ready hues. These summer shades feature our innovative holo glow flake finish for perfect coverage in 2-3 coats. Each polish is filled with colorful shimmer, for shades that come alive on your nails. So grab your friends, load the cooler, and let’s head outdoors to celebrate summer vacation! 


Flock This Way –A raspberry pink shade with glowing holo flakes and a sizzling copper shimmer for a color that morphs into a deeper pink and coral in different lighting. Your tips and toes will never be more summer ready than in this flocking shade. 


Shady Beaches- The sand, the sun, the self-tanner mistakes, ah summer in collage was so much fun! A coppery orange shade, with our glowing holo flakes and rose gold shimmer, ready for any beach. 


Squeeze The Day- Squeeze The Day is a juicy yellow color inspired by pitchers of shockingly yellow drinks. We amped up this lemony shade with an orange leaning copper shimmer, and holo glow flakes complete this fresh squeezed look. 


Kiwi Real – There are days when you just crave those sweet summer salads filled with slices of oranges, strawberries, kiwis, and green apples. This juicy kiwi color shade is almost as refreshing as a fruit salad on a hot day. We filled this color with holo glow flakes. We added a pop of grass green colored shimmer for a really refreshing summer shade. 


No Wave! – Our nod to summer days spent in pools starts with a deep teal leaning turquoise base. We then loaded this polish with holo glow flakes and blue shimmer, for a splash worthy shade. 


Hashtag You’re It! –A vibrant indigo leaning grape, this purple polish is accented by holo glow flakes and a duochrome shimmer that flips from a inky blue, to a deep purple. Hashtag your posts, this is one polish you will want everyone to see! 


Berry Chill – Andorchid colored polish with holo glow flakes, and accented with a violet shimmer for a hue so vibrant, you will want to wear sandals year round! 


I’m Onyx –Filled with holo glow flakes, this onyx black polish features a color shifting shimmer of blue and purple that dances like lights in the sky, while the flakes emulate the stars that sparkle. This polish is our proof that there is beauty even in the dark. 

     KBShimmer’s Summer Vacation collection will be available July 28th, 2017 at KBShimmer.com, Amazon.com and select salons & retailers. 
     

     KBShimmer was founded in 2008 by the husband and wife team of Jason and Christy Rose. KBShimmer offers unique and colorful nail glitter nail polishes that are Big 3 Free, with all glitter formulas being completely free of chemicals such as toluene, form aldehyde, form aldehyde resin and dibutyl phthalate (DBP). KBShimmer glitter polishes feature a flat glitter- grabbing brush for easy application. KBShimmer also offers a 2-free quick dry polish topcoat, olive oil lotion, sugar scrubs, mani shots, and other hand care products. If you would like more information about KBShimmer, contact Christy Rose by emailing sales@kbshimmer.com or visiting http://www.KBShimmer.com

Monday, July 17, 2017

6:00 AM

Polish My Life - Pink Sandals


     At the end of last year, I decided to go on a no buy and start working through my polish stash so that I could get more of them featured on the blog. After all some people like seeing older polishes right? Well, I make this decision almost every year and every year I'm good about it for about a month or two and then I start buying polishes again. Needless to say, my list of untried polishes is probably double if not triple my list of tried polishes. That's where today's blog post comes in. Back in September of last year, I swatched Polish My Life's Pink Sandals from the 2014 A Time To Chill Collection. But the post kept getting pushed back and pushed back until today. Pink Sandals is finally having its turn on my blog and I hope you enjoy it even if the polish is no longer available for purchase.


     Pink Sandals is a very pale baby pink creme polish. It's a little pale for my personal taste but it does work well in nail art. In fact, I used it as my accent nail for my Pink Roses nail art look earlier this year.


     Remember when I mentioned that this collection was released in 2014? That's how long this bottle has been sitting in my helmer waiting to be loved. That length of time may have contributed to the issues I had with the application because I hear nothing but good things about this brand.

     For me, Pink Sandals applied streaky when I used thin coats and a bit goopy when I tried to use thicker ones. Thankfully the polish self-leveled so I wasn't left with a disaster on my nails. Shown here is 2 coats (1 thin and 1 thick) plus top coat. 


     How do you feel about pale shades like this? Are then something you gravitate to or like me are they not something that really appeals to you?  I'd love to know your thoughts in the comments and well as if you like seeing posts about older no longer available polishes. Thanks for stopping by and Happy Polishing!

Friday, July 14, 2017

6:00 AM

Sassy Sauce Polish- The launch


     Happy Friday Everyone! I made it through my first week back at work, just one more week to go and then it's back to summer vacation for me. That means no more setting alarm clocks and lots of time to paint my nails. Until school starts up again in September that is. Speaking of painting my nails, I was recently given the opportunity to paint them with a brand new indie: Sassy Sauce. And when I say brand new I mean brand new, you can't even buy her polishes yet, but you will be able to tomorrow. That's right the very first bottle of Sassy Sauce Polish will be sold at 11 am CST on July 15th. How exciting is that!

     Today I will be sharing 5 polishes from the inaugural launch with you but there are more to come. For today all polishes will be shown as 2 coats plus a layer of Sassy Sauce's personal top coat and photographed in my light box using daylight light bulbs.

Giltzie Pleasure


     Color: A coral colored base with gold and purple shift and purple holographic glitters. In most lighting, the base took on a rose gold hue.

     Application: I had a smooth application with even coverage and tons of the smaller glitters with each coat. I did need to do a little fishing for the larger glitters due to some settling in the bottle but nothing more than swirling my brush around inside the bottle to get them. 

     Finish: Dried with a slight texture due to all the glitter but not anything close to what I would consider a chunky texture. And all the glitters laid completely flat on the nail.


Charming Wench


     Color: A bright pinkish purple crelly base with Bright pink and copper glitters in various sizes.

     Application: Smooth even coverage with tons of glitter in each coat. There was no fishing for glitter required with this one and all the glitter laid flat against the nail. 

     Finish: Dried to a smooth finish.


Savage Deviant


     Color: Medium neon pink with tiny blue glass flecks.

     Application: Effortless application and extremely opaque on the first coat. Heavy coverage with the glass flecks for each coat.

     Finish: Dries to a smooth glass like finish. 


Dorothy's Dark Side


     Color: Red jelly base jam packed with black and holographic glitters.

     Application: Amazing coverage and very opaque coverage for a jelly. Amazing glitter coverage in each coat and no VNL after 2. You don't get that often with a jelly polish!

     Finish: Dries to a smooth glossy glass like finish. 


Bitter Break Up


     Color: Black jelly based polish with a smattering of red glitters.

     Application: Smooth flowing formula with very even coverage and amazing opacity. I did have a slight VNL after 2 coats but I had to really look for it. Sadly because the base color is so opaque you do lose a lot of the red glitters.

     Finish: Dries to a smooth glossy glass like finish.


     Now at the beginning of this post, I mentioned using Sassy Sauce top coat for all my swatches. At the time of writing this post, that top coat has no official name but I believe it was being called Sassy Top Sauce. Well weather it has an officialy name or not I was really impressed with it. Not only did it dry quickly for me but it was extremely glossy and smoothed out the texture of Giltzie Pleasure with 1 coat. I was sent a sample sized bottle to test out and will be picking up a full sized bottle when the shop officially opens.

     Out of the 5 polishes I've shared with you today Dorothy's Dark Side is my hands down absolute favorite. Which surprised me because I wasn't so sure what I thought about it when looking at the bottle. I'm a tad disappointed with Bitter Break Up because you lose so much of the red glitter in that black base. I was impressed with the formulas on all the different finishes and can't wait to watch the rest of the colors to share with you. Out of these 5 which one is your favorite?

     Sassy Sauce Polish will officially open for business at 11 am CST on July 15th and polishes will be $8.50 for a full sized bottle. Thanks for stopping by and Happy Polishing!

Sassy Sauce Information
Store: https://sassysaucepolish.com/
Facebook: https://www.facebook.com/sassysaucepolish/
Instagram: https://www.instagram.com/sassysaucepolish/
Fan Group: https://m.facebook.com/groups/110224172936324

Wednesday, July 12, 2017

6:00 AM

Fluid Nail Art - Desert Sunset


     Today I have a fun nail art look to share with you using a new technique. It's called fluid Nail art and is super easy to do. It's just a bit time consuming, but totally worth it. The finished look is a cross between a watermarble and a needle drag but with much less skill required. Seriously this look is so simple I'm kicking myself for not doing it earlier.


     What do you think? Pretty cool looking huh! And all it took to create this was some nail polish, a silicone mat and some time.

     The polishes I used for this look are Hidden Treasure, Paparazzi, Black and Blue, Haute Chocolate and Raisin the Bar from the Complete Salon Manicure line. All 5 polishes have a shimmer finish and a gemstone tone to them.


     To create this look I started by putting random drops of each polish on my mat making sure that they overlapped and covered about a 2in X 2in area. Once I was happy with the coverage I picked up my mat and tilted it side to side and back and forth until I was happy with how the polish mixed and flowed. Then came the hard part for me, patiently waiting for the whole thing to dry. Thankfully I got the bright idea to try this technique at about 11 pm so instead of sitting there watching my polish dry I went to bed. The next morning I added a layer of Sally Hansen Double Duty top coat and ran some errands while it dried. See what I mean about this technique taking some time...

      When I got back I was able to peel everything off my mat and cut it into nail sized pieces. A quick layer of Orly Bonder on my nails and I was ready for application.


     The toughest part about this manicure for me was the cleanup. The "decal" is a bit thicker than regular nail decals which makes them more flexible but also a little tougher to cut away the extra. And it doesn't help that my little nail scissors is pretty much on its last leg and the darker polishes wanted to stick to my cuticles. But I love the way this turned out and I will be trying this technique again with other color combinations.

     What do you think of my finished look? Have you tried the fluid nail art technique yourself? Also, don't forget to check out my previous post. There might be a prize in it for you if you do. Thanks for stopping by and Happy Polishing!

Monday, July 10, 2017

6:00 AM

Quick Giveaway (Closed)


     A while back I ordered a grab bag from Lollipop Posse Lacquer and a few of the polishes I already owned. So my loss is your gain! I decided that I'd do a quick little giveaway rather than let them sit around gathering dust on my shelf. 


     The Polishes I'm giving away are Prism Perfect and The Get-Fresh Flow. Both bottles are completely brand new. I only opened them to check the brushes.

*PLEASE READ CAREFULLY*
     This giveaway will run from 7/10 to 7/21 and is open to U.S residents 18 or older.  Once A winner is chosen you will have 24 hrs to respond to my e-mail to claim your prize. If I don't hear from the winner after 24 hrs a new winner will be chosen. This giveaway is being run through raffelcopter and entries can be done using the raffelcopter widget below.
     

a Rafflecopter giveaway

     Good Luck, Thanks for Stopping by and Happy Polishing!

**Giveaway Closed**

Friday, July 7, 2017

6:00 AM

Sinful Colors - Get Bright Back to School Collection


     As you may have noticed I'm a big fan of Sinful Colors nail polish. One glance at my Collection page will show you that I easily have twice as many Sinfuls as I do other brands. Not only are they very wallet friendly but they have a wide variety of colors and finishes. Plus they release new collections every few months.  

     This summer they have released 2 collections with Back to School themes, The Get Bright Collection and the School Goals Collection. I'll be sharing the Get Bright collection today.  This collection contains 6 neon pastel shades with a matte finish. All photos are shown as 2 coats without top coat or undies and photographed in my lightbox. Some of the colors were very hard to photograph with color accuracy. Because of this, I had to use a variety of lighting setups which caused a few of my photos to be a bit on the dark side or blurry. But the polish is the correct color!

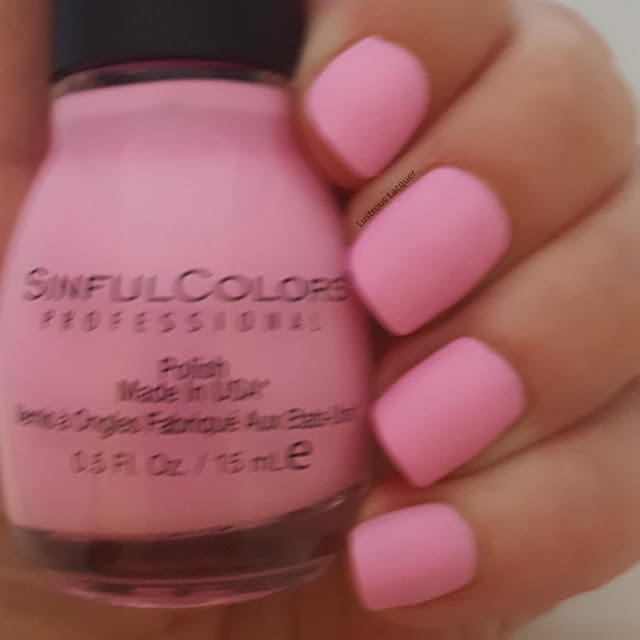
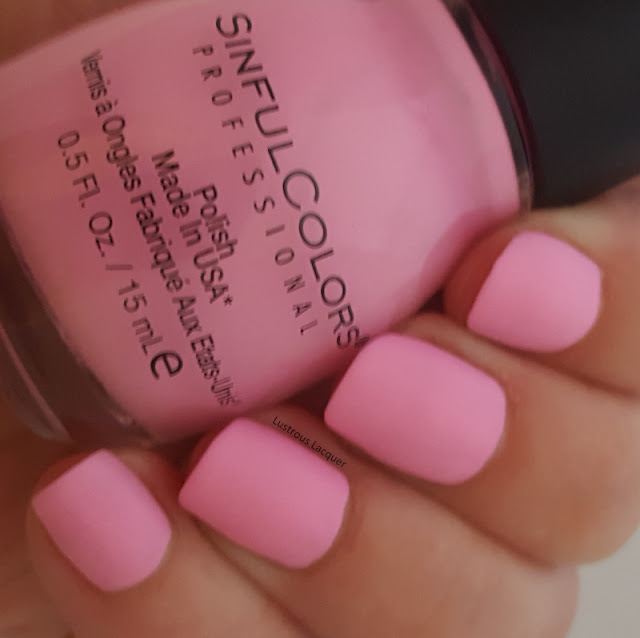
Make a Scene

Bubble-gum-pink-nail-polish-with-a-matte-finish

     Color: Bright bubblegum pink creme nail polish.

     Application: The formula for Make a Scene is a bit thick which caused the application to be a bit streaky on the first coat. I have come to expect a streaky application from most neon polishes, even the pastel kind so that wasn't a huge negative for me. You will want to make sure to use multiple strokes on the same nail to avoid dragging. Full opacity and an even finish were reached after 2 coats.

     Finish: Dries to a rubbery matte finish.

Bubble-gum-pink-nail-polish-with-a-matte-finish

Bubble-gum-pink-nail-polish-with-a-matte-finish

     I really like the color on this one even though the application was a bit troublesome. It reminds me of Lime Crime Parfait Day but without the glossy finish. And I do have a weakness for pink nail polish.

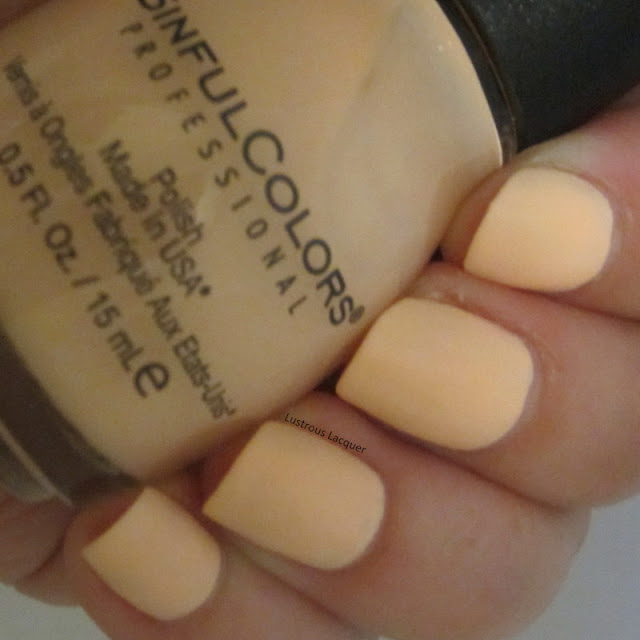
In Your Elemelon

Peach-nail-polish-with-a-matte-finish

     Color: Pale peach creme nail polish.

     Application: The formula was a little bit easier to work with than Make a Scene but I still had a few streaks on the first coat. Again I would avoid multiple brushstrokes on one nail to avoid dragging. A smooth fully opaque finish was achieved after 2 coats.

     Finish: Dries to a rubbery matte finish.

Peach-nail-polish-with-a-matte-finish

Peach-nail-polish-with-a-matte-finish

     In Your Elemelon reminds me of orange sherbet and just looked yummy on my nails.  This one was the hardest to photograph. My camera kept washing it out and making it look more yellow than it really was. The macro shot is the most color accurate. This color reminds me of Bleached in Peach from the Maybelline Bleached Neons Collection released in the summer of 2014.

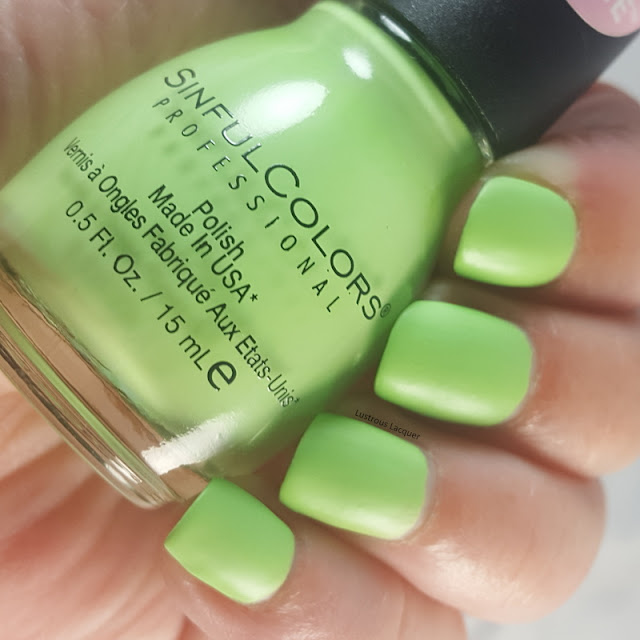
Acid Test

Vibrant-pistachio-Green-nail-polish-with-a-matte-finish

     Color: Pistachio Green creme nail polish.

     Application: The formula of Acid Test was an odd combination of being thick yet super streaky on the first coat. Again try to avoid multiple brushstrokes to prevent dragging. Full opacity and an even finish were reached after 2 coats. Shown 2 coats without top coat.

     Finish: Dries to a rubbery matte finish.

Vibrant-pistachio-Green-nail-polish-with-a-matte-finish

Vibrant-pistachio-Green-nail-polish-with-a-matte-finish

     This was a fun color to wear for me. I know bright green isn't for everyone and I'm not sure I would wear it completely on its own on my fingers but definitely for a summer pedi. 

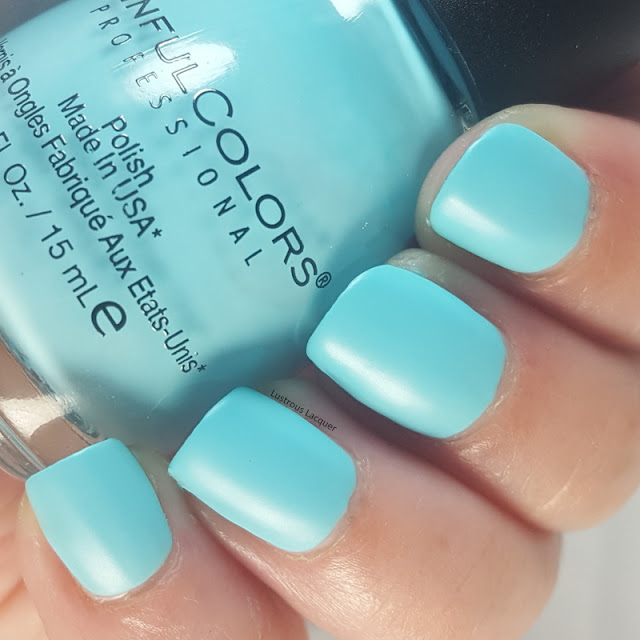
Under the Inbluence

Robin-egg-blue-nail-polish-with-a-matte-finish

     Color: Robin's Egg blue creme nail polish.

     Application: A better formula than the others in the collection by far but still a tad streaky on the first coat. While seeming to self-level on the first coat a completely smooth and opaque finish was reached after 2. Shown 2 coats without top coat. 

     Finish: Dries to a rubbery matte finish


Robin-egg-blue-nail-polish-with-a-matte-finish

Robin-egg-blue-nail-polish-with-a-matte-finish

      While being a gorgeous shade of blue this one didn't really do anything for me. I can't see myself reaching for it very often.

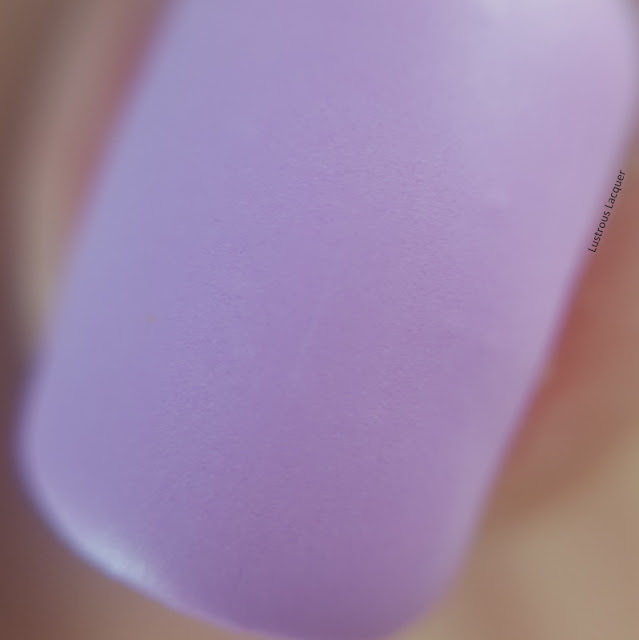
Lilac Out Loud

Muted-pastel-neon-purple-nail-polish-with-a-matte-finish

     Color: A perfect lilac purple with just a hint of pink.

     Application: Smooth even application with the best formula of the collection. Absolutely no streaking with the first coat and extremely opaque. Lilac Out Loud could almost be considered a 1 coater.  Shown 2 coats without top coat. 

     Finish: Dries to a rubbery matte finish.

Muted-pastel-neon-purple-nail-polish-with-a-matte-finish

Muted-pastel-neon-purple-nail-polish-with-a-matte-finish


     You know from my previous post on Cupcake Polish Lilac You Mean it I love all things lilac. This is my favorite color in the Get Bright collection and I can see myself wearing it quite a bit. Especially in the summer months when I want something bright and fun on my nails. 

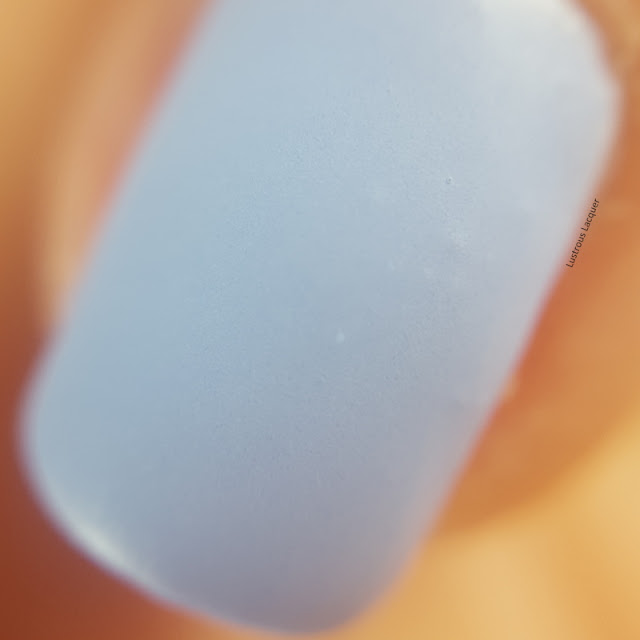
Quick Study

Muted-pastel-coneflower-blue-nail-polish-with-a-matte-finish

     Color: Muted coneflower blue creme nail polish. 

     Application: Easy application with a smooth effortless formula. I did experience minimal streaking on the first coat but it was almost more like the polish was sheer than actual streaking. 

     Finish: Dries to a rubbery matte finish

Muted-pastel-coneflower-blue-nail-polish-with-a-matte-finish

Muted-pastel-coneflower-blue-nail-polish-with-a-matte-finish

     This is another color from the collection that I really liked. I'm not sure I have anything else in my collection that's quite like it. 

     The Get Bright collection has been popping up at Walgreens stores all over the country although it seems to be taking its time getting into all of them. I actually went to 2 different stores over an hour away to find them. At the first one, the associate told me their displays were on back order and I guess I lucked out because I found mine at a different store 3 miles away from the first one. While the formulas in this collection are not ideal I'm still glad I picked it up. The polishes are fun colors and I'm pretty sure they will work well for watermarbling. Do you have a favorite color and will you be on the hunt for this collection? Thanks for stopping by and Happy Polishing!


Like what you see? Share it with your friends!