Thursday, April 26, 2018

6:00 AM

Contrary Polish - The Juice Fiend


     Today I've got a polish to share with you from Contrary Polish which was released for the November Polish Pickup Fandom theme.  The inspiration for this polish is Buster from the show Arrested Development. I have to be honest here and let you know that I've never watched the show. But it did inspire one gorgeous polish.

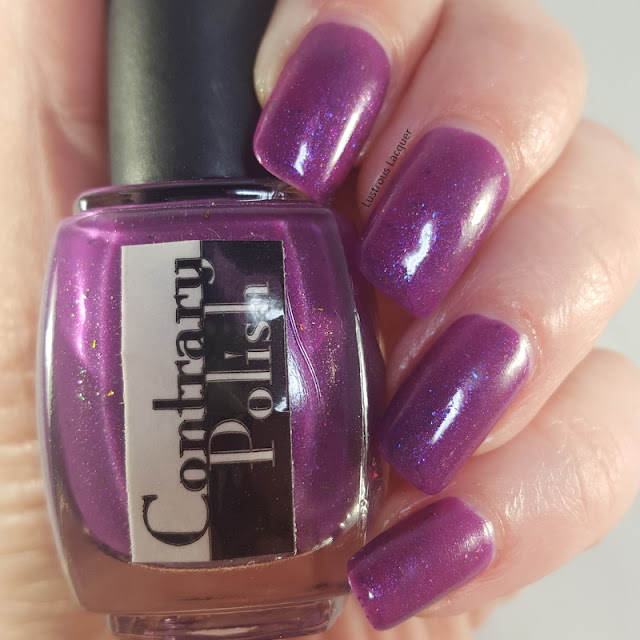
Purple jelly base with scattered magenta flakes and blue micro shimmer nail polish

    The Juice Fiend has a purple jelly-like base filled with scattered holographic flakes and blue micro-shimmer.

     This is my first polish from Contrary Polish and I have to say that I was pleased with what I experienced. The formula what I typically experience with a nail polish. The first coat applied thinly and was a bit patchy like a lot of jelly polishes are. The Juice Fiend builds up nicely and has even coverage after two coats. Shown here is two coats plus top coat.


     The purple jelly base, the beautiful blue shimmer, and the holographic flakes add depth and Character to this polish. In fact, there are so many aspects to this polish I had a hard time capturing them all on film. 


     I have since ordered a few more polishes from Contrary Polish but I have a feeling The Juice Fiend will always hold a special place in my heart. Thanks for stopping by and Happy Polishing!

Tuesday, April 24, 2018

6:00 AM

Neutral Nail Art


    Sorry for my little absence last week. I got home from my vacation to find out we had a death in the family and I was busy taking care of the details which didn't lead to much social media time. And to be honest I'm still dealing with everything and not back to my old blogging self which will make today's post another quick one.  Today I've got some nail art that is neutral enough to wear to work to share with all of you. 


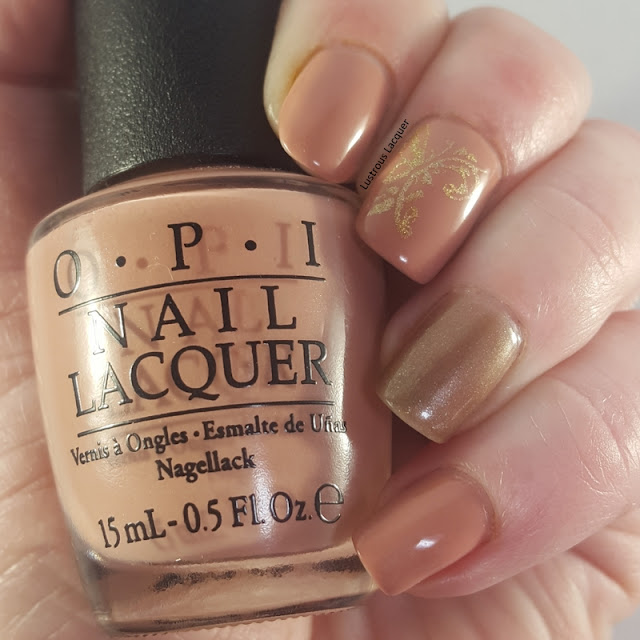
     For this look, I started off with a base of OPI Dulce De Leche from the South American Collection released in the summer of 2002. My accent nail is done with Stella from 77 Nail Lacquer which was part of their advent calendar for 2017. I really like the way these colors work together. 


         I did the stamping using Hit the Bottle A Glint of Gold with a stamping plate from My Online Shop GPS - stamping #5. 

     I have to admit that when this manicure was first finished I wasn't a huge fan. I thought it was boring and a bit blah but as I wore it it started to grow on me. What do you think of today's look? Is it something you'd wear? Thanks for stopping by and Happy Polishing!

Tuesday, April 17, 2018

6:00 AM

Untried A-Z Challenge Letter H


     We are up to the eighth week of the Untried A-Z challenge and that brings up to the letter H. What is the Untried A-Z challenge? Well, it's simple really, every other week we share a polish that corresponds with the appropriate letter. You can go be the brand name or polish name, share one polish or more. Really it's just a laid-back way to work through your untried polish and have a little fun doing it. I opted to go in alphabetical order as a way to help narrow down which untried polish to use since I often have a hard time picking out which polish I want to wear. This challenge is open to anyone who wants to participate, and you can do as many or as few prompts as you'd like. Now let's get letter H week started. 


     Once again I'm switching things up and sharing more than one polish with you today, in fact, I've got 3 polishes from Milani and two nail art looks for today's post! 

Hot Orchid
     
Medium pink metallic nail polish with subtle silver shimmer

     Hot Orchid is a medium pink metallic polish with a subtle silver shimmery micro glitter. This polish was released in 2012 and I believe was part of the core line. 

Medium pink metallic nail polish with subtle silver shimmer

    The formula for Hot Orchid has a nice consistency, it applied smoothly and evenly with a nice opacity on the first coat. Shown here is 2 coats plus top coat.

Medium pink metallic nail polish with subtle silver shimmer

      Hot Orchid is a highly pigmented polish but like most metallic polishes suffers from brushstrokes. Thankfully they are minimal and don't distract from the pretty color. You can also avoid the brushstrokes by using the tip I shared in my recent review of the Pastel City Collection from Orly

Hi-Tech

Spring green scattered holographic nail polish

     Hi-Tech is a spring green scattered holographic nail polish released in 2012 as part of the 3D Holographic collection. 

Spring green scattered holographic nail polish

     The formula on this is a little thin but applies evenly on the nail. The first coat was a bit on the sheer side but Hi-Tech builds up nicely and full opacity was reached after two coats. Shown here is two coats plus top coat. 

Spring green scattered holographic nail polish

     While this polish doesn't have a strong holographic flash it still packs a pretty punch. While I tend to wear more traditional nail polish colors I actually like this one and can see myself wearing it during the warmer months. 

Hi-Res

lilac purple scattered holographic nail polish

     Hi-Res is a lilac purple scattered holographic nail polish. It was also released in 2012 as part of the 3D Holographic collection. 

lilac purple scattered holographic nail polish

     Just like Hi-Tech, Hi-Res has a thin formula but even coverage. Once again I had a sheer first coat but nice buildability. Full opacity was reached after two coats. Shown here is two coats plus top coat. 

lilac purple scattered holographic nail polish

     This is a bit light for my personal tastes but I still think its a pretty color. I feel like the holographic flash is just a bit stronger in Hi-Res than it is in Hi-tech but still wouldn't consider it a strong flash. 

     After swatching these polishes I noticed how nicely they seemed to flow together and wanted to try them out in a gradient. 


      Because of the thinner formula of the holographic polishes the gradient ended up being very subtle. I used Hi-Tech as my base color which caused Hi-Res to look more silver than purple. 


     Of course, I couldn't stop there, so I added some stamping using the marble paradise 01 plate from Pueen and Straight Up Black from Bundle Monster.


     Straight Up Black is an intense stamping polish! It's a bit thicker than my other stamping polishes and I found that I needed to cover more of the image before scraping to get the image fully covered. The messy pointer finger is because I was impatient when taking photos and smudged it rather than a result if the image plate or polish used. 


     What did you think of my letter H polishes, do you have a favorite? Remember this challenge is open to anyone and everyone so please feel free to join in! Did you review a polish from Heather's Hues this week, feel free to add it to the link up! I'd love to get the word about this challenge out more so others can join. Thanks for stopping by and Happy Polishing! 


Thursday, April 12, 2018

6:00 AM

Purple, Green and Blue Drip Marble Nail Art


     Hey everyone, I've got a quick post to share with you today. And I do mean quick, I just got back from vacation and walked in my front door 20 minutes ago and I am exhausted and ready for bed! But I had to share my latest drip marble creation with all of you before drifting off to dreamland. 


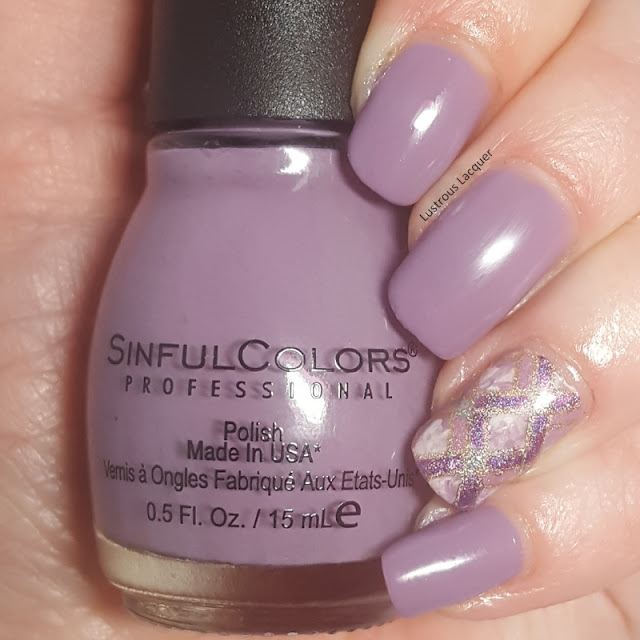
     To create this look I reached for the newly released colors from Sinful Color. There are actually 6 different colors here but a few of them were overpowered but the darker shades and didn't really show up.

     The polishes I used are Rave New World, Positive Vibes from the Target LE tri, Sassy Lassie from this year's St. Patrick's collection, Unicorns R Real, Coco Bae and Forbitten Fruit which are core line additions this year. 


     Just like my previous drip marble manicure, I opted to show this one both glossy and matte. I honestly can't decide which look I like better. Although the glossy version is slightly ahead of the matte look for me on this one. 


     Although this look turned out a bit darker than I was expecting I'm still very happy with the results. This technique is quickly becoming one of my favorites. Have you tried this technique yet? Do you like the glossy or matte version better? That's all I've got for you today, now it's tie to unpack and settle in because I have a feeling reality is going to hit hard tomorrow. Thanks for stopping by and Happy Polishing! 


Tuesday, April 10, 2018

6:00 AM

Supermoon Lacquer - Moon Crystal Power


    Today on the blog I've got my thoughts on Moon Crystal Power from Supermoon Lacquer. I recently used this polish is my art deco nail art and as promised, now I'm showing this beauty all on its own. 

     Moon Crystal Power was released in January in the Polish Pickup Pack as part of the Crystals and Gemstones theme. If you haven't checked out Polish Pickup yet I highly recommend that you do. It's a great way to discover new brands and have a variety of polishes available for one flat shipping rate. I've got the basic information in my review of Northern Star's Scream of Nature post from the very first month PPU was available. The group has grown quite a bit since then and now offers nail polish, nail care items and jewelry from 70 different makers! I've picked up a few cuticle balms and oils, a sugar scrub, wax melts and a shot glass over the last year. I've gotten off topic though so now it's back to the polish.

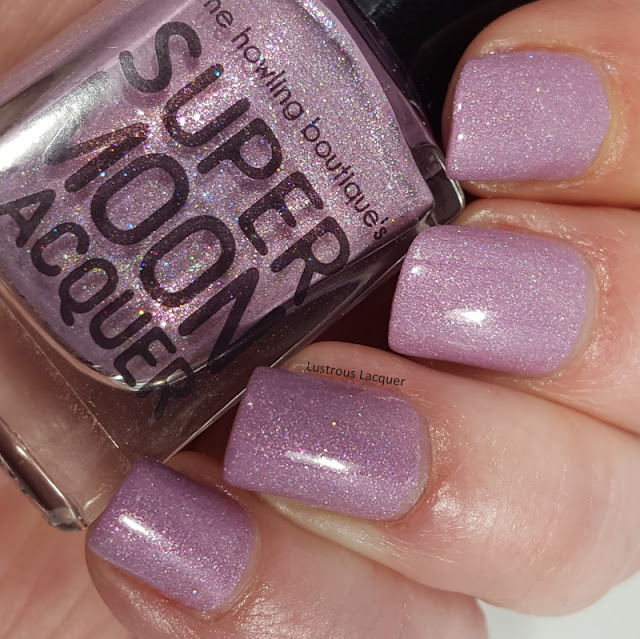
Pale lilac polish with holographic falkes

     Moon Crystal Power is a pale lilac polish with a pink undertone and scattered holographic flakies. Mardi's inspiration was the Maboroshi no Ginzuishou (illusionary Silver Crystal) from the anime Sailor Moon. 

pale lilac nail polish with holographic flakes

      The Formula for Moon Crystal Power is perfection. The polish applies smoothly and evenly with a nice opacity on the first coat. It's not quite a one coat polish but its pretty darn close. Full opacity was reached on the second coat. I felt just a hint of texture on my nails once the polish dried but it was nothing that a little top coat couldn't take care of. Shown here is two coats plus top coat.

Pale Lilac nail polish with holographic flakes

     This is my first polish from Supermoon lacquer but it won't be my last. I was really impressed with the formula and I absolutely love the color.  I'm actually wearing it on my toes as I write this. Mardi has mentioned bringing back every polish she's ever made and releasing them sometime this summer. What I want to know from you is, which Supermoon lacquer is your favorite and should be added to my wishlist? Be sure to come back on Thursday to see my latest drip marble creation. Thanks for stopping by and Happy Polishing!


Thursday, April 5, 2018

6:00 AM

Watermarble manicure featuring Bee's Knees Lacquer


     Hey everyone, I've got a quick post to share with you today featuring a watermarble I did with a few polishes from Bee's Knees Lacquer. You might remember I recently reviewed Which Witch Trial? and I'll be using that polish again in today's look.  


       Last November my daughter was playing around making watermarble designs and I'd just received my order of Bee's Knees polishes. Yes, you read that right, I originally did this look in November and am just now getting around to sharing it. Anyway, after she was finished creating her designs I decided to see if my new polishes would work in a watermarble this is the results. 

     
     I used the Illuminating base coat from Sinful Colors as my base and Bee's Knees polishes in Which Witch Trial?, House on Haunted Chill and Salty Anon for the design. Because I was just playing around I dipped all 4 fingers in at once which caused the design to get a little messy and filled with bubbles, but I still like the results. By the way, I wouldn't recommend dipping all 4 fingers at once. It did save a little time but not enough to sacrifice the finished look.


     What do you think of the end results? That's all I've got to share today, now I need to go finish packing for my first trip to Las Vegas. We are flying out this weekend for a friends wedding and I can't wait! WHich reminds me I'll still be in Vegas when my post goes live on Tuesday. I won't be able to do much sharing of that post because that's the wedding day but I'd love it if you all came back for that and if you like what you see give it a share. You can share it easily by using the buttons located all the way down at the very bottom of my post. 

    I've got one last bonus shot to share with you before I go.  This one was taken in the sun and really shows off all the sparkle. Thanks for stopping by and Happy Polishing!


Tuesday, April 3, 2018

6:00 AM

Untried A-Z Challenge Letter G


     It's the 7th week of the Untried A-Z Challenge and that brings up to the letter G. This week I've gone back to the mainstream side of things with a polish from Jordana. Now I'm not even sure if Jordana still exists because I never hear anything about them and the only store I ever found their products in has closed almost all of the locations in Minnesota. 


     Good Luck Charm fit's this weeks theme in two ways, not only does the name of the polish start with the letter G but the color does also. Any guesses as to what color it might be? Well with a name like Good Luck Charm it has to be green.


     This Granny Smith Apple green polish is packed with green shimmer and has a jelly finish.  Originally when I purchased this 5 years ago the shimmer is what caught my attention. 


     The formula is nice and smooth with an even application but that's about all the good things I have to say about this polish. It is so sheer and builds up very very slowly. The first coat looks yellow and has a distinct VNL. After two coats you are left with a yellow tint and thin coverage. 

     By the third coat, you start to get a hint of green but a bug VNL. The fourth coat starts to build up the opacity and the fifth gives a nice green color and 98% coverage. Yes, you read that right, 5 coats! At this point, I was done with this polish, 5 coats is more than any polish should need in my opinion. And I say that with the knowledge that this wasn't advertised as a sheer tint or topper but a polish to be worn like any other regular polish. 


     While I am a bit disappointed in this polish I'm not ready to count it out yet. I want to try it as a tint rather than a regular polish. I think it might work for leadlighting but that's only if the green will show through and not look yellow. It might also work for pond manicures so I'll have to give that a try also. What are your thoughts about this color and the fact that it takes 5 coats? That's all I've got for you today, but be sure to check out the other G polishes from this week. Thanks for stopping by and Happy Polishing!


Saturday, March 31, 2018

8:49 AM

LynBDesigns Easter Sale (Press Release)


With the code BUNNY everything in the store is 50% off through Tuesday

It's Easter weekend and I can't have candy. That means I want to shop. So let's have a sale.

-With the code BUNNY everything is half off through Tuesday. Buy any three polishes and get a free mystery gift with your purchase. 
-The April polish of the month is live now in the store. It's inspired by diamonds and is a perfect layering polish.
-The entire Us Against the World collection has been restocked and is also included in the sale.
Start Shopping

Group Custom

Shop this gorgeous wine themed custom polish now in the store. Must be a member of LynB Loves to purchase.

It's April, Check out the POTM

We have a polish of the month for each birthstone of the year. This month is Diamond

Thursday, March 29, 2018

6:00 AM

Lustrous Lacquer's Quarterly Favorites Round-up


     I've decided to try a new feature on my blog this year in the form of a round-up. Every three months I'll look back and share some of my favorites looks from those months. This way I will be able to really see how I've progressed as a nail artist and also see if I tend to lean more towards one technique or do a good job of mixing them up. I haven't decided yet if I'll just do nail art looks or incorporate swatches also. I'm kind of doing this on the fly and hoping for the best. So, what are my Favorite looks from January, February, and March? Let's take a look.


    January started off with some nail art featuring the Orly Darlings of Defiance Collection. While I created two looks for that post one really stuck out in my mind. The gradient I created using Penny Leather and Champagne Shushe.


     There was just something about this color combination that I really liked. This combination was also a bit out of my comfort zone and I'm proud of the fact that I'm starting to branch out a bit. Even if it is just a small amount. More photos of this look can be found in my Nail Art with Orly Darlings of Defiance post. 

     January also saw the start of the Untried A-Z Challenge, another new series for my blog this year that I hope you are all enjoying. I've mixed things up a bit with this challenge and have done some swatches, shown two polishes and shared a bit of nail art. My next favorite look is from the second week of the challenge, Letter B week


     This is some of the cleanest, crispest stamping I have ever done and that is the reason I've chosen this as one of my favorites. Not to mention I have a little obsession with geometric nail art right now. I've gotten away from sharing nail art in the latest posts of the Untried A-Z challenge but will be getting back into it as the challenge progresses. Speaking of the Challenge, next week starts letter G week and I'd love to see more people participate. This is a come and go kind of challenge where you can do as many or as few prompts as you like so feel free to join in. Even if you didn't mention the challenge in your post but used a polish with a G in the brand name or polish name add it to the link up! Help me get the word out and let's get through those untried polishes together. 

     February was a short month but I was still able to squeeze in a few different looks and some new techniques. I started out with a technique I'm very comfortable doing and ended with one I've been trying to master for years. This first look was my Groundhog Day prediction manicure which sadly turned out to be wrong and winter is still hanging on.


     I am full on head over heels in love with this look. I love the bold vampy base color, I love that it's got flowers, the contrast between the gold and berry wine is gorgeous and I want to wear this look again. Plus it was so easy to do using the advanced stamping technique. It is my absolute favorite look so far this year. 

    This next look while not quite as pretty as my floral image is one that I am very proud of. For years I've been admiring the needle drag manicures that pop up in my news feed, and have attempted the technique a handful of times with horrific results until now. 


     This was the first look I created for Valentine's Day and my first successful needle drag manicure. I know it's not much but for me finally getting this technique to work was huge! What was the secret to my success? You'll have to read the original post to find out, I'm not giving away all my secrets today. 

      I haven't attempted to do another needle drag yet this year but have a few ideas in mind, plus I'd like to do a full hand look instead of just the accent nail. And I think colors with a bit more contrast will give a more interesting look.

     The beginning of March brought a lot of green nail polishes to my blog for St. Patrick's Day and has ended with some softer shades and we ease into spring. I have to giggle at the "ease into Spring" part because as I'm writing this post they are predicting another 9 inches of snow to fall tonight. Hopefully, it will all be melted when this post goes live. *Fingers crossed*


     My first look from March is the drip marble I did for St. Patrick's day. I shared this look is both a glossy and matte version. While I like both looks the matte version won my heart and is my second most favorite look so far this year right behind the Ground Hog day floral. 

     Finishing up my quarterly favorites is the art deco look I shared last week. This was a blogger meet up manicure featuring the reverse stamping technique and my second geometric manicure this year. Did I mention I have a slight obsession with geometric manicures?


    This is the first manicure I can remember doing where I mixed two different techniques on one nail. The first being a smoosh manicure and the second a reverse stamped look. I really like the classy, elegant feel this accent nail has which is why it made it into my top 6 looks this year. mixing two techniques together is a great look and need to remember to do this more often. I know gradient and stamping are commonly mixed together but I have yet to do a manicure like that. Maybe I'll have one in my next quarterly favorites post? 

     I hope you enjoyed this look back at the first 3 months of blog posts.  I hope a few of you decide to join in on the Untired A-Z Challenge, full details can be found at the Facebook Event.  If you decided to recreate any of these looks please share them with me on my Facebook page or tag me on twitter. Thanks for stopping by and Happy Polishing. 

Which look is your favorite?

Like what you see? Share it with your friends!