Friday, July 22, 2016

6:00 AM

China Glaze- Ravishing Dahling


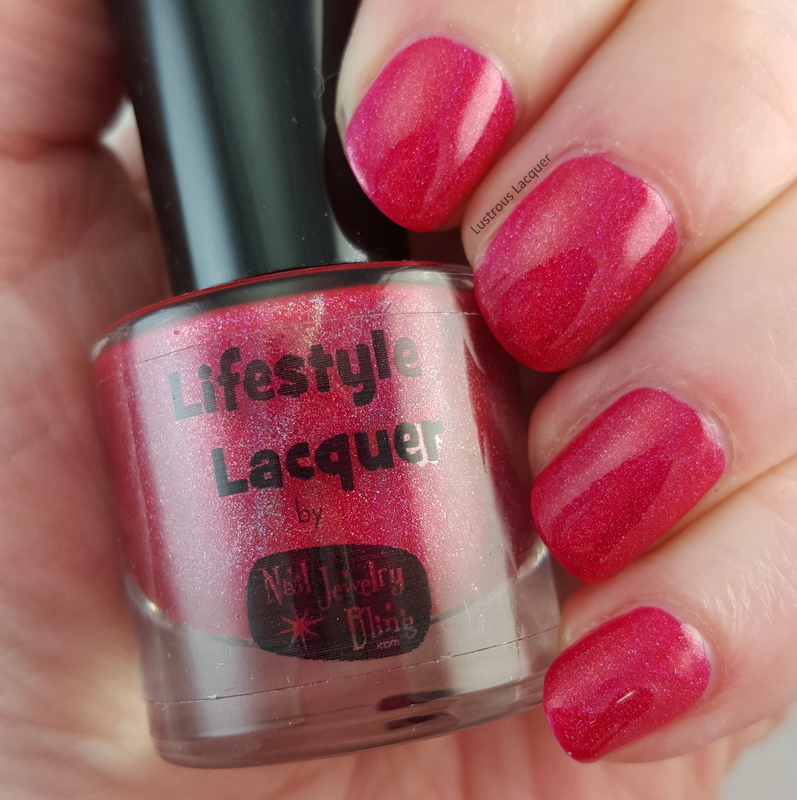
     Happy Friday!!! Who's ready to get their weekend started? As I mentioned in my post on Wednesday I'm headed out for a weekend vacation with some friends, what I didn't tell you was that we are spending our time camping and tubing/canoeing down a river. With as hot as it's been here lately, I hope we all don't fry to death. The heat index here yesterday reached 117!  Can you say hot! Speaking of hot, I've got a sexy color from China Glaze to share with you today. So turn up the a/c grab a beverage of your choice sit back, relax and get ready to discover China Glaze Ravishing Dahling. 


Deep-rich-vampy-red-nail-polish-jelly-finish

    Ravishing Dahling is a glossy darkened red polish with a deliciously squishy jelly finish, and the opacity of a creme.  There just aren't enough adjectives in the English language to describe how much I love this color. Sadly that's pretty much where the good news ends. 

Rich-red-nail-polish-jelly-finish


     The formula on this one is quite tricky to work with.  The first coat went on a little patchy, and even after 2 coats you can still see some evidence of it on my nails.  When I wear this one again I will be sure to use 3 thin coats and give it a little longer to dry time between. All the photos in this post are shown as 2 coats plus top coat.


     As you can see in my macro shot I got a little messy with my paint job and ended up with some staining on my skin, and that's after 2 separate attempts at clean-up. So be careful, and go slow when applying this nail polish and I'd also suggest a good base coat to avoid any staining on your nails as well. 

     Even though the formula gave me some issues, because of the opacity I was curious to see if I could get Ravishing Dahling to work for stamping.  I've never tried this with a jelly finish before, and was a little skeptical, but I love finding regular polish to stamp so it had to be done.  And guess what? It worked!!! Well, kind of... 


    I used the promo plate I received from Cult Nails and my jumbo squishy stamper from Bundle Monster over a base of Sinful Colors Snow me White. I'm not sure if it was the squishy stamper or the jelly finish that worked against me but I had some issues. The color is uneven on my nails and the polish wanted to separate on the stamper head before I could get it on my nails. I'm going to have to attempt this again with my firm stamper to see if I have the same issues. But all in all, I think it was a successful stamping attempt. If you've got any other suggestions to try I'm all ears. Just let me know in the comments. Thanks for stopping by and Happy Polishing!


Wednesday, July 20, 2016

6:00 AM

Finger Paints - A Heart for Art


     How is everyone's week treating them so far? Mine has been a little hectic. Not only did I go back to work for summer school but I decided that I'd try to squeeze in 2 family vacations in 8 days. One heading south for the weekend with friends, and the other headed way up north for the week with family. So I've been busy packing, figuring out menus, and racing to get laundry done. By the time Friday rolls around I'm going to need these vacations! I decided that since I've got so much going on and 4 blog posts to write before I leave that I'd keep them short and simple, maybe try to keep a little sanity. With that in mind today I'll be sharing with you an older polish from Finger Paints; A Heart for Art.

     Released in 2011 I  picked A Heart for Art up from the clearance rack at Sally's around 2 years ago. Sadly I'm not sure what collection it was a part of and my searches online have come up with nothing so I'm assuming it was part of their core line. But if someone else knows the answer please let me know in the comments.

Pink-purple-frost-nail-polish

    A Heart for Art is a pale blush color with subtle shimmer. Depending on the lighting it can lean  more pink or purple. Perfect for when you want something ultra feminine on your tips. All photos are shown as 2 coats plus top coat. 

pink-purple-shimmery-nail-polish

     I found that I had great coverage during application. Which was very impressive since this bottle has been sitting unloved and separating in my helmer for 2 years! As you can see like 99% of frost finish nail polishes there are some brush strokes.  But they weren't quite as noticeable as my photos show, as you will see in my macro shot below. Just like the color the visibility of the brush strokes depended on lighting and the angle of my nails. 


     I wasn't too sure about this color when I first put it on, but it quickly grew on me. I've been wearing some unseasonable dark colors lately so I found this refreshing and just what I needed for summer. Well, that's all I've got for today, I'm off to keep getting ready for vacation. Thanks for stopping by and Happy Polishing!


Saturday, July 16, 2016

9:23 AM

MoYou London - The Arabesque collection (Press Release)


     MoYouLondon just released a new collection! This 9 plate collection contains images with some amazing patterns. Just looking at these plates gives me several manicure ideas! Let's take a look.


Hey, it's time to escape!
Our latest Arabesque Collection is all about
Moroccan mosaics and Egyptian hieroglyphics, 
all drenched in sunburnt shades.


     MoYou London Plates can be purchased in their shop. Plates are  £4.99 or about $8 U.S. Thanks for stopping by and Happy Polishing!


Friday, July 15, 2016

6:00 AM

Put Up Your Dupes - Orly Beautiful Disaster vs. China Glaze Flying Dragon


     It's time once again for another comparison post! I just love these kinds of posts, don't you?  This time around I'll be comparing Orly Beautiful Disaster to China Glaze Flying Dragon. Both polishes are a beautiful, red-violet color often referred to as a deep tone of rosy magenta. This similarity is what caught my eye and made me wonder just how close these nail polishes really are.


    When comparing Beautiful Disaster and Flying Dragon in the bottle you can tell that these two are very close. Beautiful Disaster is a darker shade and leans more purple. But as we all know what you see isn't always what you get. Some nail polishes dry darker or take on a different undertone.At this point, I'm not convinced one way or the other if these are dupes or not. I had to investigate further.... I had to see them on my nails.


     Well, there's no denying it, they are much closer on the nail but these two polishes are not dupes. I used 2 coats plus top coat for this comparison. Beautiful Disaster shown on my pinky and middle finger dries to a shimmery high gloss finish. Flying Dragon shown on my ring and pointer finger dries to a matte finish. The addition of a top coat brought out some shimmer which I wasn't expecting from a neon polish and, made the colors appear to be closer than they really are.

     I decided that in order to do this post correctly I needed to show what the polishes looked like without top coat. See what I mean when I say the top coat made them appear closer than they really are.


     The application process was surprisingly similar. Like most neons, Flying Dragon was a bit streaky on the first coat but built up nicely with the second. As I mentioned in my previous post, Beautiful Disaster also had some streaks and patchiness with the first coat, builds up nicely after applying the second but like a true shimmer finish has a few brush strokes. 


     Final verdict: while these polishes have similar undertones, they are not dupes. The colors are similar shades of red-violet but the finish is what really separates these two. Which one would I buy? Both! The differences are enough that there's room in any nail polish collection for each one. And the price points are pretty much the same for each brand. My question for you is, if you could only have one which one would you choose? 

     That's it for this segment of Put Up Your Dupes. I'm off to look at my collection for more possible dupes. Thanks for stopping by and Happy Polishing!

Wednesday, July 13, 2016

6:00 AM

A New Nail Line from Swarovski Crystals


     I missed a week of blog posts! Not a good thing to do when you're just getting back into blogging. I feel horrible about it but I have a pretty good excuse for being radio silent for a week.... We had a small tornado touchdown 6 miles away from my house last Tuesday. Now thankfully everyone here is alright and there was no real damage. But it did leave me without power and several trees down in my yard. So I've been busy running a chainsaw, yes I am that kind of girl, and picking up branches, garbage and getting my yard in shape. Now that that's over with I can get back to my otherwise regularly busy life.  So onto the nail polish posts!
 
     Did you happen to see the teaser I posted to Instagram a few days ago? Well if you did happen to catch it, you may have noticed the uber textured accent nail. Not sure what I'm talking about?  Shame on you for not following me on Instagram. Only kidding. For those of you who missed it, here's the picture again.

Nail-Art-3D-Crystals


     OK, now that we're all on the same page I wanted to tell you that that isn't just any regular texture. It's a super blinged out nail thanks to the new CrystalPixie from Swarovski. Tiny little gems that pack a ton of sparkle. I'll show you the full manicure a little later on in the post so be sure to stick around for that.

     Today as you might have guessed my post is all about a new line of nail art products from Swarovski. "Swarovski is the premium brand for the finest crystal embellishments since 1895. It is recognized for its innovative excellence and its collaborations with top-class designers. Now you can  experience the beauty of Swarovski crystals on your nails with a sparkling manicure." I was sent 4 packages of items to review. 2 Motif's containing a variety of Swarovski crystals and metallic shapes and 2 sets of CrystalPixie's in Black and White.


crystal-nail-art-from-Swarovski

 
     For my first look, I used the neutral colored Trends Motif and tried to recreate one of the looks on the packaging. My attempt was only semi-successful because I started off placing my first gem in the wrong place which threw everything off. What's the best thing to do in that situation? Go big and cover the entire nail in gems!

3d-nail-art-swarovski-crystals

      My base color is Song of Summer from Sinful Colors, a pistachio green shade that I think is fun for summer.  Can you tell which design from the packaging I was going for? I know not very creative on my part, but I wanted to feature multiple gems on one nail and that's out of my usual comfort zone and I was feeling a bit lost. 

3d-nail-art-accent-nail

     
      You might notice I had a little trouble with the silver metallic squares sitting flat on my nail in some places. I have a very large C curve to my nails which caused the ones on the side to stick up but if you have a smaller C curve it shouldn't be an issue. Also placing the squares closer to the center of the nail will prevent this from happening. 


     There was a little trick to getting the crystals off since they kept wanting to stick to their paper backing. I found that by using my dotting tool to slide them off worked the best. Also because I opted to not top coat this manicure the gems removed easily and I am able to reuse them for another look!

    The Swarovski motif kits are available in 3 styles. The Classic, the Neutrals, and the Trends collections with 3 options in each collection for a total of 9 kits to choose from. With each package containing 48 Swarovski crystals and metallic shapes. That's a lot of nail art look possibilities if you mix and match. 

     Now about that manicure I mentioned at the beginning of this post... turns out I was able to create a 4th of July manicure after all!

4th-of-july-3d-nail-art

    This look was perfect for the holiday because my ring finger sparkled more than the fireworks did. Sadly my pictures do not do this manicure justice. Like all sparkly things, it's was very hard to capture on film.

     
4th-of-july-nail-art-3d


     For this look, I used China Glaze Cranberry Splash and Drip Drop Prototype #517. The accent nail has a thin coat of Sally Hansen white on and then covered in the Cute Mood CrystalPixie. "CrystalPixie is Swarovski's newest innovation, just for nails! Be it for an everyday occasion or a special event, CrystalPixie brings unmatched Swarovski brilliance to your hands. It is easy, fun and limitless."  Just a word of advice, be sure to have a container under your hand to catch the crystals as you pour them over your nail. You won't want to lose a single one after you see them sparkle. 


     "Swarovski crystals are at the forefront of the crystallized nail super-trend, turning nails into a canvas for self-expression, as well as a stylish accessory both on and off the catwalk." Swarovski supports ongoing education through the Crystal Culture Educational Program developed and administered by Swarovski Authorized Instructors Gina Silvestro and Viv Simmonds at www.crystalculture.co Visiting the Sparkling Nails section on YouTube.com/createyourstyletv  will give you access to videos on the application of Swarovski crystal and Swarovski CrystalPixie. 

     To keep up with all the latest news or get inspiration ideas from Swarovski be sure to check out createyourstyle.com , pinterest.com/createyourstyle or facebook.com/createyourstyle . Want to purchase these sparkly gems for yourself? They can be found at your local Sally Beauty Supply or purchased online at Sallybeauty.com.  Thanks for stopping by and Happy Polishing! 


Friday, July 1, 2016

6:00 AM

Ninja Polish - Divinity (Enigma Collection)


     Happy Friday!! And not just any Friday, but a holiday weekend Friday for those of us that Celebrate the 4th of July.  Whos ready for a nail polish post from me? It feels like forever since I've written about nail polish, and I might be a bit rusty so bear with me. It would have been pretty good planning on my part if I kicked things off with a 4th of July manicure but that would have required me having my act together and lately that isn't happening. Instead, you'll have to settle for the jaw-dropping awesomeness that is Ninja Polish Divinity.

     Divinity is just one of the polishes available from the Enigma collection which unfortunately is currently out of stock. I actually received mine in a swap package a few months back. It's my one and only polish from Ninja Polish. but it certainly won't be my last.

     Trying to describe this polish is a bit tricky for me because every time I look at it I see something new. At first glance of the bottle you see a sparkle red polish, but once on the nail, you see so much more. The multi-chrome polish shift from red, to green, to orange and yellow. I even caught a glimpse of purple leaning magenta flashes at one point.

Mulit-chrome-nail-polish-red


      The application on this one is a bit fussy if you're not used to sheer at first polishes. If you're going for even coverage on the first coat chances are you'll end up with some dragging. It's best to use multiple thin coats and let the beauty build. I have to admit that on the first coat I was a little nervous because the polish was so sheer and very purple leaning magenta. Which was a gorgeous color but I was looking forward to the gorgeous red I saw in the bottle. Turns out I had nothing to fear. Divinity builds up nicely and I reached full opacity and the red color I wanted after 2 coats.  Depending on how thinly you apply your polish you may need a 3rd coat.

Multi-chrome-nail-polish-Divinity-from-Ninja-Polish
Photo was taken under incandescent lights

    
color-shifting-nail-polish
Photo was taken in full Sun

     I should know after all these years to not expect what I see in the bottle to be what I see on the nail. Indie Makers are getting so good at mixing all the different pigments and glitters to create unique and interesting nail polishes.

color-shifting-nail-polish
Photo was taken under incandescent light

color-shifting-nail-polish
Photo was taken in full sun

       As if this polish isn't rich enough on its own, I had to add a stamped accent nail. I decided on something simple but rich looking to go along with the decadent feel of Divinity.

Color-shifting-nail-polish-with-accent-nail


     I used Milani Black Swift and Bundle Monster plate bm-309 for my finished look. What do you think? I enjoyed wearing Divinity so much that I wore it as a pedicure too. One of the few times that my toes matched my nails. And I can't forget the quick and simple dotticure I did using Divinity as an accent.

     I hope you enjoyed my first post back. It was a little rough going in places I know, but I'll get better as I write more posts.  Of course it doesn't help that I wrote my notes for this post almost 6 months ago and to be honest they weren't very good notes. Let me know in the comments what your must have Ninja Polish is whether you own it or it's on your wish list. Thanks for stopping by and Happy Polishing!


Tuesday, June 28, 2016

3:43 PM

Where have I been?


     Hello, everyone, it's been way too long since I 've written! As some of you may know google recently put the hammer down on links in blog posts. Every link  in every single one of my previous posts needed to be changed. Now I was already feeling a bit ho-hum about blogging and having to change my links was the proverbial straw that broke the camels back.  I missed blogging but the thought of having my post blocked by google until I fixed everything was daunting if not discouraging, to say the least. 

     About 2 months ago I decided that enough was enough and I needed to get back to blogging. I missed it, and all the people in the nail polish community. So I sat down each and every night after the kids were in bed and began the tedious task I had been avoiding. I was hoping to have a complete blog makeover done but that plan has been put on the back burner for now. My head is still spinning from fixing links in 417 posts. 

    I may decide to tackle the makeover myself soon or see if it's something I can afford to hire out. If it's the later, I better figure out what I want.

     Now google hasn't removed the "block" on my page yet, and they said it would take a few weeks, but I'm anxious to get back into the swing of things.  I have no idea how many of you  are actually  able to see my posts, and I know it's going to be a long road back to getting readers, but I'm up for the challenge. I even have a great support system behind me this time. 

     Right now my goal is to have at least 2 posts a week, and work my way up to 3 depending on how much free time I have.  Since my last post I have gotten a full-time position at the blind school became "pre-engaged"  (there's a ring on my finger but it's not official yet) and have begun house hunting. 

     So as you can see I have a lot of balls in the air right now, and I just keep adding more! I am happier than I've been in a long time and look forward to sharing all of it with you. So be on the lookout for a new nail polish post on Friday because I'm ready to kick off July with a bang!

     Thanks for stopping by and as always, Happy Polishing!

Wednesday, March 30, 2016

6:00 AM

Lifestyle Lacquer by Nail Jewelry Bling - Autism Awareness Box


      Today I have for my thoughts on the Autism Awareness box being released this Friday April 1st at 5pm est from Nail Jewelry Bling. April is Autism Awareness Month and as some of you know this subject is near and dear to my heart. I work with autistic children everyday and I love it. It has some challenges because they are also visually impaired and mostly nonverbal. But I think it's important to get people talking about autism because so that the taboos of the word alone can be erased and an understanding can be found. 

    Now this is going to be a very picture heavy post so in case you don't make it all the way down to the end I'll get all the important  info to you now. Like I mentioned above this polish duo is releasing Friday April 1st at 5pm est. There are several options for you to purchase. I'll be reviewing the full box in this post so you'll get to see all the options.  Individual prices for these polishes are $6.50 for mini's (7.5 ml)  or $13 for full sized (15 ml) The vinyls can be purchased for $6. You can purchase the box for $30 which contains a full sized polish in each color, a sheet of 20 (x2) stencils and a sample of cuticle balm. *the sample is only available with the purchase of the box* All prices include shipping for the US, but international is available at a fee. 

      Whew! That was a lot of information. How about we look at some pictures of pretty polish? There are a lot of them, it might be a good idea to get yourself a beverage and settle in. I'll start off by showing some full sun shots, add my thoughts about each polish and then show some light box shots and nail art. 

Autism-Awareness-Polish-Blue-holographic


     Different is Beautiful is a denim blue polish with scattered holo. This beauty has sooth flawless application and is jam packed with holographic goodness,  Shown here as 2 coats plus top coat.

    One of the very special things about this color is it was created with the help of the makers son. And here is what she had to say about it... 

"This is Different is Beautiful, the 2nd polish available for the‪#‎autismawareness‬ Duo. It's a royal blue shade with a hint of red shimmer & loaded up with ‪#‎holographic‬ micro glitter. This one is very special to me, my partner in crime & mini-me helped a little bit with the creative process on this one. For a 6 year old (almost 7) he's got quite an eye for color pairing. He chose the blue base pigment & did some mixing. He's also the reason why this cause means so much to me, he might be different than your child but that doesn't make him any less. He's more than just autism, he's kind, generous, loving and unbelievably smart. Please do a little research and talk to your children about what acceptance means & why it's important to be kind to those that are seemingly a bit odd to them. After you get past the barriers, it's all worth it, you'll see the true kindred spirit that lies beyond!"


    I also used Different is Better in some nail art that  I posted a teaser pic about already. I used the puzzle vinyls to create this next look along with Heathers Hues Show Me the Raz-zle Dazzle.


     The finished look isn't anything too fancy but its still pretty cool! I like the way the holo peeks out between the pieces.  I'll be using these vinyls again this month but adding different colored puzzle pieces. 

Autism-Awareness-Polish-Cherry-Red-Linear-Holographic-nail-polish


     Peace, Love, Awareness is a cherry red linear holographic polish that has me drooling the minute I unwrapped it. I mean look at it, how could you not want that in your nails the minute you see it. And not only is it pretty but it's super opaque. Were talking a one coat wonder here! Just like Different is Beautiful I had flawless application. I will tell you that I had a tiny pink tint to my nails after removal (which came off after a few more swipes of remover) so make sure you use a good base coat. 


     For this next nail art look I used the ribbon nail vinyl and a little but of Different is Beautiful. I really wanted to see if the blue would pop over the red base or turn a purplish color. And I have to say I wasn't disappointed.  There are also Light Bulb vinyls in the box but sadly I havent gotten around to using them yet. 


     If you're still with me at this point I thank you. I know that was a lot to get through and I haven't even mentioned the cuticle balm yet. I'm actually going to review that in another post. I've only been using it for 3 days so I don't have much to share for results. I will say that so far I like it. It goes on smoothly, doesn't have a greasy feel to it. And the part I like best ... it doesn't leave a shine on my skin like most balms and oils do. I actually have it freshly applied in each and every one of those pictures I posted and you'd never know.

    Now that important purchasing information again just in case you forgot. This polish duo is releasing Friday April 1st at 5pm est. There are several options for you to purchase. I'll be reviewing the full box in this post so you'll get to see all the options.  Individual prices for these polishes are $6.50 for mini's (7.5 ml)  or $13 for full sized (15 ml) The vinyls can be purchased for $6. You can purchase the box for $30 which contains a full sized polish in each color, a sheet of 20 (x2) stencils and a sample of cuticle balm. *the sample is only available with the purchase of the box* All prices include shipping for the US, but international is available at a fee. 

    And be sure to check out Nail Jewelry Bling on all the social media outlets to stay caught up on all the latest news.  Facebook, Twitter, Youtube, Google+, Instagram and Pinterest

     Before I go I wanted to share a flash back to my first Autism Awareness manicure that never made it onto the blog. This manicure was done back in 2013 and was one of my first attempts at a color block manicure.  


    You know cause this post was feeling a little short on pictures at this point. =) Thanks for stopping by and Happy Polishing!


Like what you see? Share it with your friends!