Friday, July 11, 2014

6:00 AM

Northern Star Polish- Have Time Will Travel

 
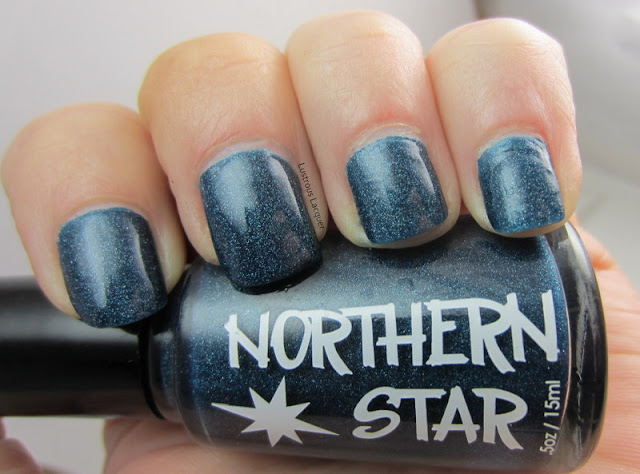
     Today I have a polish from an Indie that's local to me! Have Time Will Travel by Northern Star Polish is a deep denim blue with scattered holo. The rich pigmentation made this polish almost a one coater.
Northern-Star-Have-Time-Will-Travel
Have Time Will Travel 2 coats no top coat
     The application was smooth and easy, with the polish going exactly where I wanted it to go. The polish flowed evenly off the brush leaving little need for clean up.
  
Northern-Star-Have-Time-Will-Travel
     
     While I only had this polish on for about 30 minutes I experienced no staining. And that's without a base coat underneath! But to be on the safe side I would still recommend one when wearing any polish, not just Have Time Will Travel.

Northern-Star-Have-Time-Will-Travel

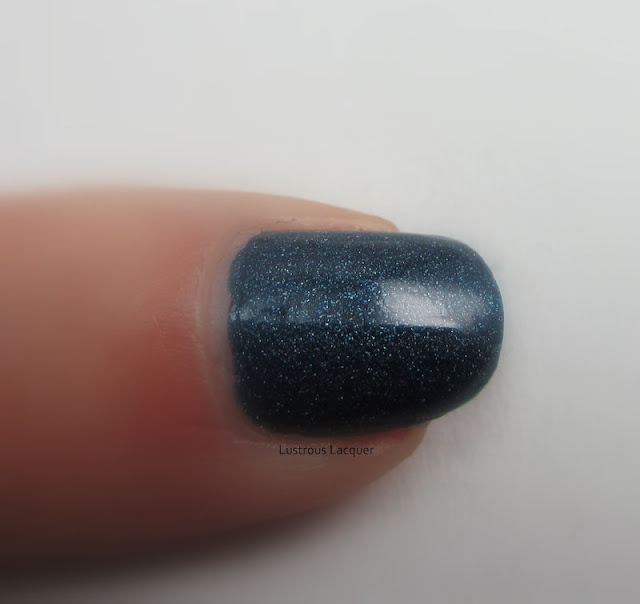
     Unfortunately, it was raining here when I swatched this so I have no outdoor pictures to really capture the scattered holo in Have Time Will Travel, but you can get a glimpse of it in this macro shot.  Hopefully the next time I wear it Mother Nature will cooperate. 

     Overall I was very happy with Have Time Will Travel, and I know I will wear it again soon. I can see it looking fabulous under some delicate silver stamping. What are your thoughts? Is this a polish you'd like to wear? Would you tempt fate and wear it without a base coat? Im kidding of course but I would love to hear your thoughts on this polish, or even your must have polish from Northern Star.

     Thanks for stopping by and Happy Polishing!


Wednesday, July 9, 2014

6:00 AM

Put up your Dupes: Sinful Colors Cream Soda vs. Orange Cream


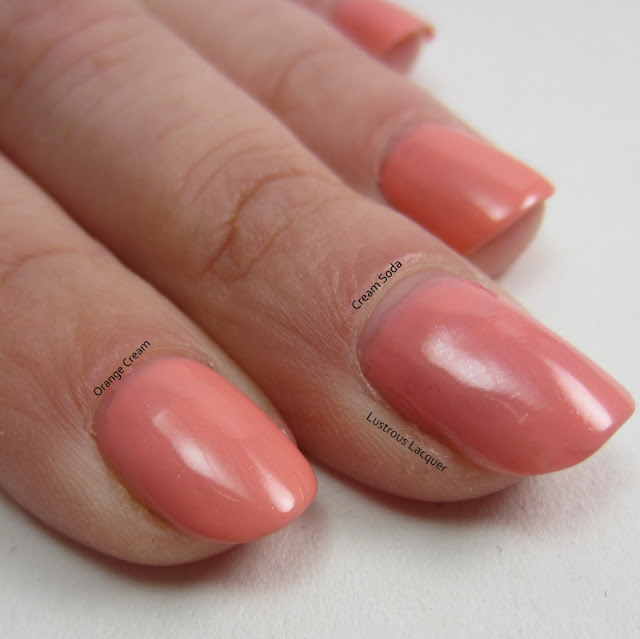
     Lately I've been noticing that Sinful Colors has been releasing very similar colors in their collections from last season. I decide to go through my stash and see if I had any dupes. Today we take a look at Orange Cream from the 2013 Sugar Rush collection and Cream Soda from this seasons Mod in Bloom collection. My review of Cream Soda last week prompted this post.


     In the bottle there doesn't seem to be much of a difference between these two. They both are a creamy peach color. There is very very subtle shimmer in both Cream Soda and Orange cream. The similarities continue into application. Both are on the runny side, and slightly sheer. I needed 3 thin coats to reach full opacity. But are they exact dupes?


     No they are not 100% exact dupes but they are so close they might as well be. It's not quite as obvious in my photos but Cream Soda has a touch more pink to it, making it appear slightly darker. Orange Cream tends to look more peachy on me.

Cream Soda is on my pinky and middle fingers, Orange Cream is on the ring and pointer.


    From this angle the difference are a little easier to see. But again the differences are so slight that I would say you wont need both if these is your collection. And what about that very subtle shimmer I mentioned earlier? The only way I could capture that was with this macro shot.


     The shimmer is so subtle that I couldn't see it on my nails. In fact I can barely see it in the bottle. I was honestly shocked when I saw I was able to capture it in this shot.

     My Overall conclusion is that these are in fact not dupes. ( maybe 98% dupes) Are they similar, oh yeah they are! Do you need both? I guess that's up to you to decide but I wouldn't think so. Id say based off of formula and appearance there is no clear winner here. Which one would you choose?

     Now I'm off to look at the other polishes I've picked up from these two collections to see if I have any other possible dupes. Thanks for stopping by and Happy Polishing!
Monday, July 7, 2014

6:00 AM

Gloss48 Exclusive- Sirens Call


      I'm so excited to be able to share this opportunity with you on a Monday morning. Gloss48 has partnered with My Sirens Call to bring you an exclusive thermal polish duo, which just happens to be going on sale starting on the 9th at 11am! Pygmy Seahorse and Into the Abyss are just one of the duos available for $15. The sale will run until next Monday at 11am.

     First up is Pygmy Seahorse. A purple to pink shifting polish with silver micro-shimmer. The application was near perfection with the polish sliding onto the nail like butter but with nice control. The first coat was slightly sheer and had me a tad worried, but full opacity was achieved in 2.

Sirens-Call-Pygmy-Seahorse-Thermal-Polish
   
     This one is actually my favorite of the two. Just look at how pretty this polish is while in transition. Perfect for the long hot summer nights. This is exactly how my fingers looked the entire time I was wearing Pygmy Seahorse. The color shift was almost instant on my fingers.

Sirens-Call-Pygmy-Seahorse-Thermal-Polish

     I wanted to show you these polishes in action so I included a short video. Pygmy Seahorse is purple when cold and changes to pink when warm.


     The other amazing polish in this duo is Into the Abyss. Into the Abyss has blue and silver glitters in a black base. The application was just as perfect as Pygmy Seahorse. However Into the Abyss is a little more on the sheer side and 3 coats were needed to reach full opacity. Also, the color shift didn't happen quite as easily with this one.

Sirens-Call-Into-The-Abyss-Thermal-Polish

     I like thermal polishes that have a drastic shift in color like Into the Abyss. The lighter blue really made the glitters pop.

Sirens-Call-Into-The-Abyss-Thermal-Polish

     And here's another quick video to show you Into the Abyss in action. Black when cold it shifts to a nice blue color when warm.

    
     Don't forget to stop by Gloss48 before next Monday to pick these polishes up if you'd like them in your collection. You can also follow them on Facebook and Twitter to be kept up to date on all the latest news. You can also find My Sirens Call on Facebook.

     I'd love to hear your thoughts on these two polishes or if you decided to make a purchase. Thanks for stopping by and Happy Polishing!
Friday, July 4, 2014

6:00 AM

4th of July Nail Art


     Happy Fourth of July! For today's post Im going to keep it short. I know many of us have BBQ's and parties to get to before the fireworks. I did want to share with you what I ended up doing for my manicure before I head out to a friends for the day.

     I decided to keep it simply this year. I was starting to drive myself crazy trying to come up with a fun intricate design. Plus my right hand is more than a little rough around the edges thanks to my recent camping trip. Short nails for me are particularly uninspiring and I knew that I would be wearing this manicure for 2 days so I didnt want art on ym left and plain on my right.

4th-of-July-Nail-Art


     I went with Finger Paints Paper Mache, and Zoya Nidhi and Dream for my colors. The Zoya's added a little sparkle to my manicure but it's still simple and easy.

    So there you have it. My 4th of July nail art for 2014. And if you want to see some more nail art just check out the links below. Have a safe and Happy 4th!


Thursday, July 3, 2014

6:00 AM

The Nail Polish Blogger Connection July Giveaway {closed}

     Hi everyone. I know Im posting a little bit off my regular schedule but I did say in my Monday post to be on the look out for a special announcement. Today starts a group giveaway from the Facebook group The Nail Polish Bloggers Connection! This giveaway will run until noon on July 31st Pacific Standard Time.


     The bloggers behind Fixin to Faff, Inky Whicker's Musing, Lacquer or Leave Her!, Lauriestrodes Fun With Nails, Shelby Lou Nails and I have gotten together to offer 3 $40 gift certificates to the online store of your choice. That's right there will be 3 winners, and this is open to everyone!  To enter just fill out the raffle-copter below and good luck!


a Rafflecopter giveaway

Wednesday, July 2, 2014

6:00 AM

Lightning Nials and a tutorial


     Today I have a Lightning Nails tutorial for you inspired by Robin Moses. To be honest, mine look more like stained glass than lightning to me though. I decided to give this look a try after watching this video. I thought it was a great way to use some of my pretty sheer polishes that get no love. This post is quite picture heavy but I hope you enjoy it.
  
     The products I used for this are, base and top coat, Finger Paints Black Expressionism, Sinful Colors Fire Fly, Sally Hansen Black, and Blue and Byte, OPI Totally Tangerine and a Gold Striping polish.


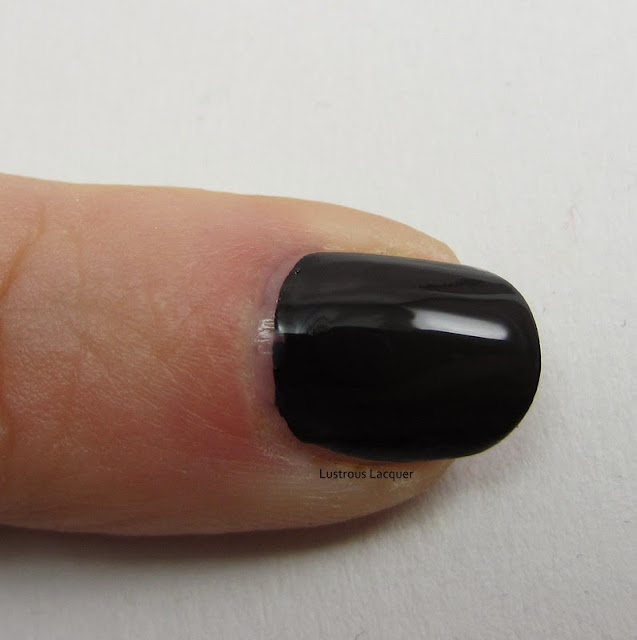
     Start off by applying your base coat, once that's dry apply your black polish over the entire nail and allow to dry.


Finger-Paints-Black-Rxpressionism-Lightning-Nails-Tutorial
     
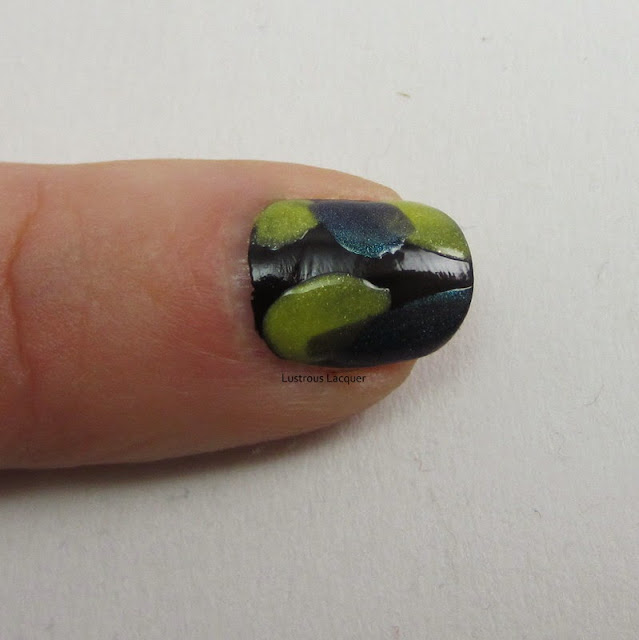
     With your yellow polish add 2-3 spots on the nail. I used Sinful Colors Fire Fly. You don't want to be very controlled with this. The more randomness you can get the better.

Lightning-Nails-Tutorial
   
      Next go in and add 2 spots with your blue polish. I used Sally Hansen Black and Blue from the Complete Salon Manicure series. Again you want this to be random, but also touching the edges of your yellow spots. This particular blue was very sheer so I ended up adding 2 layers to my spots.

Lightning-Nails-Tutorial
  
     Continue by adding in a few spots with your orange/copper color. I used OPI totally Tangerine which ended up having a golden tint to it when layered over the black.

Lightning-Nails-Tutorial
     
     Going in with your Pink polish, fill in any remaining black space on your nail. I used Sally Hansen Byte from the HD series of polishes. This is where I wished my nails were a little longer so I could have more room for the pink.

Lightning-Nails-Tutorial
 
      Lastly, you want to take your striping polish and go over the natural lines where the polishes meet. This is where having an unsteady hand can be your best friend. I found that the less "structured" the lines look the better this manicure looks. Also, you want your lines to be thin, mine got a little heavy-handed for my taste.

Lightning-Nails-Tutorial

     Wait a few minutes for everything to dry and finish off with your favorite top coat. I used a generous coat of Seche Vite.


     The best part about this manicure is how it sparkles in the light, and gives off a different look depending on the angle. Do you agree with me that mine look like a stained glass window rather than lightning?

     Here's a quick collage of each step in case you want to see everything together. If you attempt this look Id love for you to share it with me. Please post your pictures on my Face Book page.


Lightning-Nails-Tutorial

     So there you have it, an easy way to do some nail art with all those sheer polishes that you don't know what to do with. Id love to hear your thoughts on this look. Or any feedback you have about this tutorial. Id like to do more in the future and want them to be as helpful as possible. Thanks for stopping by and Happy Polishing!


Monday, June 30, 2014

6:00 AM

Orly- Sparkling Garbage

       Good morning and Happy Monday! I am officially back from my vacation, feeling rested, slightly sunburnt and very bug bitten. But I had a good time and am ready to do it again.....next summer. I don't think my kids were quite ready for that level of camping. But they all had a good time, and want to go back so that's promising. Now onto the polish.

     Today's quick post is Orly Sparkling Garbage. Released in Summer 2013, Sparkling Garbage is part of the Mash Up Collection. A light Turquoise holographic polish that looks more like very fine glitters with multi-dimensional shine.

Orly-Sparkling-Garbage-Mash-Up-Collection

    Here I've shown 2 coats of Sparkling Garbage on its own and then 2 coats layered over black, without top coat. I like the look both ways but really should have added a 3rd coat when wearing it alone. As you can see it dries to a high shine finish and has an almost 3-dimensional look to it.

     In my opinion, this polish deserves to be worn as a full manicure, instead of just swatched for my blog. It's such a unique polish compared to the others in my collection.

     What do you think of Sparkling Garbage? 

     Sorry, this was such a quick post, but I'm in recovery mode from vacation and you know what that means. Laundry, lots and lots of laundry! See you back here later this week with a special announcement.


Friday, June 27, 2014

6:00 AM

Put Up Your Dupes. OPI Spotted vs. Fing'rs Get Spotted

 
     Hi Everyone. I'm currently on vacation, camping with my family deep in the Northern wilderness. But I still wanted to share a post with all of you. Today's post is one that's long overdue. Today I'll be comparing the Fing'rs Get Spotted top coat and OPI's Spotted.  You can find my original post about Get Spotted here.

     So this won't be the in-depth comparison that I originally wanted it to be because I'm a little pressed for time right now. I still have a ton of packing to do, and I've got 6 volleyball games to play tonight. Nothing like waiting till the last minute right?

     In my picture, I've shown both topcoat applied the way they are supposed to be applied, and also with my little top coat trick.


     OPI Spotted is on my pointer and ring fingers, Fing'rs Get Spotted is on the middle and pinky. The base color is Orly Flawless Flush. As you can see there is quite a bit of difference between all 4 fingers.  My ring and pinky fingers have the specialty coats applied according to the directions. I got mostly cracks and a few spots. OPI seemed to perform better, but still not with the desired results.

     Now for my little top coat trick. When I originally tried the Fing'rs Get Spotted I oopsed and applied a layer of quick dry top coat to my base color before the Get Spotted. And I got amazing results. I decided to see if I could get the same results with OPI. On my pointer and middle fingers I tried out this trick again and would you look at that! I got the desired "spotted" effect.


    OPI Spotted still performed better than the Fing'rs Get Spotted. The trick is still to use extremely thin coats even if you use a top coat in between. The thinner the coat the better the results. If I had to choose between the two I'd go with OPI. OPI Spotted is considered a HTF polish if you can't get your hands on it, the Get Spotted is an ok substitute but definitely not a dupe.

     I've recently been made aware that Fing'rs has changed the formula of their Get Spotted polish. I have the original one that came in a kit. I have no knowledge if the newer version is better or not, but I do want to make you aware of the change.

     Thanks for stopping by and Happy Polishing!


Wednesday, June 25, 2014

6:00 AM

Leadlight Manicure

  
     Today I'm sharing with you a manicure I wore to a wedding last weekend. No not the wedding of my good friend Alissa who you might remember from my recent gradient post, but another friend who got married. I knew I wanted to do a fun, special manicure that went with my dress.

My inspiration
     I knew I had to do something special for this night. The girls that I was going with take a very active interest in my manicures and I wanted to impress them. Well the most impressive nail art technique currently for me is the leadlight technique.
     For those of you unfamiliar with leadlight it's really quite simple. It's just like coloring pictures in a coloring book but with a stamped image and sheer nail polish.

leadlight-manicure
   
     I started off with a base of Finger Paints Paper Mache, then stamped with Konad special black using Bundle Monster plate BM-318. The flowers reminded me of the flowers on my dress without matching them exactly. I then took my smallest dotting tool and filled in the centers of the flowers with OPI I'm Never Amberrassed from the sheer tints collection.

leadlight-manicure

     While my stamping still isn't perfect I really love how this turned out. And what did the girls think? Well, they were impressed, which made me feel really, really good. I don't tend to do a lot of nail art so when it comes together, I'm overly giddy about it and want people to notice it.

     I got especially giddy about this manicure. It turned out just like I wanted it to and I matched the dress pretty darn well if I don't say so myself.  What do you think?


     I hope you give the leadlight technique a try. I think it's an easy way to get a great outcome. If you do try it out, please share your manicures with me either on my facebook page or in the comments here. Thanks for stopping by and Happy Polishing!


Like what you see? Share it with your friends!