Wednesday, June 4, 2014

6:00 AM

Mentality - Tempest


     Today I have for you Tempest from Mentality. Tempest is from the Ombre Mattes Collection and is a blackened dark red with red shimmer. I was lucky enough to snag this beauty from a blog sale. The application process was smooth. I didn't experience any dragging like I have with other matte polishes. However, as you will notice the shimmer is hard to see once the polish dries. All pictures shown are 2 coats.

Mentality-Tempest-Matte
     
     I love the look of Tempest matte but wanted to see if I could get some more of the shimmer to show with top coat.

Mentality-Tempest

     You can start to get a glimpse of the depth that Mentality has with the addition of topcoat. Here's a Macro shot for a closer look.

Mentality-Tempest

     And now to share with you the reason for those 2 stripes on my ring finger. I decided to do some negative space nail art inspired by LacquerStyle. You can see her manicure here. This is my version.


Mentality-Tempest
     
     I used Essie Shine of the Times for my flakey strip and then topped everything off with a matte top coat. I really like how this turned out. It felt elegant and fun at the same time.

     I have a few more Mentality polishes on my wishlist but would love to hear some of your favorites or must haves. Thanks for stopping by and Happy Polishing!


Monday, June 2, 2014

6:00 AM

What's in a finish? - Glitter


     Today I wanted to take a look at glitter nail polish. I myself used to have a love/hate relationship with glitters and would shy away from them.  I love the way they look but hated the removal. That changed once I got my peel off base coat, though.

      Glitter polish is considered the flashiest of the finishes and has the largest variety of looks with the variety of glitters available. There's multi glitter, two-toned glitters, single glitters, bar glitter, round, square, hex, and even shaped glitters. The base used to contain little to no color and the "color" is formed by the glitters used.  However, more and more indie polish makers are adding glitter to a pigmented base.


Fickle-Fairy-Potions-Quit-Your-Clownin'-Glitter-Lustrous-Lacquer
Fickle Fairy Potions Quit Your Clownin'
     You will sometimes hear someone refer to a glitter polish as being "top coat hungry" which means that the polish has a very rough texture. All glitter polishes have a rough finish but some are worse than others. Micro glitter polishes, for example, are the smoothest of glitters but even those have a slight texture to them.


Cover-Girl-Scalding-Emerald-Green-Glitter-Lustrous-Lacquer
Cover Girl Scalding Emerald
      Overall I feel that glitter polishes are an essential part of any one's collection. They can spruce up a day old manicure, change the look of the polish, or just make you sparkle. But save yourself the headache of removal and invest in a peel-off base coat.

     Thanks for stopping in, I hope you enjoyed this post. I'll have the last post in this series for you next Monday. Happy Polishing!

Sunday, June 1, 2014

4:00 PM

Im back from my blogging break giveaway! {closed}

     I'm Back!! Sorry for my quick and longer than expected absence. I needed to take a step back from blogging and the nail polish community in general. There was so much drama going around there for a bit about clean up, and cuticles that it started to feel like bloggers and makers were being pitted against each other. I needed some time to think, figure out where I wanted my blog to go. If I wanted to continue with this as a hobby or turn it into something more. I still don't have all the answers but I missed my blog and all of you. So as a thank you for sticking around I decided to do a giveaway.

     I have decided that I'm not going to highly promote this giveaway because I want my true followers to have a fair chance at winning. There is however an option to share the giveaway if you choose. There will be only 1 winner but this giveaway is open to everyone!

     Now, what am I giving away? I've put together a little nail art kit so to speak. The prize includes a set of dotting tools, 10 rolls of stripping tape and, 12 little pots of multicolored rhinestones.


       The giveaway will run from today until Sunday, June 15th. Winners will be announced Sunday night here and on my Fb page. Good luck and thanks for sticking with me!


a Rafflecopter giveaway

*Giveaway Now Closed*

Friday, May 2, 2014

6:00 AM

BA STAR smokey eye pallet review


     *Press Sample*


     Today I have another opportunity from Brand Backer to share with you. This time around I have the Smokey Eye pallet from BA STAR.

      "BA STAR is the #1 Performance Makeup! Sing, Dance, Strut, Perform- Shine Like a Star! These affordable Palettes contain 5 High Pigment Eye Shadows + Eye Shadow Base for All Day Hold! Available in 2 color combinations: Midnight Smoky and Natural."
                             
BASTAR-Smokey-Eye-Pallet
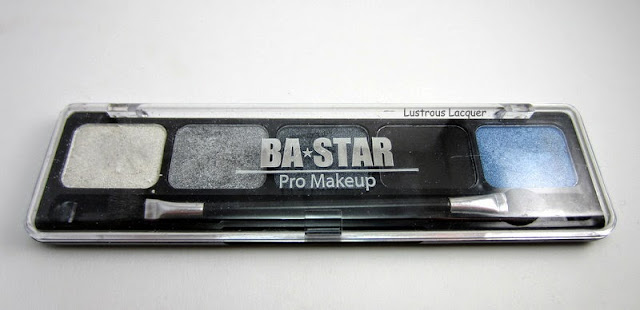
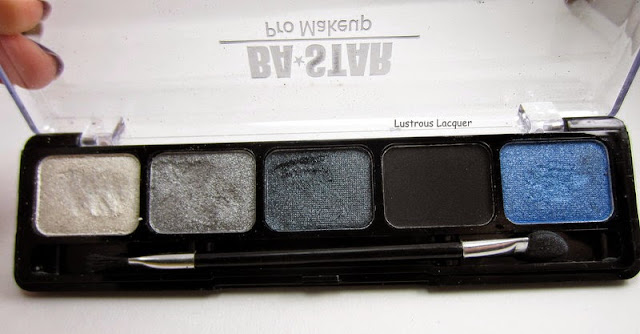
A pallet in Midnight Smoky

    This pallet contains several shades of grey from pale to almost black and one intense blue.

BASTAR-Smokey-Eye-Pallet

     On the back you can find the web address of some helpful videos on how to use this pallet to create different looks as well as make a purchase.


     I actually watched a few of the videos and tried to recreate one of the looks. I will show you how mine turned out a little bit farther into the post. First I want to show you the brush.


     I have never come across a makeup brush like this. It has these semi-rough nylon bristles. I had 3 loose bristles in mine that I pulled out with my fingers, and give it one more good tug to see if there were any more but the rest were nice and secure. I noticed in the videos that I watched that they weren't using this kind of brush, but felt that I should as part of my review.

     I liked the way this brush let me apply the eyeshadow exactly where I wanted it to go on my eye. I was finally able to get a nice ending "line" at the outer edges of my eye. Normally my eyeshadow seems to go lower than I want it to and I have to clean it up. The downfall of this brush is that stiffness irritates the delicate skin around my eye. You might notice in the next picture that the skin at the outer edge of my eye (right below my watermark) looks slightly red. This is also the picture where I show my attempt at recreating the look I saw in the video.


    Looking at it like this I would call it a success. The colors are placed where they should be. The eyeshadow is highly pigmented and blend well together. I have a nice shimmer highlighting my brow bone. As far as application goes I was very happy. But......


     When I opened my eye I noticed it looked more like I had a black eye than a smokey eye. The 2 darkest shades are way too dark for my skin tone. I kind of had a feeling they might be so I didn't even touch the darkest shade. And you'll notice that I only have one eye done. I couldn't stop laughing at myself long enough to do the other eye.

     I di, however,r try out another look to share with you because I was having fun with this pallet. I always thought I was getting to be too old to wear sparklyeyeshadoww, but these seemed different so I went for it. I noticed that I didn't have any shadow getting caught in my creases and that helped to no accentuate them like most sparkly things do.


     This time around I tried out the silver and blue shades, along with the pale white/beige along the brow bone. I even tried out adding a little shadow along my lower lashes. I've tried doing that once before and the shadow seemed to go under my lashes and "flake off" onto my cheek. Not this time. The shadow went where I wanted it and no where else.

     Because I wanted to feature the eye pallet I didn't add any other makeup except a little mascara and lipstick. I like this look and imagine I would love it had I done my full routine.

     Now normally I don't let my daughter wear make-up but we had a dress up day today since it's been raining for 3 days now and she wanted me to show you her look. I might be bias but I think she looks pretty darn cute.


     BA STAR products can be purchased at http://bastar.com  you can also follow them on Face Book, IG and Pinterest.


*The products in this post were provided for my honest review. All opinion and photographs are my own. I am in no way affiliated with Brand Backer or BA STAR.*


Monday, April 28, 2014

6:00 AM

What's in a finish? Specialty Polish


     Today for the whats in a finish series we take a look at specialty polishes. There are many different types of specialty polishes but the most common are Crackle, Magnetic, and Spotted. While these seem to be passing trends, you still see them pop up every now and then.

     Let's start off by taking a look at the crackle finish. Crackle nail polish is a layering polish that cracks to create different patterns. This is the most user-friendly of the 3 polishes we will be looking at today. The polish cracks all on its own without the assistance of anything else, and from my limited experience with it the thickness of the coat doesn't play a factor.


     Now let's take a closer look at the Magnetic Polish. Magnetic nail polish doesn't require anything underneath for it to work, but I always recommend a base coat. You then put down one layer of the polish but on the 2nd coat you hold a magnet (usually provided in the cap) over the polish for 10 seconds and a pattern is created in lighter and darker parts on the nail.

Nabi-Purple-Magneic-Polish-Lustrous-Lacquer

     It's no secret that there are iron shavings in magnetic polish. That's why it responds to the magnet. But what isn't clear is why the nail polish forms a distinct striped pattern. Most of us have seen metal shavings hanging from the ends of magnets in long 'beards,' so it seems like the whole coat of polish should just pull to a peak right under the magnet. It doesn't because the magnet in the jar isn't just an 'end.'  but both poles going to work on the shavings.

     While not overly complicated to apply, magnetic polish does have a little bit of a learning curve to it. Especially with how long to hold the magnet over the polish, or how close to get to the nail.

     Last but not least we have the Spotted finish. Both OPI and Fing'rs have come out with this type of specialty polish. Just like the crackle finish, the spotted finish is a layering polish. This is probably the hardest finish to work with for most people. It requires an extremely thin layer to be placed over your base color. I actually had huge success the first time I used the Fing'rs Get Spotted polish, but I didn't follow the directions. You can see what I mean by checking out my previous post.

Fing'rs Spotted
Fing'rs Get spotted over OPI Die Another Day
     There are other types of specialty polish out there also. I know Barry M has one that is very similar to the crackle finish. I'm sure there are more, but these are the ones that I am familiar with. If you know of another one I'd love to hear about it in the comments.

     I hope you have enjoyed this post, and found it helpful in some way. Thanks for stopping by and Happy Polishing!


Friday, April 25, 2014

6:00 AM

Sinful Colors- Tidal Wave


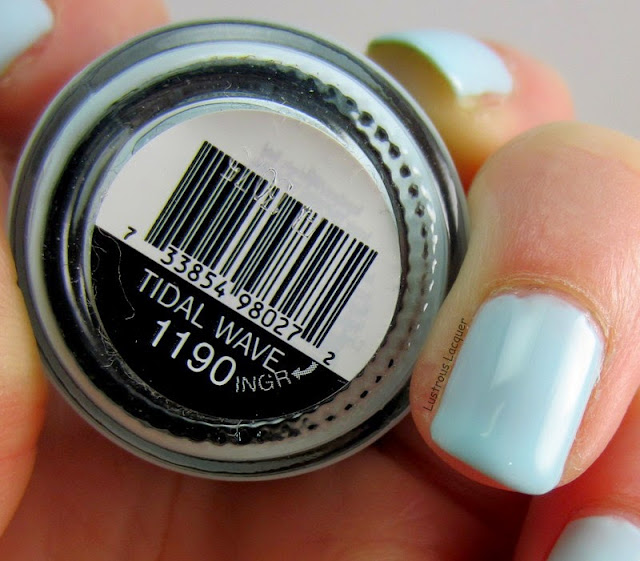
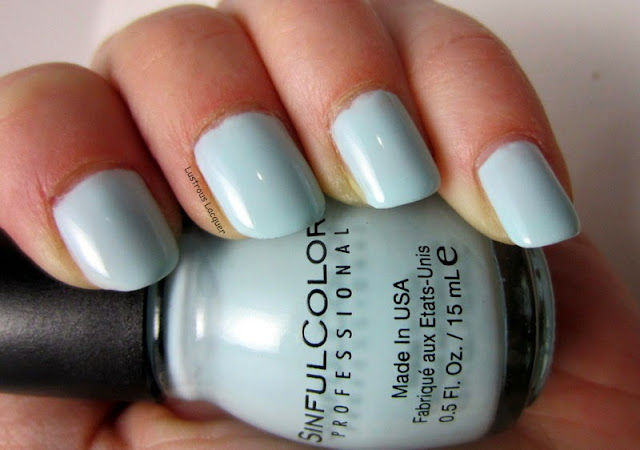
     Today I'm sharing with you a nail polish that has been patiently waiting in my stash for almost a year! Sinful Colors Tidal Wave is part of the Pool Side Collection, summer 2013. Why I let this pretty pale Robin's egg blue polish sit neglected for so long I have no idea.

Sinful-Colors-Tidal-Wave-Pool-Side-Collection-Lustrous-Lacquer

     Oh wait, I know why. The formula is kind of iffy. I didn't have as many problems with it as other bloggers seemed to. I've read that people had problems with it being running and goopy at the same time. That it would move around on the nail during application, and that it just all around sucked. I didn't have quite those issues but my bottle was pretty runny and I was surprised at how sheer this polish is. I don't know if I had fewer issues because my polish was older, or because I tend to apply thicker coats than most, but I'm glad that I didn't have as many problems.

Sinful-Colors-Tidal-Wave-Pool-Side-Collection-Lustrous-Lacquer
Tidal Wave. 3 coats plus top coat
     The first 2 coats were on the patchy side, but everything evened out after the 3rd. Tidal wave dries to a nice semi-gloss finish.  I wouldn't say that the formula was so bad that I'd never use it again, but it was more work than I'm used to doing with nail polish.

Sinful-Colors-Tidal-Wave-Pool-Side-Collection-Lustrous-Lacquer
   
     I do really like the color. It seems to have just the right amount a blue for me, and it made a great base for some failed nail art recently.  I have a few other polishes from this collection that I have yet to use. I  hope they don't have the same application issues that this one did. I should have posts up on those in the coming weeks.

     Do you have this polish in your collection? Did you have the same issues with it being spotty or goopy? Id love to hear your feedback. As always thanks for stopping by and Happy Polishing!


Wednesday, April 23, 2014

6:00 AM

Orly Dare to Bare


     Today I have for you a quick post on Orly Dare to Bare from the Blush Spring Collection 2014. Dare to Bare is a soft, nude that is described as taupe beige from Orly, but looks pinkish beige on me. For those of you still on the hunt for the perfect nude color, I would recommend giving this one a try.

Orly-Dare-to-Bare-Blush-Spring-Collection-Lustrous-Lacquer

   
     Application of Dare to Bare is easy with its smooth formula, cream finish, and no streaking. Here I've shown Dare to Bare here in 2 coats without topcoat. As you can see I still have a faint VNL after 2 coats. I would assume that would be covered with the application of a 3rd coat, but didn't try it to be sure.

     Well, that's all I have for you today. Thanks for stopping by and Happy Polishing!
Sunday, April 20, 2014

12:34 PM

Spring Renewal Nail Art Challenge Day 4: Free Style


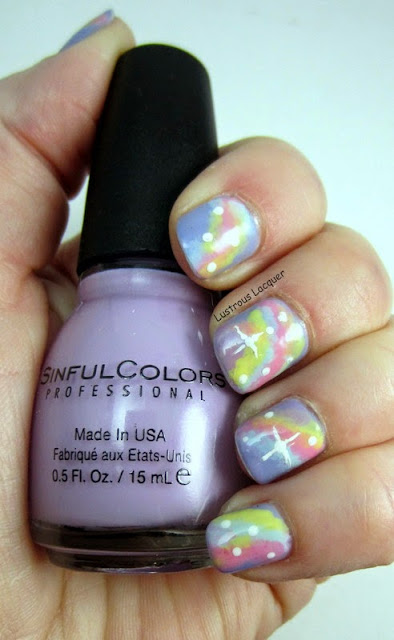
     Happy Easter everyone!  I've got a quick post for you today so I can go celebrate with my family. It's the last day of the Spring Renewal Nail Art Challenge. Like many of the challenges I've participated in the last day is freestyle. I decided to go back to the Pastel prompt and do Pastel Galaxy nails. This was one of the techniques I was seriously considering for day 2 of the challenge.

     I actually really like how this turned out and I got a ton of compliments at my softball practice yesterday on them. I hope you enjoy them just as much.

Pastel-Galaxy-Nails-Lustrous-Lacquer

     I went back to my sinful colors polishes for this manicure. I know I got a little heavy handed with the sponging but I still like the finished results. Especially my ring finger! I'm glad I could end this challenge on a high note for myself and look forward to the next challenge the group puts together. Right now I need to get back and make sure my kids aren't eating too much of their Easter Candy.

     Thanks for stopping by and Happy Polishing!

Saturday, April 19, 2014

2:16 PM

Spring Renewal Nail Art Challenge Day 3: Spring Flowers


   Today is day 3 of the challenge and the theme is Spring flowers. I thought I'd take this opportunity to try out a few different techniques and see what I could come up with. While yesterday was a nail art triumph today is a different story. What can I say, you win some, you lose some.

     I started out with a base of Sinful Colors Tidal Wave. The pretty Robin's egg blue reminded me of a clear sky on a fresh spring day.

Sinful-Colors-Tidal-Wave-Lustrous-Lacquer

      Next came time for the flowers. I attempted the one stroke flower technique on 2 of my nails and I actually like those the best. For my ring finger, I used a new nail art brush and attempted to make flowers with individual petals. Those are a bit of a fail but were a great learning experience. And I don't really want to talk about my pinkie. I consider it the bad seed of this manicure.


     I have decided to title the manicure as "The learning experience". I learned that even though I absolutely love floral manicures they don't exactly love me back. I learned that I have a hard time making the correct angels with my brush, and I need to take my time. I also learned that I can show improvement within one manicure. My pointer finger was the last one I did and I like it the best.

    So enough of my debacle, let's see what the others have come up with for today.


Like what you see? Share it with your friends!